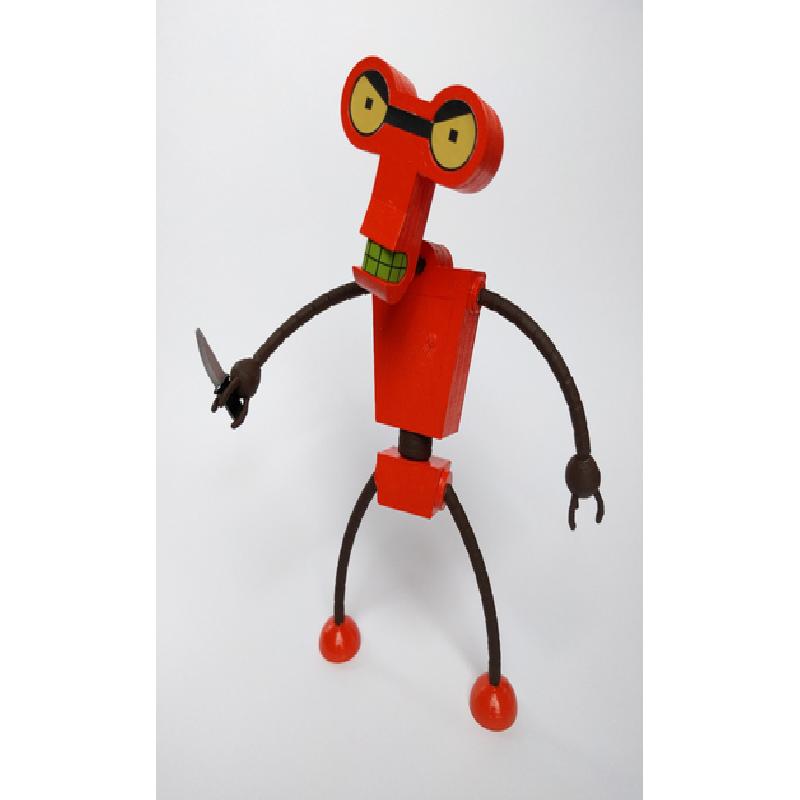
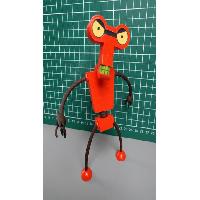
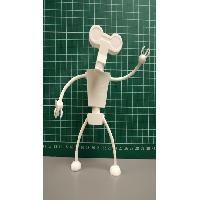
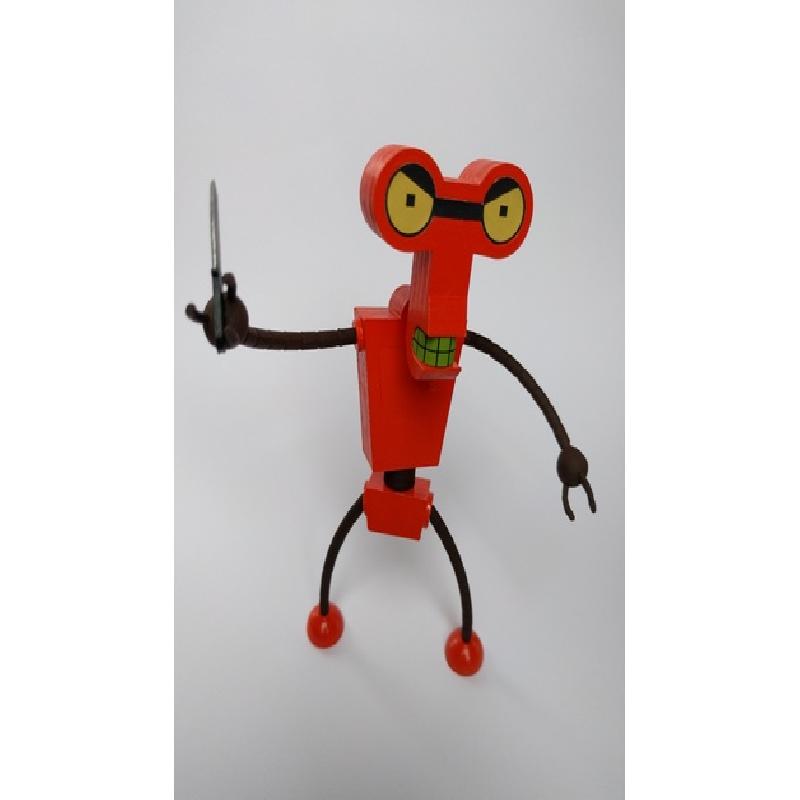
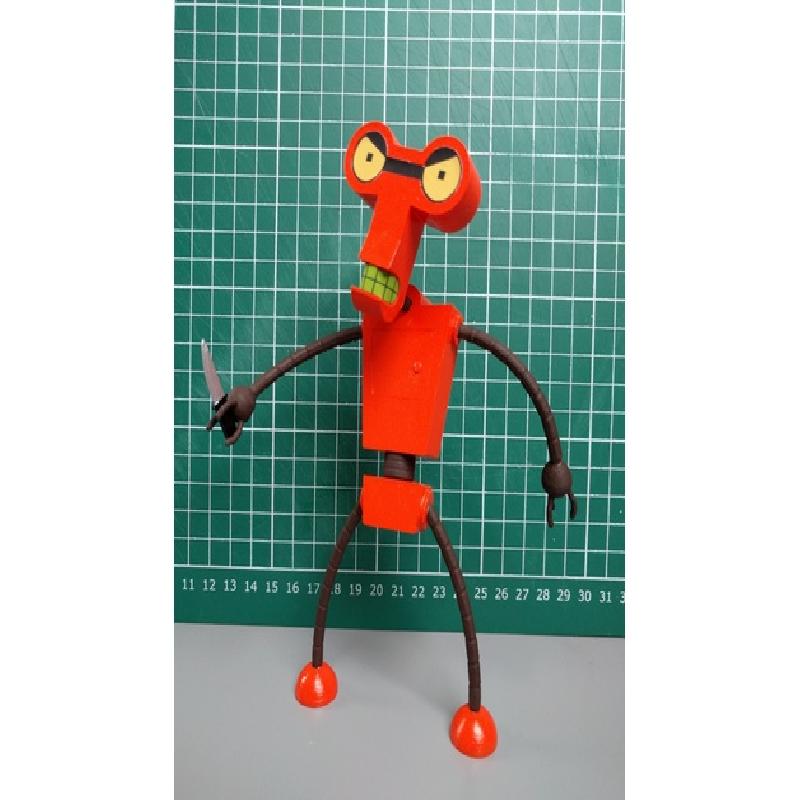
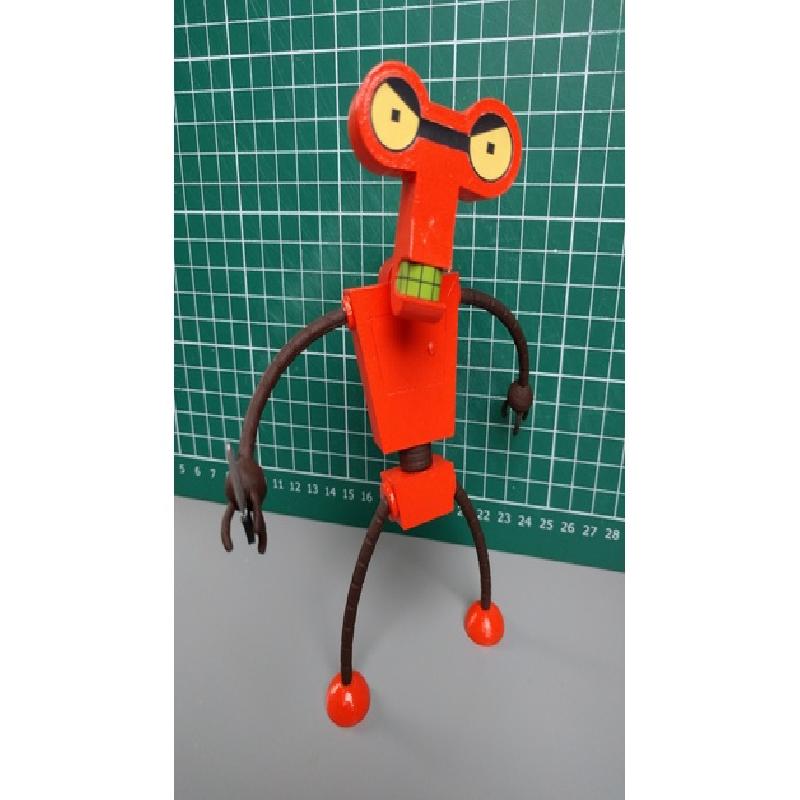
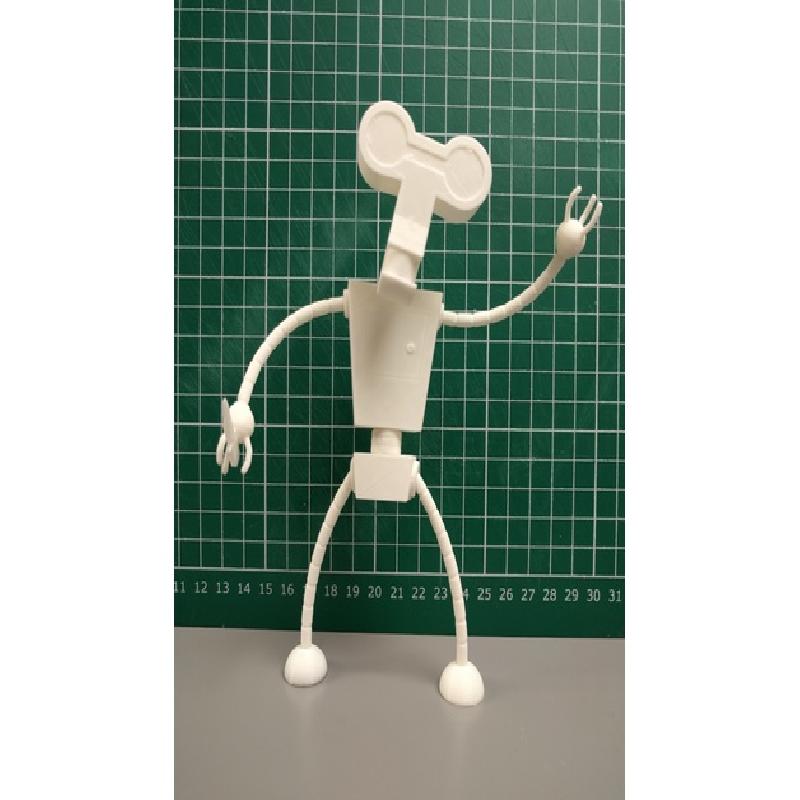
Good News Everyone...
Roberto is here, in 3D printable model form. Your favourite semi-regular dysfunctional Futurama character can not be printed and built in your own home.
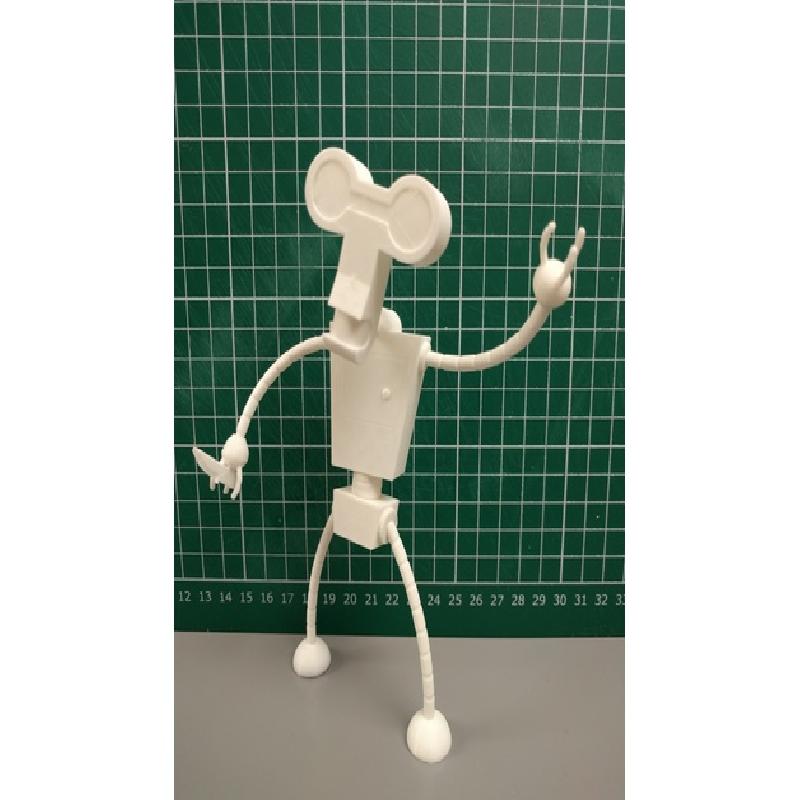
Modeled on the Toynami action figure all parts of this can be printed flat on the print bed. Then with a small amount of assembly the model can then be built and set into all sorts of poses.
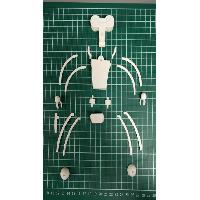
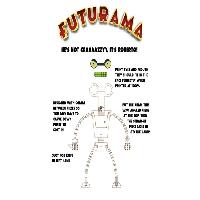
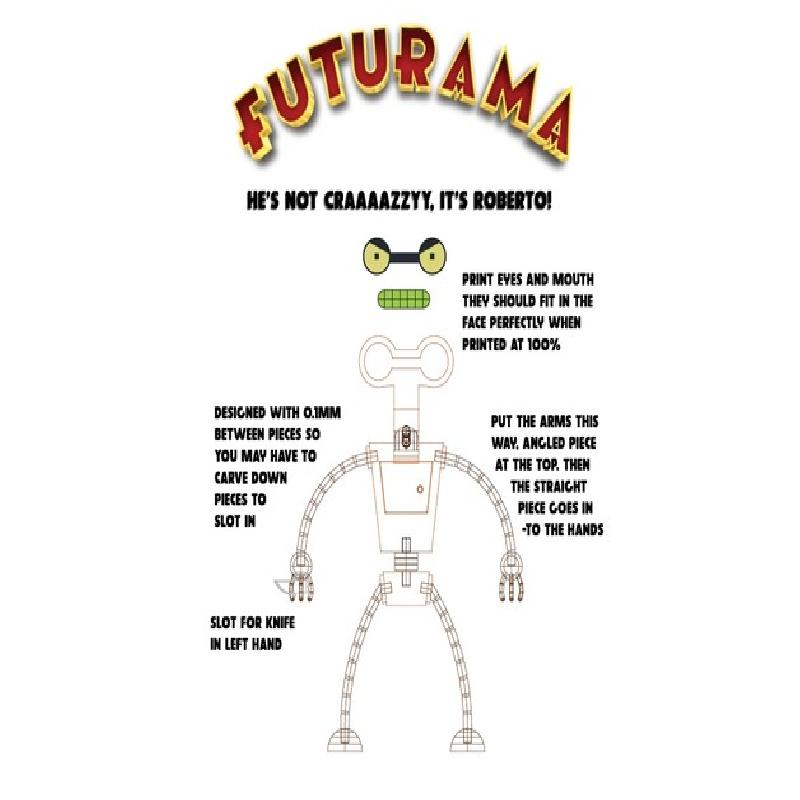
I have also provided a basic info sheet to help, which contains the eye and mouth decals. If you print on A4 paper size they should be the right size to stick onto the model when printed at 1:1 scale (obviously depends on your 2D printer settings but it's a good starting point).
Printer Brand:
Ultimaker
Printer:
Ultimaker 2
Rafts:
No
Supports:
No
Resolution:
0.15mm
Infill:
15%
Notes:
Infill is only really required on the head, torso and ass parts. All parts are orientated to be printed flat on the print bed. Objects with (x2) in the name print two of. All semicircular parts can be glued together on their flat edges.
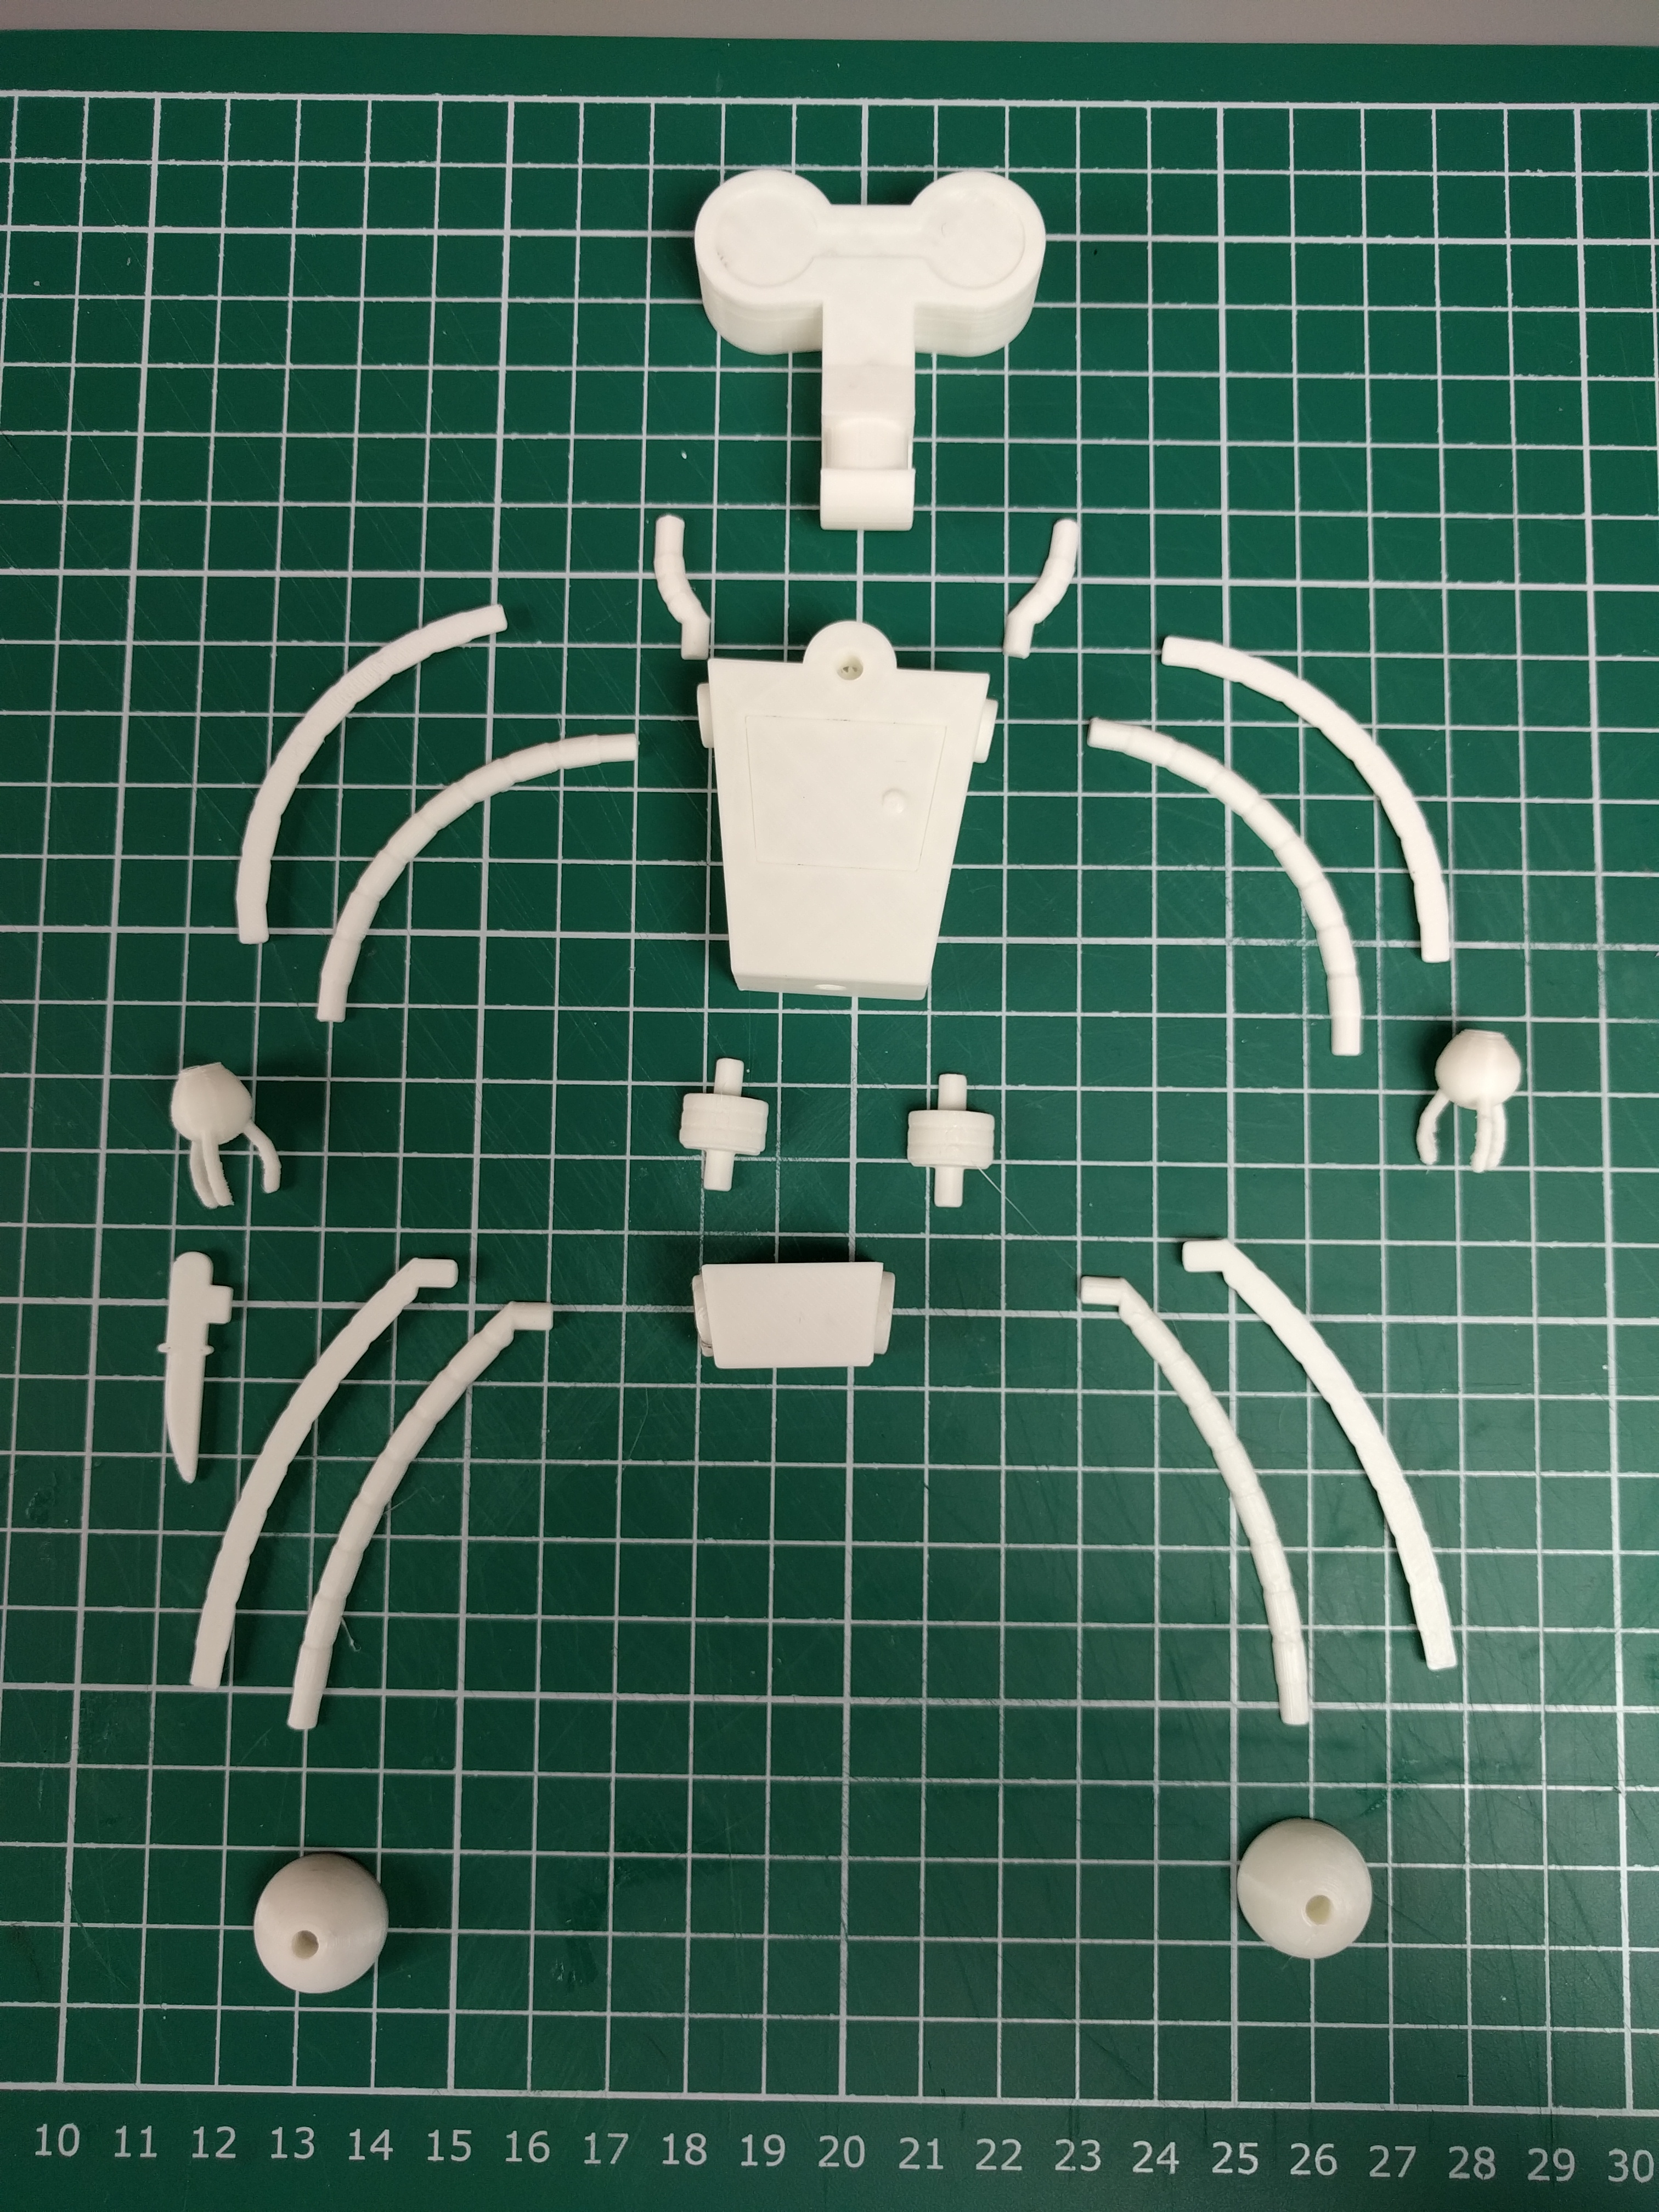
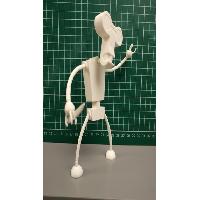
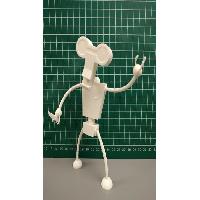
All parts printed
Printed Parts
After printing the parts there isn't really and clean up, it's designed so all parts print flat on the print bed and there is barely any overhang.
Glue the arms, neck, legs and waist parts together flat edge to flat edge.
There is a 0.1mm gap between parts so depending on the accuracy of your 3D printer the parts might need a little carving down to slot into each other. They need to be a tight fit so you can pose him.
Obviously if painting this will add additional layers you would need to remove before assembling again.
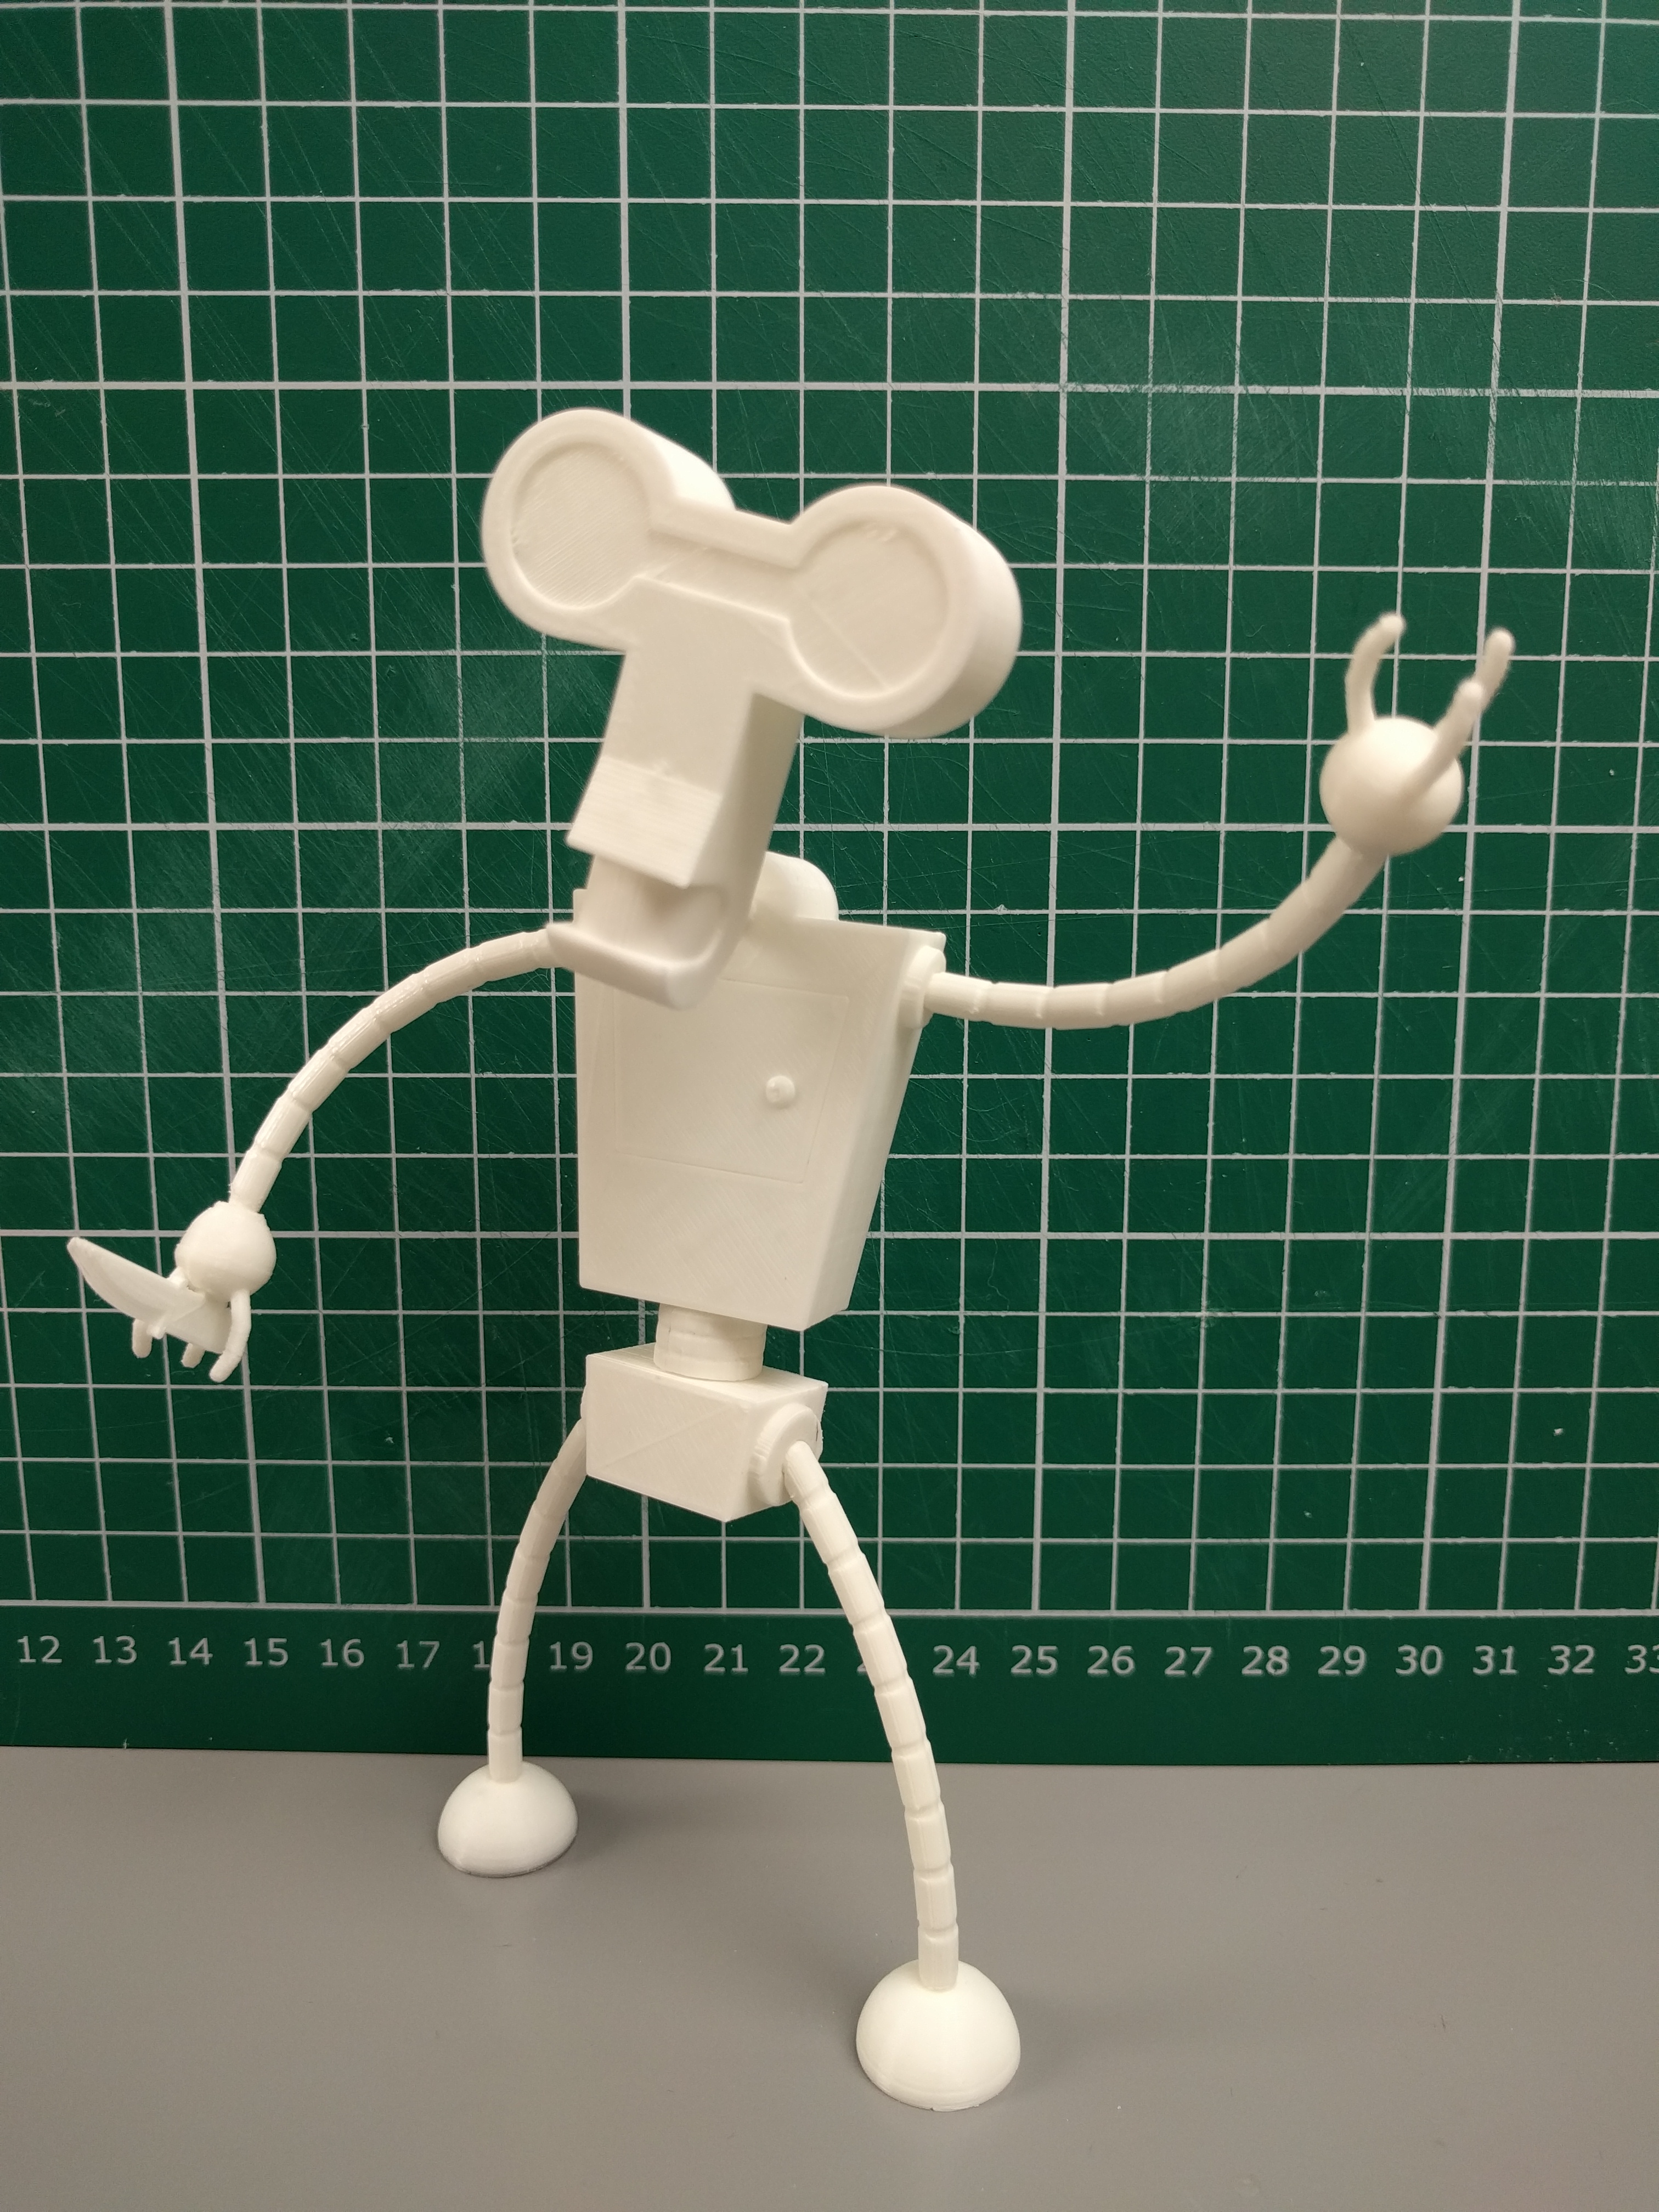
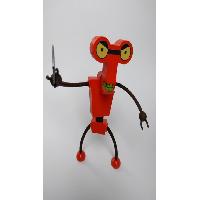
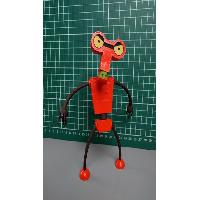
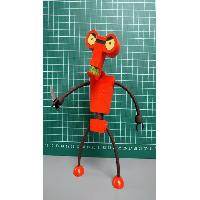
It's a g-g-g-ghost Roberto!
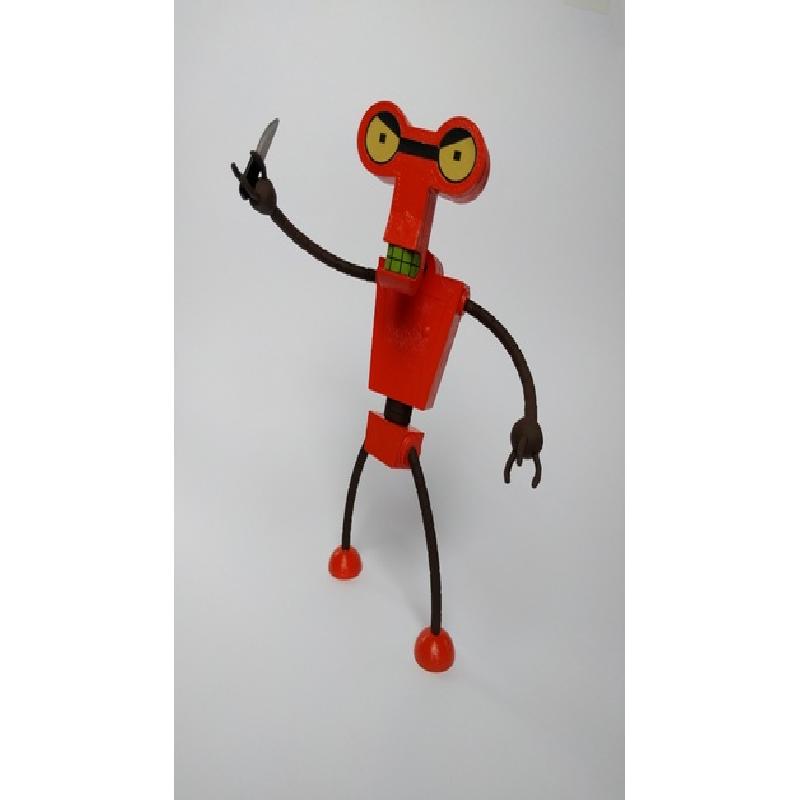
Finishing
My model was painted with 3-4 coats of acrylic paints, then I 2D printed the eyes and mouth decals on vinyl printer paper and stuck them on.
Check the info sheet in the main images which has those decals and other information on there.

Fully finished model