by joo, published
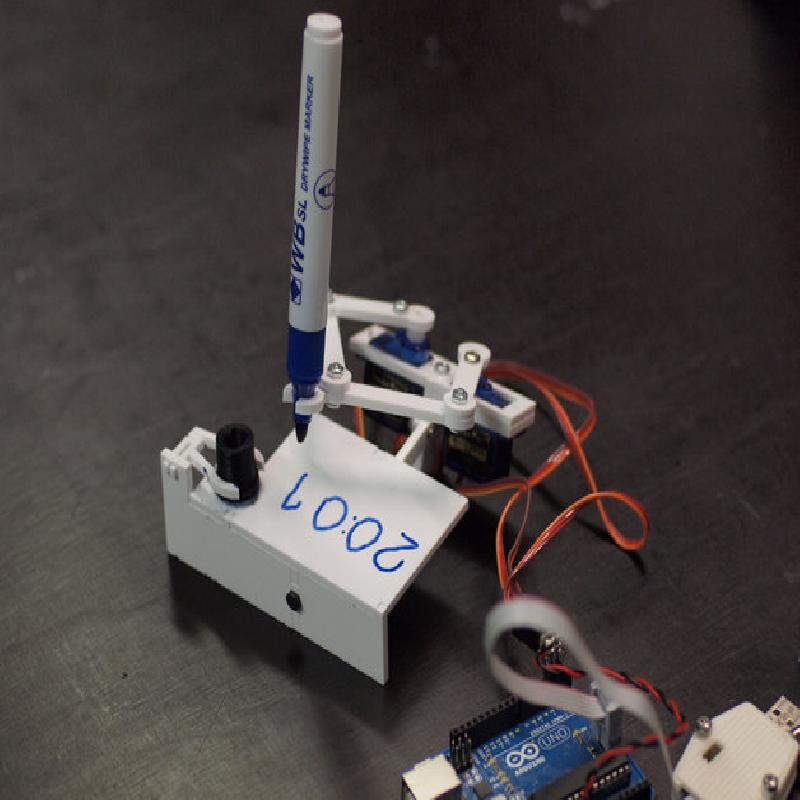
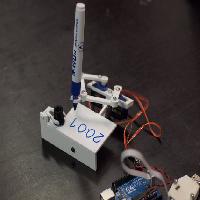
A clock that plots time. Designed with makeability in a fablab/makerspace/hackerspace in mind.
You need:
Laser cutter or 3D printer
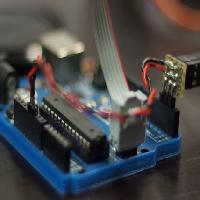
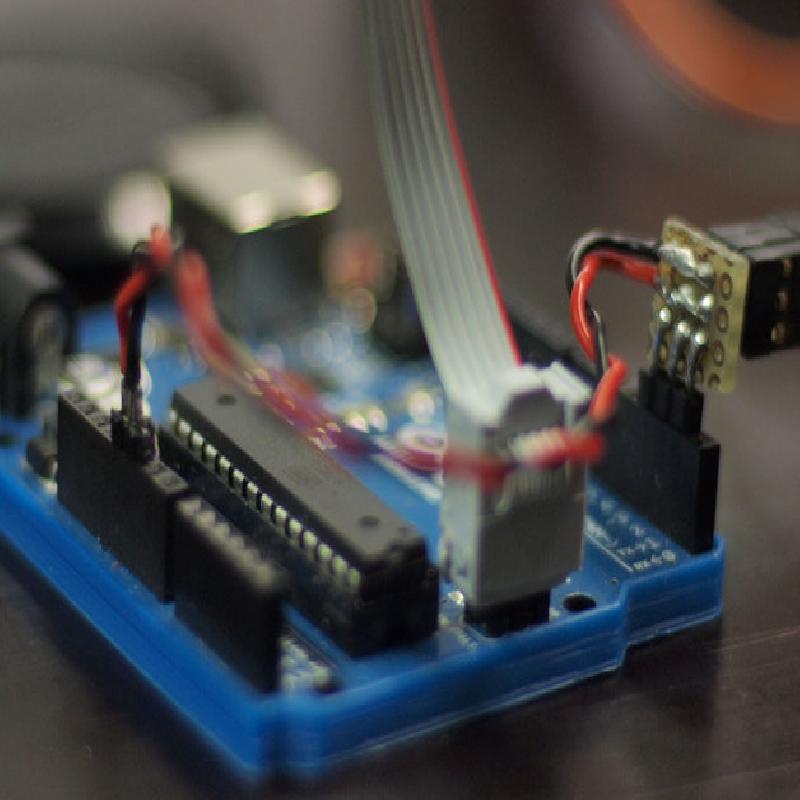
1 Arduino
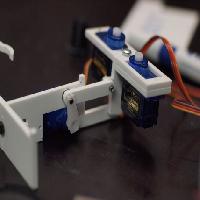
3 servos
1 dry wipe pen
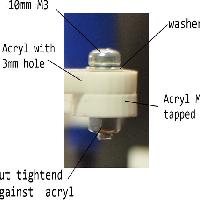
M3 nuts, bolts, thread tap
Update to V1.01:
added calibration routine and documentation to arduino code
see the instruction tab above for building instructions
http://wiki.fablab-nuernberg.de/w/Ding:Plotclock (german)
http://www.youtube.com/watch?v=iOLFP90DneY
https://github.com/9a/plotclock (not maintained!)
Update 08/15: You might want to take a look at http://www.thingiverse.com/thing:931498/#instructions for a more detailed documentation
Update 10/15: You should also check out http://www.instructables.com/id/Plot-Clock-for-dummies/?ALLSTEPS Thanks to Kjetil Egeland!
Materials I used:
Arduino uno
Tower Pro 9g servos (those cheap ones from ebay)
WB SL DRYWIPE MARKER, bullet tip
A small custom servo adapter, there are shields or servo-arduinos that also can be used. You can also just use jumper wires: 5V to red servo wire, GND to brown or black servo wire and the arduino servopins connected to the yellow or orange servo wire
Building instructions:
(for version 1.01!)
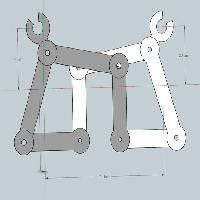
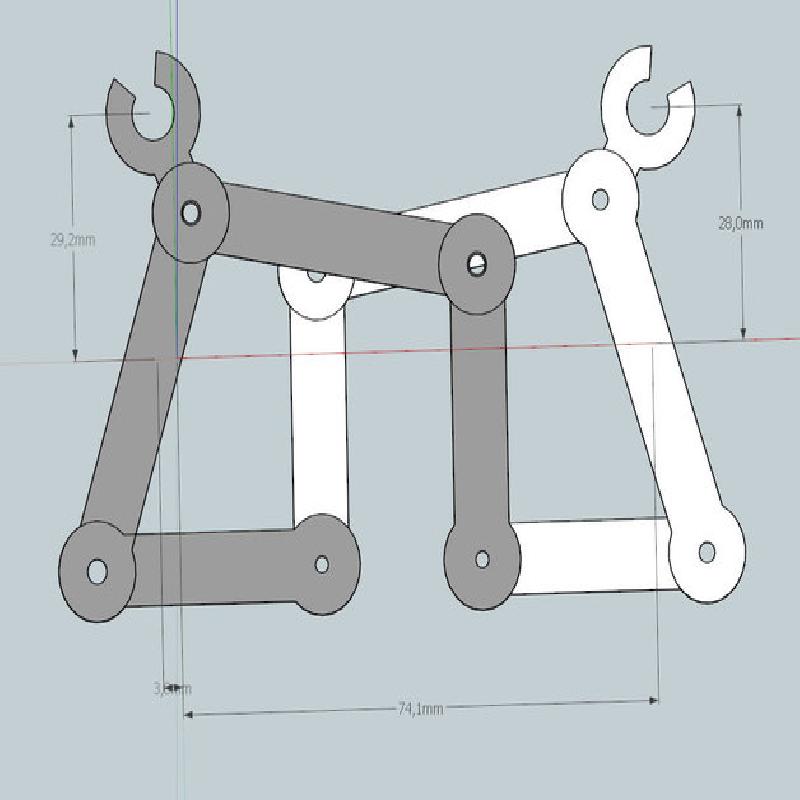
Lasercut plotclock_beta1.pdf from 3mm material or 3D print plotclock_SUP7.skp
the black areas in the pdf on the servo arms should be used to engrave some material away, so the servohorns settle in
use http://www.thingiverse.com/thing:250204 for single STL files if you 3D print the clock (Thanks corben33!)
3D print swee.stl or reuse some other cylindrical part for the sweeper
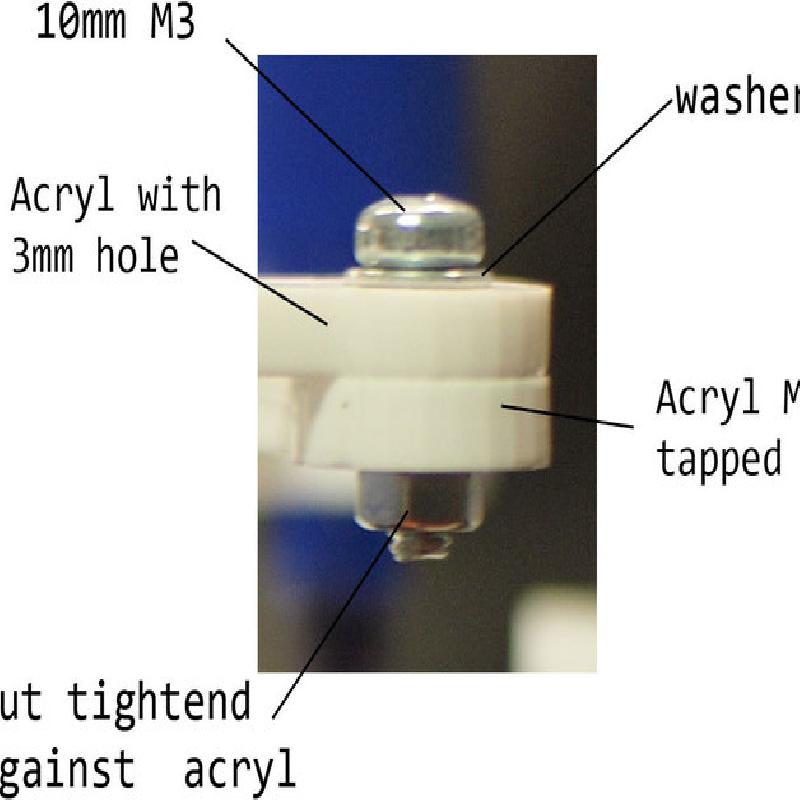
Tap 2.5mm holes with M3 thread
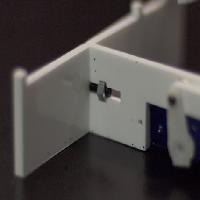
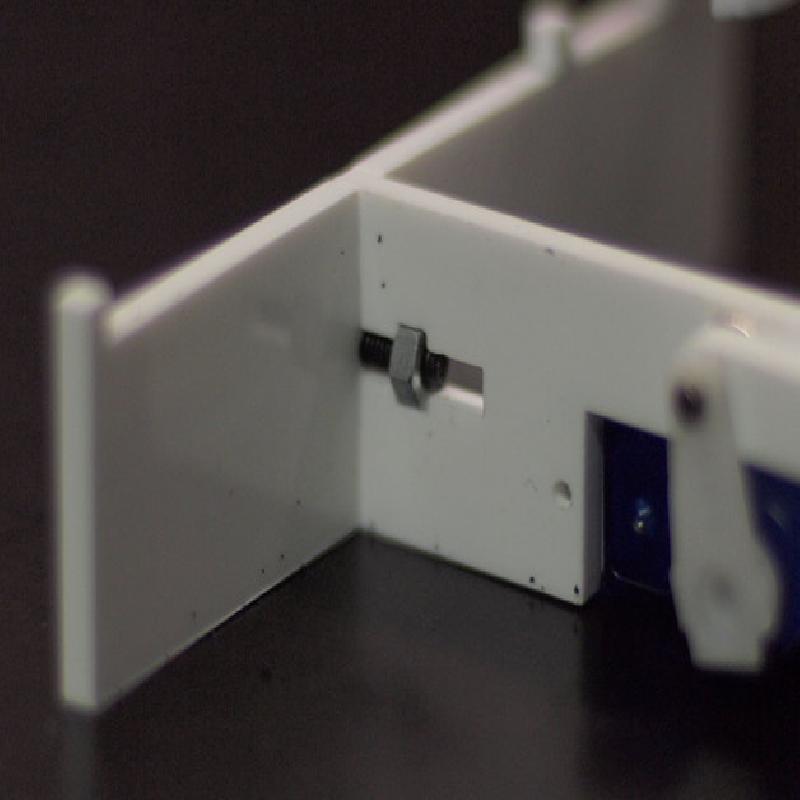
Assemble arms with M3 screws, gently adjust the counternuts so that the joints under the screw heads just have enough play for smooth movement (see joint picture).
load Arduino sketch plotclock_V1, see code comments for further information
http://playground.arduino.cc/Code/time library is needed
Add some sort of cloth with double sided tape to sweeper
Attach servos to digital pin 2, 3 and 4, according to arduino sketch, test them without anything attached by plugging in the arduino (the photos show it being connected to 1, 2 and 3, which isn't optimal since 1 is also the TX pin, so during arduino startup the lifting servo jumps around)
Put everything together
You may have to redrill the holes that are used for securing the servos, since some servo screws are a tight fit.
Acrylic is brittle and easily breaks wen the mounting holes are to small. Only push the servo arms onto their hubs, don't secure them with screws! For initial calibration do not mount the resting clip for the wiper (danger of collision with the pen). Glue or screw the servo arms to the acrylic parts.
When attaching the servo arms, make sure they can turn enough to reach every point on the drawing surface by manually turning them
Power the arduino, it should start a calibration cycle where every second the position of both servos changes by rotating exactly 90 degrees (see last image in gallery)
Change the SERVOFAKTOR, SERVOLEFTNULL and SERVORIGHTNULL values until everything matches up (see code for more information)
Attach the pen and the sweeper holder only after testing everything else
This description is still a bit of a WIP, so comment if you have any questions!