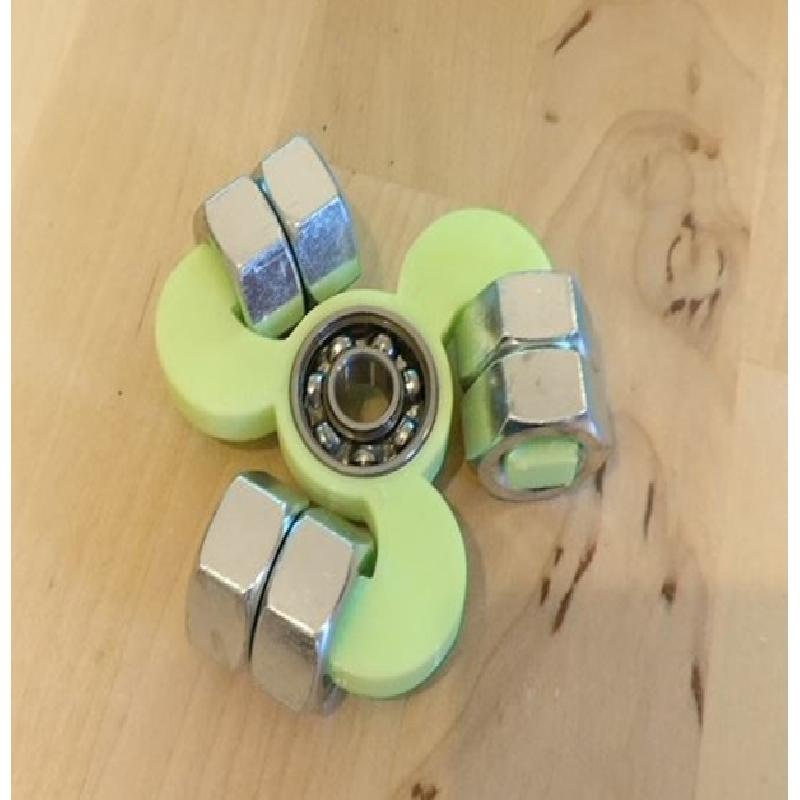
This is a fidget spinner that achieves the majority of its rotating mass from M12 nuts.
Not only do M12 nuts weigh more than other bearings, they are smaller and can be mounted creatively - this was my attempt at that.
Some simple maths:
Standard tri spinner: 12g bearing3 = 36g rotating mass
This spinner: 16g nut6 = 96g rotating mass
There is a little more to it than that, but that is beyond me!
Printer:
XYZ Da Vinci Mini W
Rafts:
Doesn't Matter
Supports:
No
Resolution:
0.2mm Layer height
Infill:
20%
Notes:
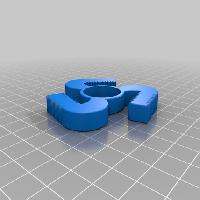
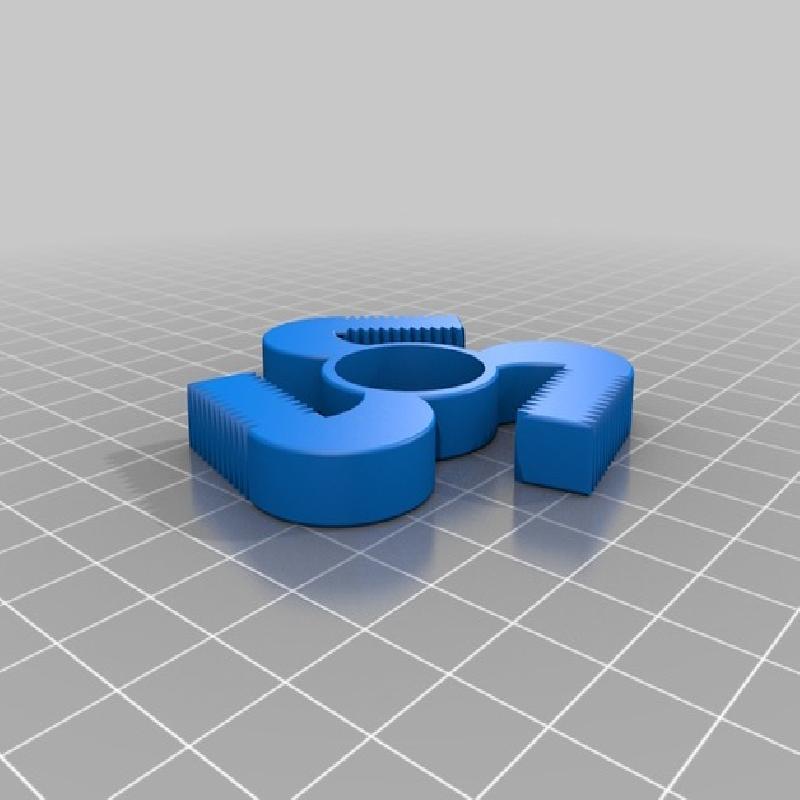
Created in onshape - this is one of my first models!
I thought using bearing as weights for a fidget spinner was expensive and not heavy enough. Enter the M12 nut - these bad boys are cheap, heavy and really uniform in weight. This means even cheap bearings spin for minutes with a full payload. The spinner can be lightened by removing a set of nuts.
My bearings weighed ~12g each, these nuts are 16g each and there are 6 of them!
The nuts are quite tight to thread on intentionally - this will obviously depend on nozzle width and the precision of your printer. If they are a touch loose, you can easily lock two nuts together.
Please comment with thoughts and improvements to the design.
Link to file: https://cad.onshape.com/documents/5ca86b800e5179beb8603669/w/347d82ae95c010c689c0dd67/e/7f54f0ada856c21e8dcbbb3a
Step 1
Print the file
Step 2
Thread your 3-6 M12 nuts onto the arms, they will be very tight (you do not want these falling off at speed!).
Step 3
Press your bearing in - this should also be very tight, but friction fit. Freezing the bearing may help it fit, but be careful not to burn yourself.
Step 4
Spin, spin, spin!
I am a complete CAD novice, I followed the Onshape tutorials and had a crack at something a little different. There were some features I wanted to add, but I haven't figured this out yet!