by neophyl
Decided to expand the Blake's 7 models.
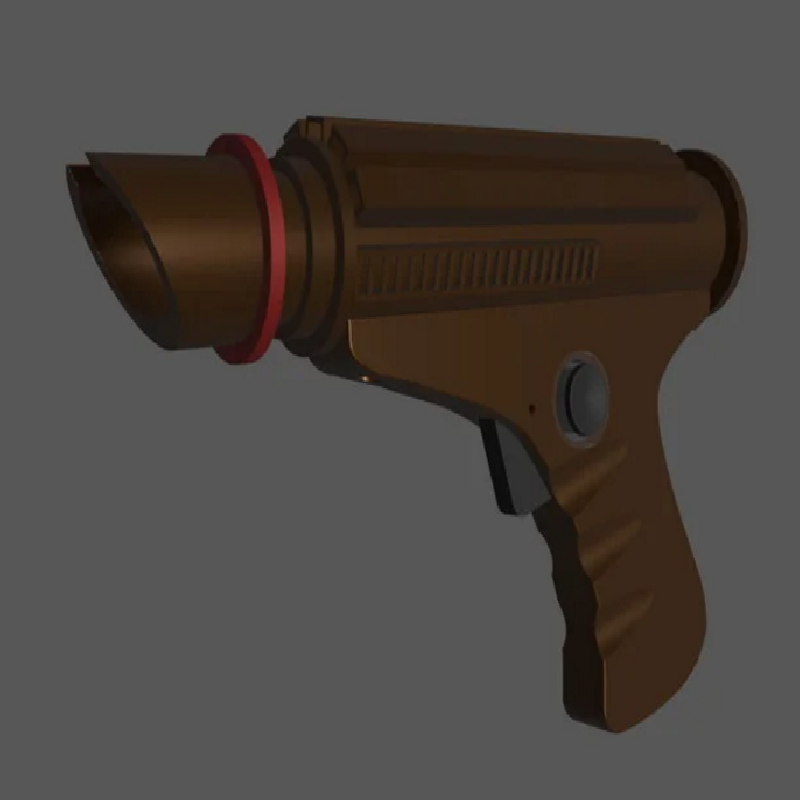
This is my attempt at the Federation Officers pistol seen in several episodes.
Print Settings
Printer brand:
Prusa
Printer:
i3 MK3
Rafts:
No
Supports:
Yes
Resolution:
0.2mm
Infill:
15% Cubic
Filament brand:
3dJake
Filament color:
Various
Filament material:
PLA
Notes:
This prints mainly without supports except for 2 parts. The Friedland Push button body has a rim at the top that needs support. While you can flip it and bridge it, I prefer to have a nice flat bottom for the button to sit on.
The other part is the grip. I print the grip such that the curve where it joins the main body is facing the build plate. This means the support surface is not visible once assembled and you can sand it without worrying about how it looks. The inside of the grip does not need supports though as all that should print with bridging just fine.
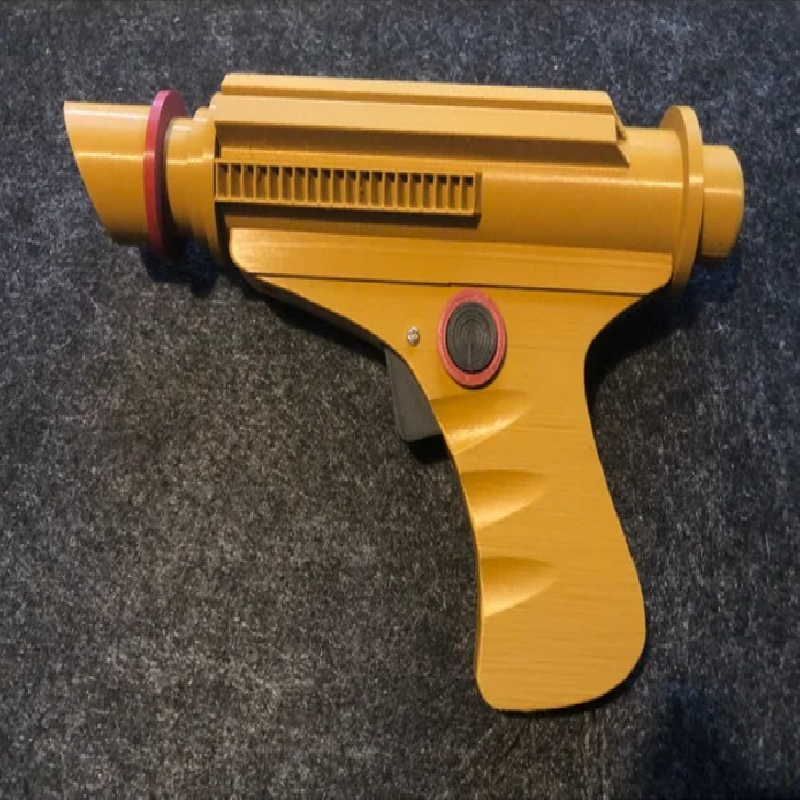
Colour wise its pretty much as pictured in the render.
Most of it is the metallic brown that so many of the props in Blakes 7 were painted with. The Barrel_1 part though was red on the pictures I could find.
The trigger was either the metallic brown or silver on reference pictures but several of the other federation blasters have them in black. I am unsure how many were made and things seem to change around over time. So I printed my test model with a basic black one.
The body of the Friedland push buttons are translucent on the original switches.
I took liberties with the inside of the power cell as a plain tube was boring.
Required Hardware
Small spring (as found in some retractable biro pens)
M3x10 Cap head socket screw
M3x10 Countersunk socket screw
2x M3 square nuts
2mm pin (or screw) to act as a trigger pivot/hinge
2x disc magnets (optional)
Glue (some parts are glued together, I used a superglue on my pla test print)
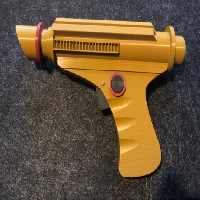
The pictured print is straight off the printer and assembled to check fit of the designed parts. No other post processing has been done at that point as it was the first print prototype.
Post-Printing
The grip is joined to the main body using 2x M3 screws and 2x M3 square nuts.
One of the nuts slides into the front of the main body tube. Slide it in until it lines up with the hole.
The second nut goes into the rear of the grip. To allow the hole to be printed without support a 1 layer (0.2mm) thick layer was added so that it would bridge. You should be able to poke through that layer very easily. Insert the nut in the slot above the trigger area and make sure it lines up with the hole.
Insert the spring between the trigger and the grip on to the posts modeled in. Then squeeze the trigger into place and add the pin. Check that it moves freely and that the sprint returns it to the rest position.
Then glue the Friedland switch body and button into place in the hole on the side of the grip.
The front of the grip uses the M3x10 Cap head screw going through the grip and into the body.
The back of the grip goes from inside the body (where the power cell fits) and down into the grip. This one uses the M3x10 countersunk screw.
There is a small hole in the top of the body to allow the allan/hex key to fit and reach the screw to tighten this.
The same front screw that holds the grip on will also go into the barrel inner to hold that in place. Once you have the barrel inner screwed in you can then glue on the other barrel parts. If you need to remove the barrel for any reason you can simple back off the front screw and the barrel assembly should be removable.
You can use a couple of disc magnets to secure the power cell in place. Glue one in the recess on top of the power cell and the other into the main body
How I Designed This
Designed in Blender 2.92