by reddadsteve
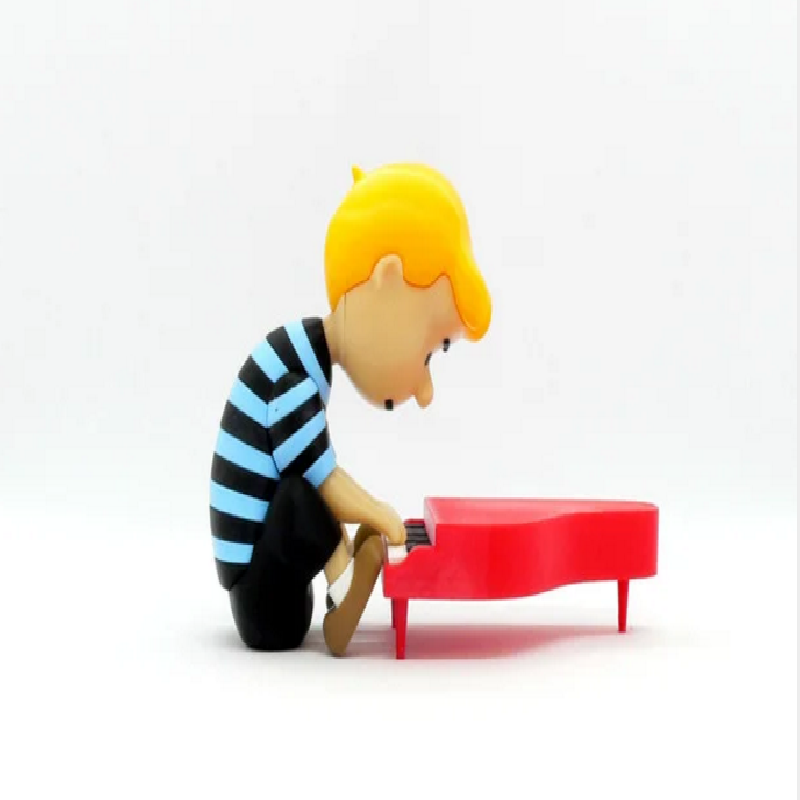
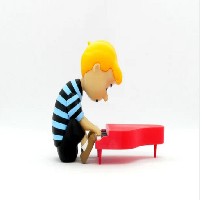
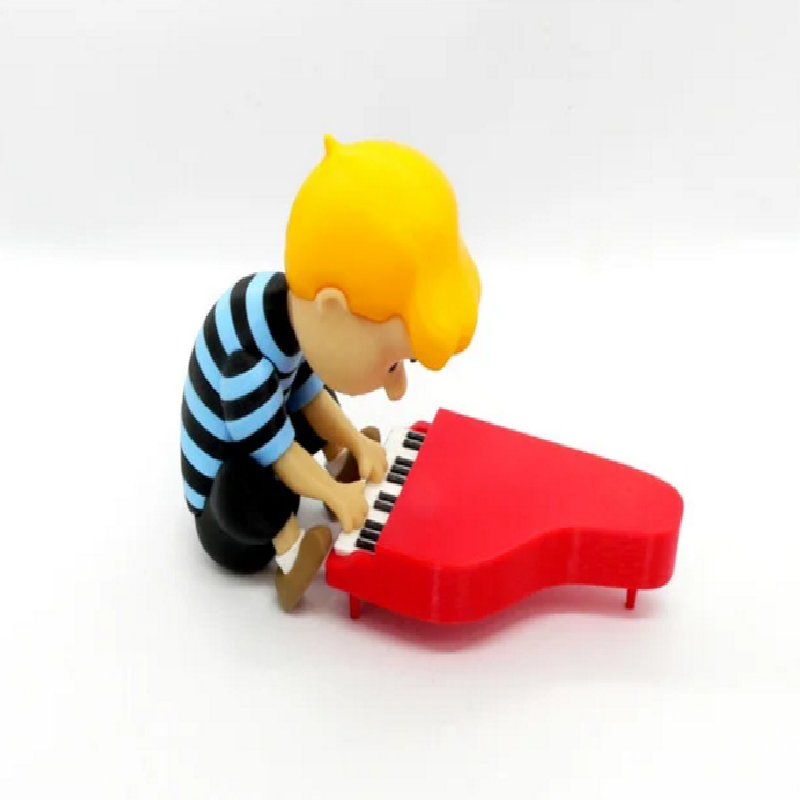
Schroeder, from the comic strip Peanuts by Charles Schulz
After Linus, Schroeder is Charlie Brown's closest friend. He is distinguished by his prodigious skill at playing the toy piano, as well as by his love of classical music and the composer Ludwig van Beethoven in particular.
No supports are required. One part is included with and without built-in supports. If you have the proper filament colors, no painting is needed.
The assembled model is 180mm tall and is in proportion to my other Peanuts models.
Enjoy!
...........................................................................................................
Print Instructions:
Supports: No
Resolution: .2mm
Infill: 10%
Notes:**
Refer to the notes below for a few helpful printing and assembly instructions.
...........................................................................................................
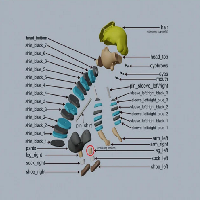
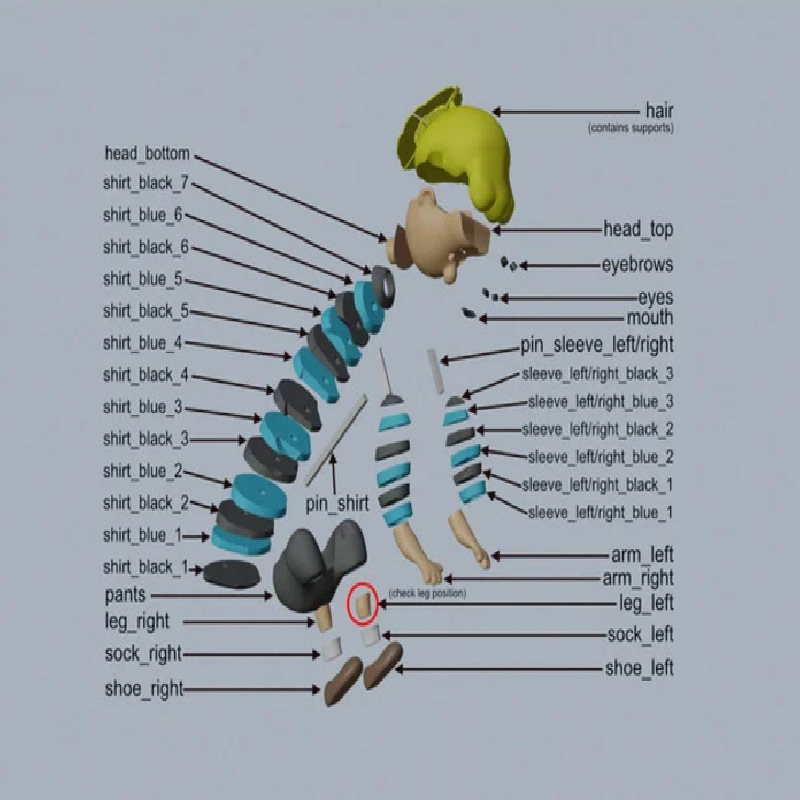
Building the model
Colors
Black: (Paramount3D PLA - Black)
eyes (contains two identical pieces)
eyebrows (contains two identical pieces)
mouth
keys_black
pants
shirt_black_1
shirt_black_2
shirt_black_3
shirt_black_4
shirt_black_5
shirt_black_6
shirt_black_7
sleeve_left_black_1
sleeve_left_black_2
sleeve_left_black_3
sleeve_right_black_1
sleeve_right_black_2
sleeve_right_black_3
..
White: (Paramount3D PLA - White)
keys_white
sock_left
sock_right
..
Skin: (Paramount3D PLA - Universal Beige)
leg_left
leg_right
arm_left
arm_right
head_bottom
head_top
head_onepiece (optional part requiring supports, rotate as needed)
.
Yellow: (Paramount3D PLA - Simpson Yellow)
hair (contains built-in supports)
hair_without_supports (optional part if you want to use your slicers supports)
..
Brown: (Paramount3D PLA - Military Brown)
shoe_left
shoe_right
..
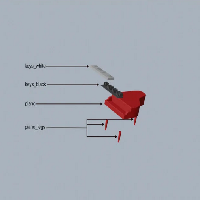
Red: (Hachbox PLA - True Red)
piano
piano_legs (contains three identical pieces)
..
Blue: (3D Solutech PLA - Aqua Blue)
shirt_blue_1
shirt_blue_2
shirt_blue_3
shirt_blue_4
shirt_blue_5
shirt_blue_6
sleeve_left_blue_1
sleeve_left_blue_2
sleeve_left_blue_3
sleeve_right_blue_1
sleeve_right_blue_2
sleeve_right_blue_3
..
Any color (hidden piece)
pin_shirt
pin_sleeve_left
pin_sleeve_right
..
...........................................................................................................
Printing and assembly tips
Printing tips
1 - No supports are required.
One part is included with and without built-in supports.
*The hair part contains built-in supports. Due to the very slow curve of the part, the supports are a bit tight fitting but do the job well. The supports have only been tested using .2mm layers but 'should' work with smaller layer heights. The supports come off in four parts. Do not use a knife to remove the supports.
*The optional part, hair_without_supports, is positioned for slicer supports and only requires support at the bottom.
One part is split into two parts for printing without supports, head_top and head_bottom. The part, head_onepiece, is also supplied as an optional piece that would require supports.
2 - There are some pieces that may need brims or rafts, use your discretion. When setting up my prints I prefer to be conservative, especially since the base of many parts are hidden when inserted into another part.
*I used brims on: head_top, eyebrows, eyes, mouth
3 - The shirt and sleeve slices can be printed at .2mm but for a cleaner look I used adaptive layer height and set the top layers of each part to .1mm to smooth out the slight slope.
..
Assembly tips:
1-Take your time gluing the model together and enjoy the process.
2-I used E6000 sticky craft glue to put this model together. The sticky glue allows more time to position the parts than a fast drying superglue. I have 'fat fingers' and a shaky hand, so the sticky glue works out best for me, especially with small pieces.
3-I purposely separated many left/right pieces to highlight that they are different, even though the difference is slight. Keep your left/right parts in separate containers until putting the model together, they can be confused very easily.
4-Pay special attention to the leg part as per the assembly diagram. I kept putting it in backward and had to look at my own diagram!
5-Glue Schroeders arms in last. If everything was glued properly they are positioned just at the right height above the keys, however if you have any minor misalignments, the hands might wind up too low. By gluing the arms to the shirt last, you can be sure they rest on the keys. I did not glue Schroeder to the piano.
6-As noted above, make sure that the left/right pieces are positioned correctly, especially the legs/socks/shoes, before gluing. Look closely at the pictures for guidance.
7-Refer to the assembly diagram in the pictures section as well as the uploaded pictures for putting the model together. The model is meant to be glued.
Do not hesitate to ask questions, feedback is essential to making better models.