by hellra1ser
Took the following things as source:
Redesigned the lower body to match the outer ring part from the PowerHobo Model.
Scaled everything to match the already done Mini Nuke Container :)
Greetings are going to all three of you - I like the combination!
I'm sorry but Thingiverse doesnt let me link to the 3 original designs from which I did this remix. Something new seems to be broken again - I hope this whole platform doesnt go up in smoke some day.
I will recheck the functionality some time and place the reference when it is working again.
Print Settings
Printer:
NeoCube
Supports:
Yes
Infill:
0.2
Notes:
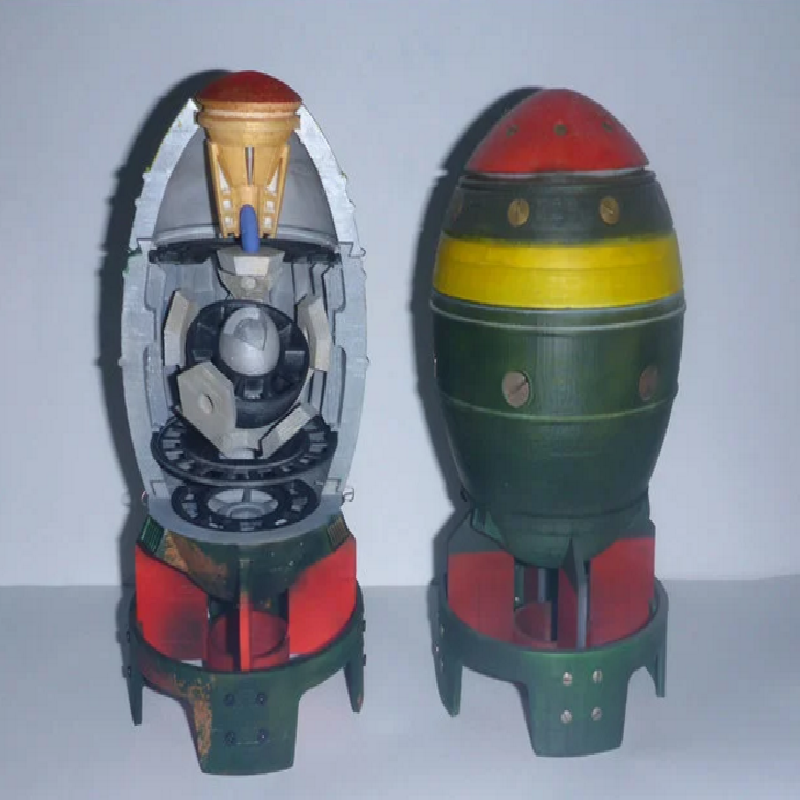
1: Body_Bottom_Fusion.stl as whole lower body model including the fins
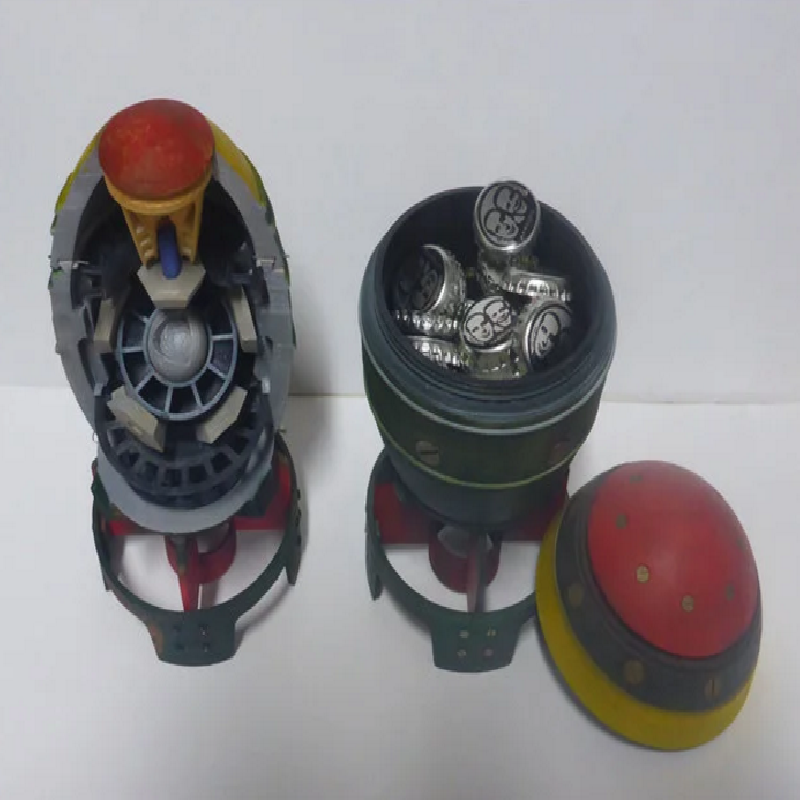
2: Body_Bottom_Fusion-slice1.stl + Body_Bottom_Fusion-slice2.stl to be printed separately to save a lot of support material (glue both parts together after print/cleanup - this is what I did in the photos)
3: Body_Bottom_Fusion_Pluggable.stl + 4x Body_Bottom_Fusion_Pluggable_Fins.stl to get a full disassemblable base
Post-Printing

Base layer airbrushing
First I coated the parts with the first base layer. Since I wanted the outside look old and "used", I've chosen brown tones.


Add Rust effect
Then I applied some NaCl (salt) where I wanted the rusty sections before applying the final coat colors.
After some time, I removed the salt with a watered brush.

Final assembly and Firing pin design
Finally I made the firing ping out of an M4 screw:
cut off the screw head
Clamp screw shaft in spindle @ 1500 RPM (standard drill will do) and shape the tip with a file
finish the tip using 400 grit sandpaper
Used 3x M4 screws on the body and 16x short M2 screws on the outer ring


How I Designed This
Assembly from 3 source models
Made all rescaling and redesigning of the bottom interface in OpenSCAD.
Original untouched from model 1 (green parts):Body_Center.stl, Body_Top.stl, Cells.stl, Clamp_Bottom.stl, Clamp_Top.stl, Exploder.stl
Original rescaled from model 2 (purple parts):Bottom_Lid.stl, Exploder_Core.stl, Launching.stl, Launching_Button.stl, Launching_Igniter.stl,Launching_Igniter_Catalyst.stl
Original untouched from model 3 (yellow parts):5_-_Outer_Ring.stl, 7_-_Fin_Brackets.stl, 8_-_Inner_Ring.stl