by rpaczula
The story:
I'm a big ol' Marvel nerd. When I read Thor: God of Thunder, I loved the “Gorr the God Butcher” arc and how he came to possess All-Black the Necrosword. Jason Aaron tells a helluva tale and puts me in mind of the old adage "the good guy is only as good as the bad guy is bad". Later I read the story of Knull the God of the Symbiotes and where it tells how the sword came to be.
I'm thinking someone has got to have this stl out there for me to print. I couldn't find it and figured this is my opportunity to do more than just print the designs of others and to create something new.
I've made little things before and a couple of remixes but this was a whole new level. I started with a very basic sword shape in Tinkercad but there's no way to make the fluid tendrils of the sword forming. So I watched some Meshmixer tutorials and started splitting and sculpting and failing and doing it all over again. That program is powerful but was a beast to learn. This prototype is the result. Overall I'm ok with the results but am working on a new version to get to "happy with the results".
Setup for prototype:
No Supports (orient parts vertically)
0.15mm layer height
5% infill (I suggest a much higher infill for the Grip and Guard Pieces)
no rafts
no brim
Instructions:
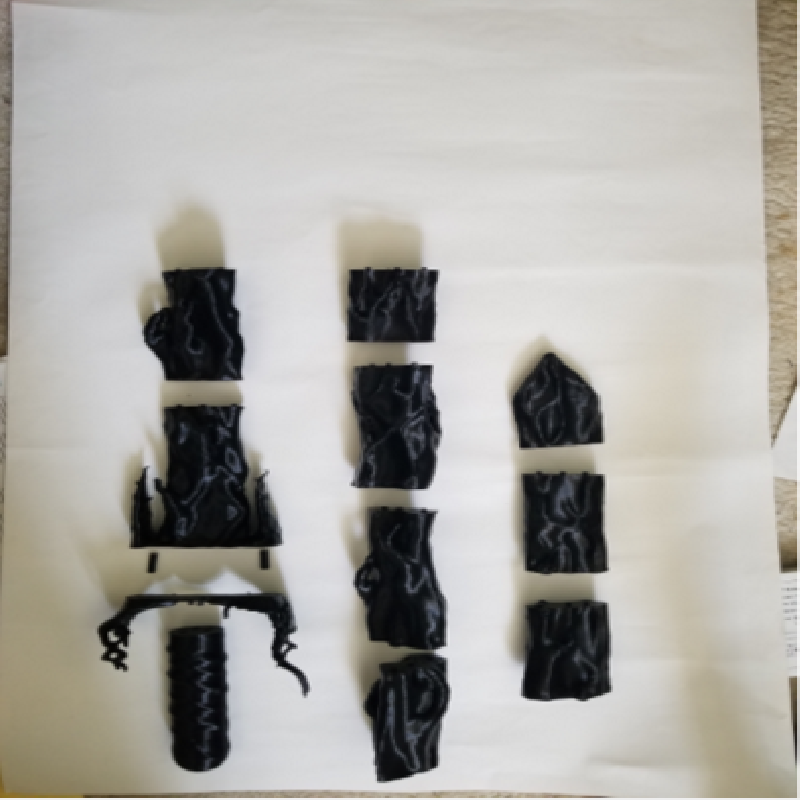
Print one of each of the stl files. They were designed for a 150 mm^3 bed so if you have larger, you can probably stack certain parts to pre-assemble them.
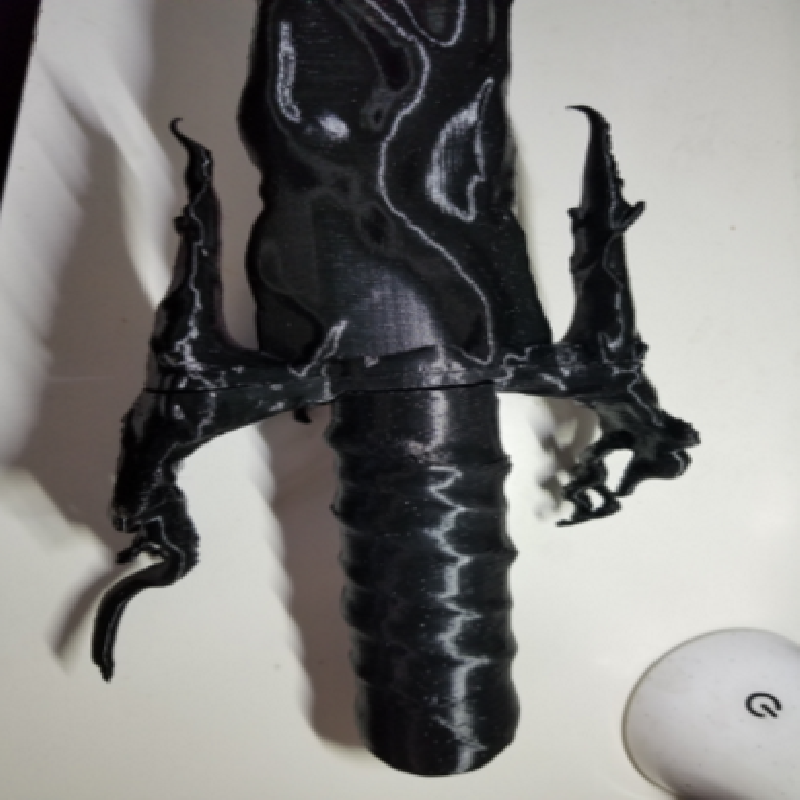
Note: to fit on my 150mm bed, "Guard Back" must be rotated 45 degrees.
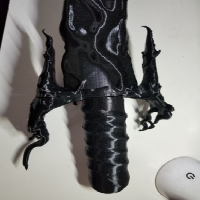
Glue hilt pins into Guard Back (or Front). The pegs on the rest of the parts should align with the holes of the neighboring part. I used glue the first time. For the next version I will use epoxy and spot welding with a soldering iron or 3d printer pen.
Note: If any of the blade guide pegs don't fit, I used a 7/32 drill bit to open the holes a bit.
Note: If the Grip doesn't seat into Guard Back you may need to sand or heat the Grip to beat it into submission.
Lessons learned:
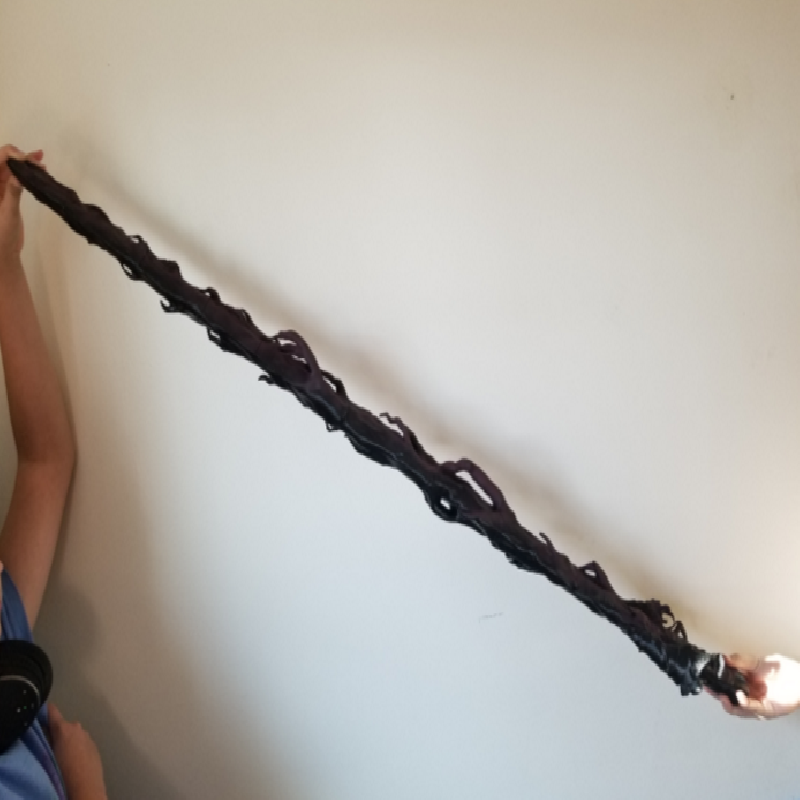
Once I printed and assembled it I realized it's too long and the grip will snap if I try to hold it one-handed. Next one will be shorter and I will have higher infill for the grip and guard while leaving the blade light.
I also need to make all the guide pegs and holes consistent.
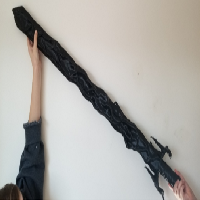
Printing in black filament means it does not photograph well. We'll see how it looks with red painted highlights once I get to painting it. Might try printing in red and painting black next time.
Print Settings
Printer:
Qidi X-one2
Rafts:
No
Supports:
No
Resolution:
0.15
Infill:
5%
Filament_brand:
Hatchbox
Filament_color:
Black
Filament_material:
PLA