by roboneko
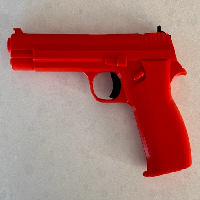
Sig P210 inspired repeating rubber band shooter. This design has a disconnector which should offer a nice trigger pull and reset for each shot.
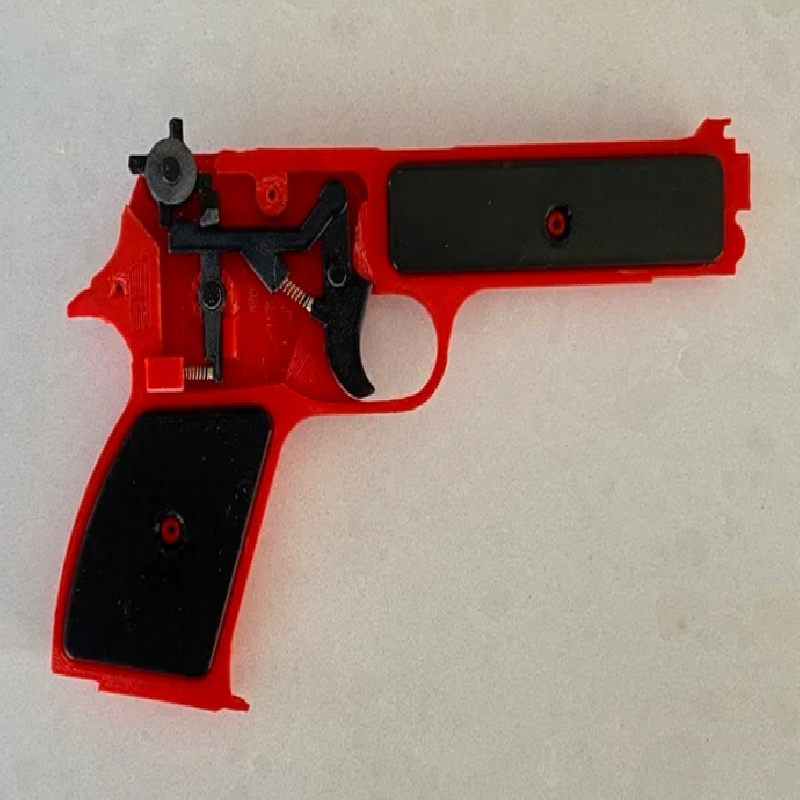
It has a capacity for 8 size 14 rubber bands which are ~ 1/16" by 2". Size 16 rubber bands might work as well.
This is an intermediate build because of the number of parts and the hand fitting required to get it to run.
In addition to the 3D printed parts you will need:
2 springs from a ballpoint click pen measuring about 1" long uncompressed
5 M3x10 pan head self tapping screws
Cyanoacrylate glue
Post print tools such as sand paper, fine files, etc.
The two main halves should be printed flat side down will full support to maintain the dimensions of the inner cavities. In my experience running bridges without support will result in sags which interfere with the internal parts. The internal supports must be fully removed post print so that internal parts move freely.
A mouse ear is included to add a small skirt which is easier to remove than a full skirt to areas that tend to lift off during the print.
The internal parts should be printed to minimize support material. Prusa slicer default bridging seems to work fine for these.
Parts should be fitted to freely move with respect to each other. There are allowances in CAD model, but 3D printer performance may require some hand fitting.
The disconnector should be glued at the pin and middle and a M3 screw used to retain the trigger.
The spur and capstans should be glued together with cyanoacrylate glue. Be careful to keep the bore freely moving on the spur pivot pin.
The sear spring cup is glued into the left hand clamshell to hold it in place.
First test function by pinching the two halves to together with internal parts installed to troubleshoot binding or other interferences.
These took about 18 hours to print with two platters full of parts.
This toy can look realistic from a distance, especially when printed in dark colors. Please be thoughtful about how others might feel before realizing it is a toy or prop.
Print Settings
Printer brand:
Prusa
Printer:
Prusa Mk2
Rafts:
No
Supports:
Yes
Resolution:
0.15mm x 0.4mm
Infill:
20%
Filament_brand:
eSun
Filament_color:
Orange
Filament_material:
PLA