by mgs925
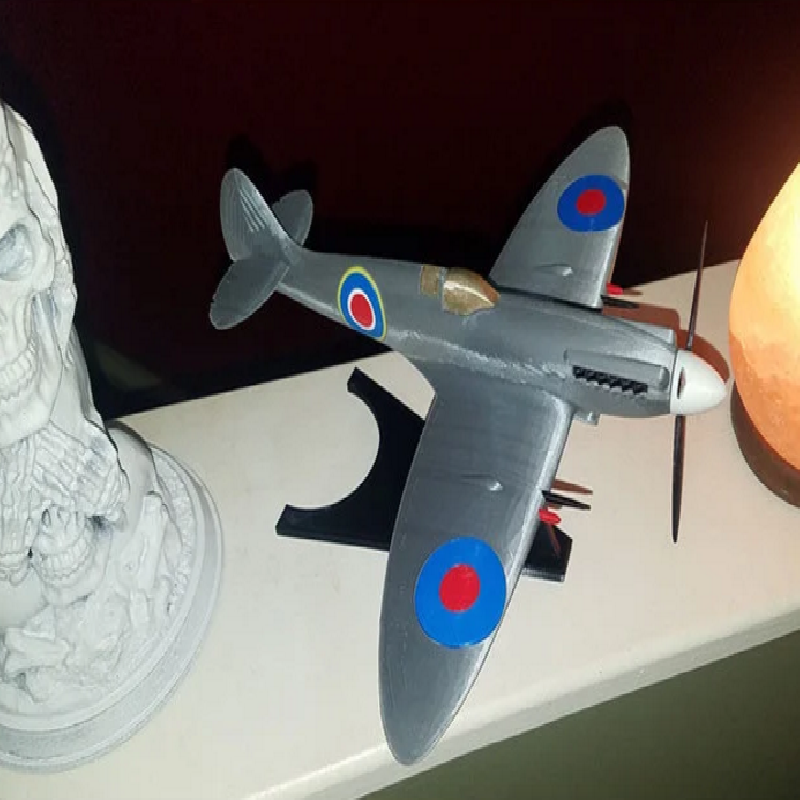
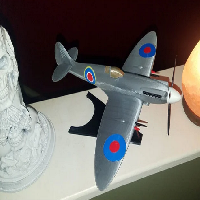
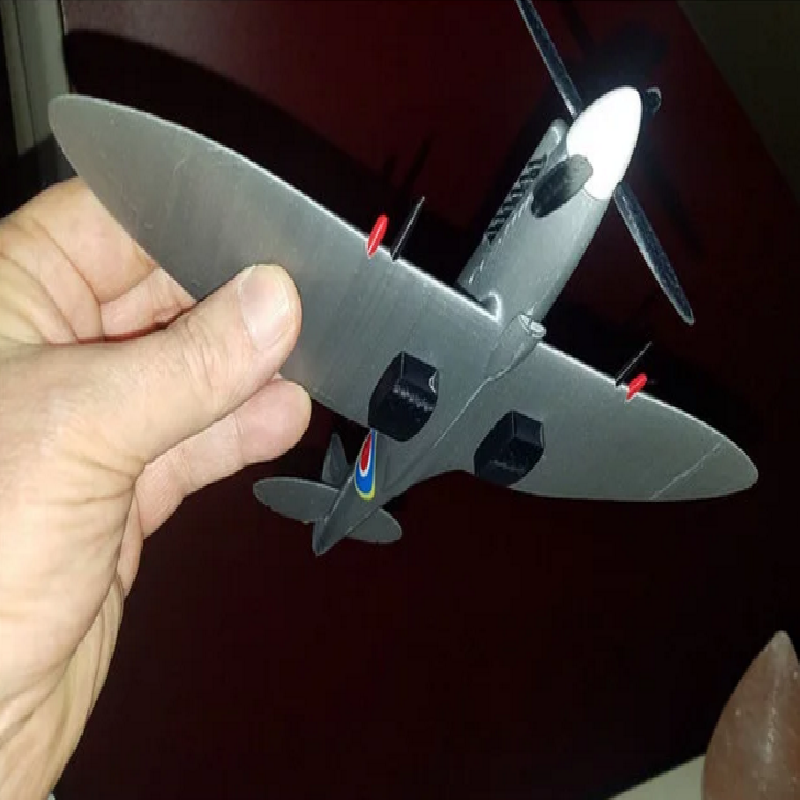
I fit the tail pieces together and attached to the body, added printable decals to the original model, also added 3 nose cones for 3,4, or 5 bladed prop, changed the accessories to look a bit more authentic, made the cockpit a bit more realistic and separate to print in a different color of choice, and made the engine exhaust separate to print in another color of choice, and beefed up the base a bit.
This was my first attempt to print this and see how my files fit together, and I scaled it down to fit onto smaller printers, it is 230m long (not including the prop). This may have been a mistake for this model as the tail pieces are very thin and did not print too well. I will print this again in the future but I will scale it up as large as possible to avoid the frayed edges on the tail.
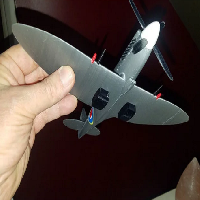
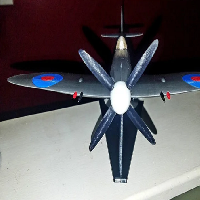
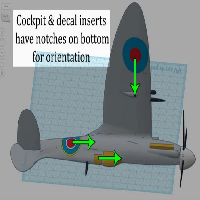
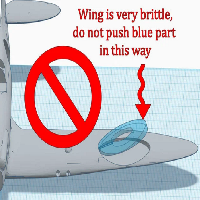
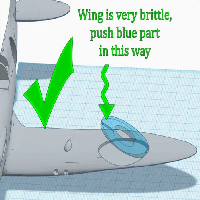
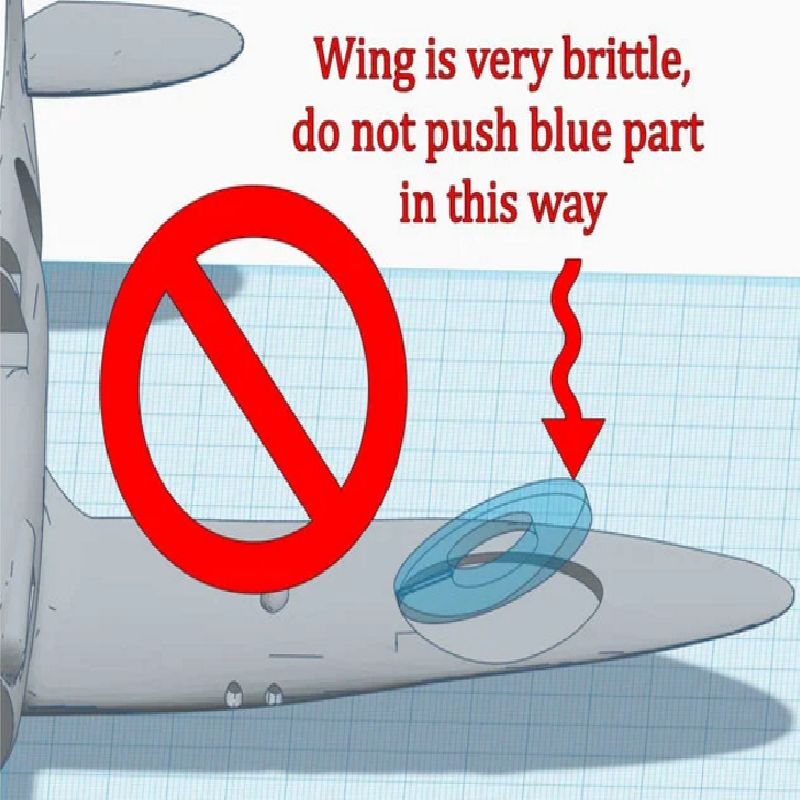
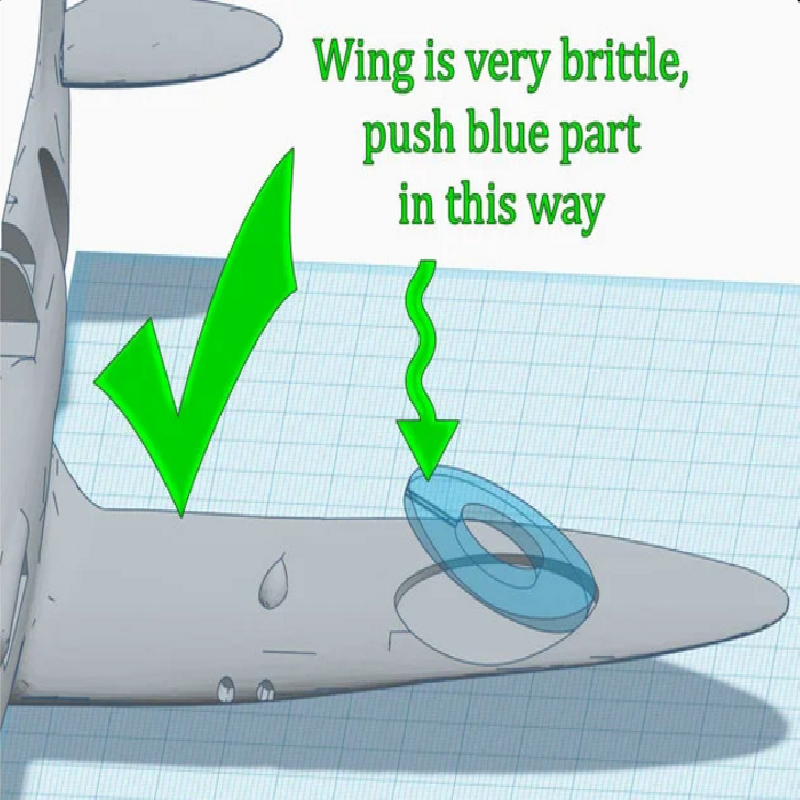
Add the decal rings to the body and wings before gluing the body together (I glued the body last). All of the pieces are fairly tight and most do not require glue. The engine exhaust, the blades (which are in 2 pieces), the front piece of the cockpit, and the two body halves are the only things that require glue. I made a mistake inserting the blue decal on a wing and broke the wing and had to glue it back on. I included images to show my mistake and how to avoid making it yourself. The decals have a notch on the bottom to show which direction they go, also included in an image to show what I mean. The White and Red decals on the sides are very tight, I had to use the backside of a screwdriver to hammer them in completely so, make sure you add all the decals before gluing the body halves together.
I made a file for each color, and each side, you can obviously add all the same colored pieces together and slice them into fewer prints if you choose.
For a rough draft, so to speak, I think it came out well, it would have been better larger, but this was a first run to see how things went.
Lastly, I printed this before realizing I forgot to add a hole on top of the plane for the pole. I added it to the STL after I noticed my mistake.
The file "Part_2" means print two times (one for each wing), "Part_3" means print three times (one for each wing, one for behind the cockpit). The file "Pegs" is for the two halves of the plane to line up while gluing them together. And, as mentioned before; the blades are in two pieces and need to be glued together. They are quite thin, so I printed them with my bed at 70ºC and let them completely cool down before removing them from the build plate. Do not lift them up and bend them, bend the build plate to release them a bit then slide them off horizontally to prevent bending them. They snap into the cone perfectly and do not require glue to hold them in the cone.
The red/white/blue/yellow decals are very tight and shouldn't be glued.
I printed it all with 0.16 layer heights, 50mm/s, the body halves took 8 hours and 15 minutes each to print. Everything fits tightly, except for the engine exhausts, they are loose and need super-glue to hold them in.
The base is adequate, but could be improved so it cradles the underside rather than being flat, allowing the Spitfire to teeter left or right.
Print Settings
Printer brand:
Creality
Printer:
Ender 3
Rafts:
No
Supports:
No
Resolution:
0.16
Infill:
10%
Filament_brand:
3D Solutech
Filament_color:
Red, White, Blue, Yellow, Gray/Silver, Black, Gold
Filament_material:
PLA