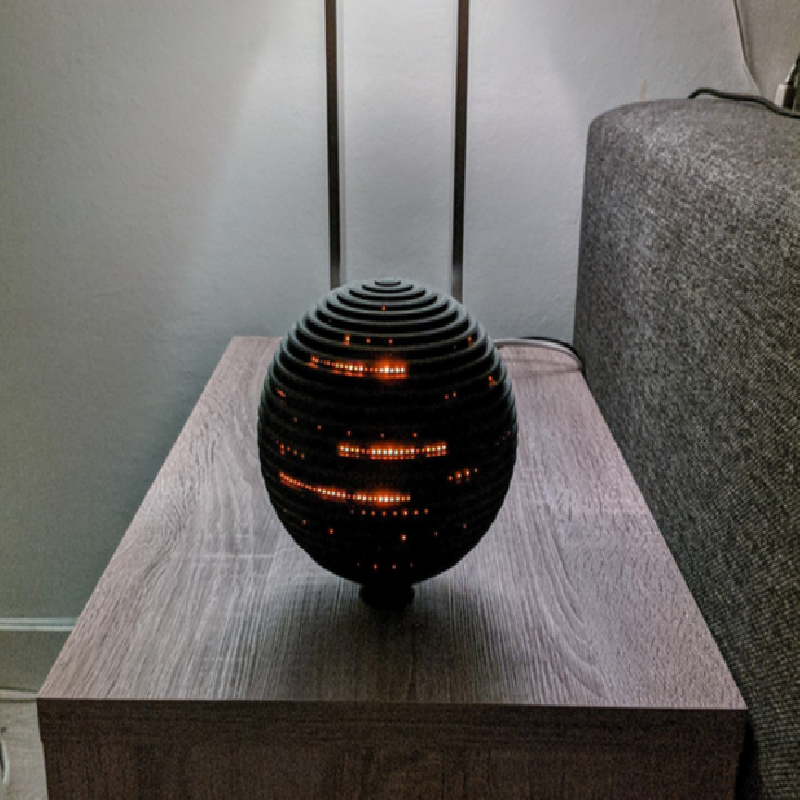
by lv_88
After some interest I'm upload my Rehoboam model that I did after watching Westworld S3. I did not initially plan on posting it here so here are some tips/info on how I printed it to get the end results shown:
All parts should be printed its natural up position, essentially as the final assembled model stands, that way there wont be any need for supports with two exceptions. For the very top part, depending on your printer, you might want to give it a bit of supports since its the thinnest part of the print(the top 2-3 rows of windows). Also on the very bottom part, you probably want to give a bit of extra support so it doesn't tip over if you print it "standing" correctly.
Youtube clip:https://www.youtube.com/watch?v=kEEY1Lp5mOA
The files:
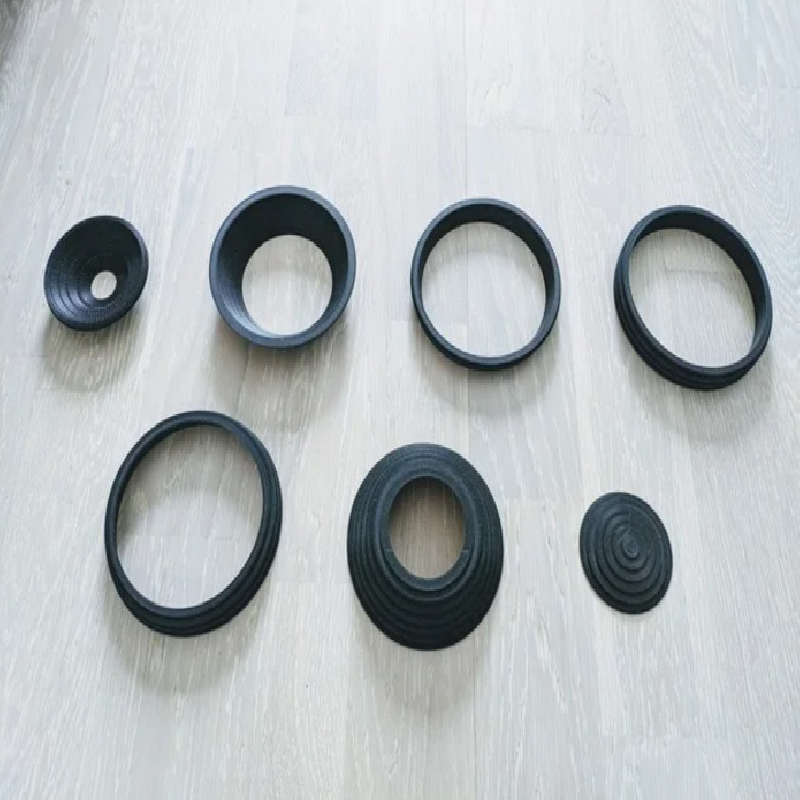
If you are a bit braver I made a 2 part/pieces print (named 2piecesprint) and the 7piecesprint is just what it sounds like, 7 pieces print. I did the 7 pieces since I was having some bad issues (needed new nozzle) with my CR10S and didn't want a failed print after X hours, so I made smaller prints to make sure I could make it before the replacement parts arrived.
The pieces I named with bottom should be in their natural up position so you can skip the supports (except the very bottom one), but you'll notice this in the slicer if you orient them the wrong way.
On the DIY creation/assembly:
I simply glued the pieces together, fairly straightforward.
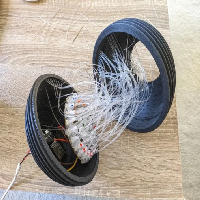
As far as the lights go, what I did was use 1mm and 0.75mm optic fiber cable that goes through the holes fairly smoothly if its printed correctly, otherwise just use a needle carefully through the hole if there stringing or something covering it a bit.
The parts used:
WS2812B Led rings
ESP32 with wled firmware (but you can pretty much use any arduino)
1mm / 0.75mm optic fiber (the very top 3-4 and bottom 3-4 rows should only use 0.75mm)
some 3d printer ptfe tube to gluegun to the led rings so the optic fiber cables could be placed smoothly on the leds. (this could very well be modeled/designed and be printed instead as a single piece to put over the led rings)
While all this above is not a full detailed explanation of how I made it, I did want to share the model for those that got curious, so here you go, do please share the printed results if you do make it!
I don't expect anything for this, but if you'd like to contribute with a coffee as support I'll humbly be thankful, but the most important thing is to have fun and enjoy your 3D printer! :)
Print Settings
Printer brand:
Creality
Printer:
CR-10S
Rafts:
Yes
Supports:
No
Resolution:
0.16
Filament_brand:
Addnorth Galaxy Black
Filament_color:
Dark/Black
Filament_material:
PLA
Post-Printing