by Vantave
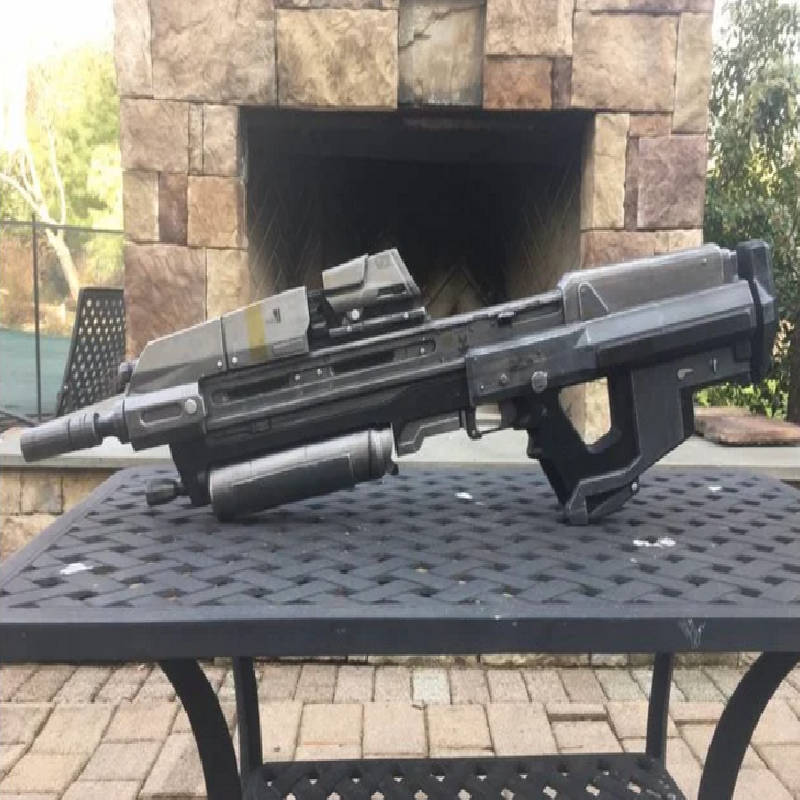
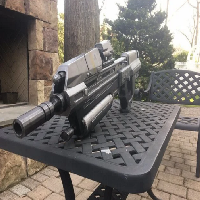
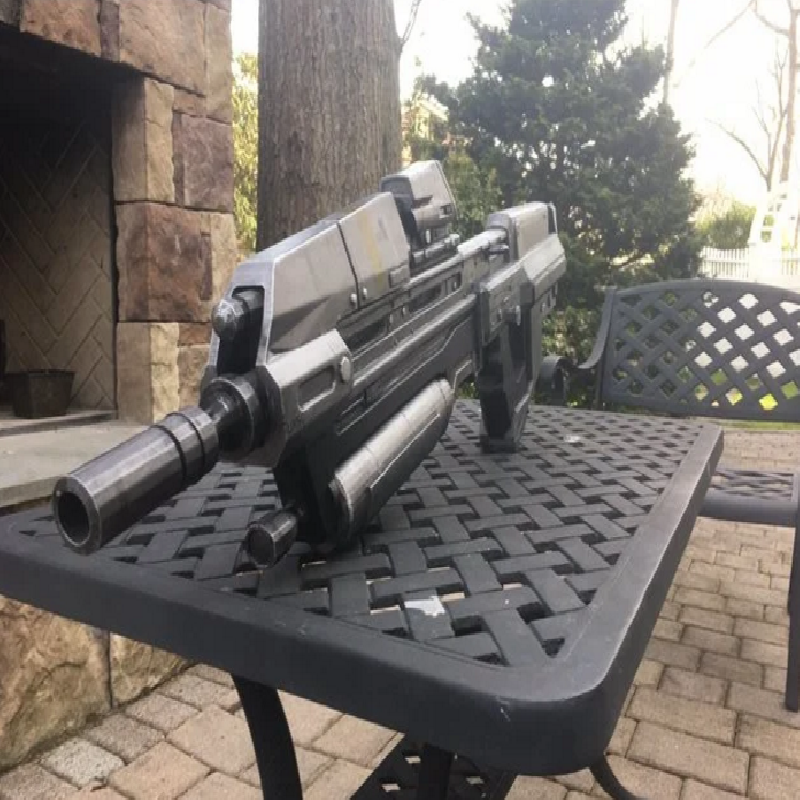
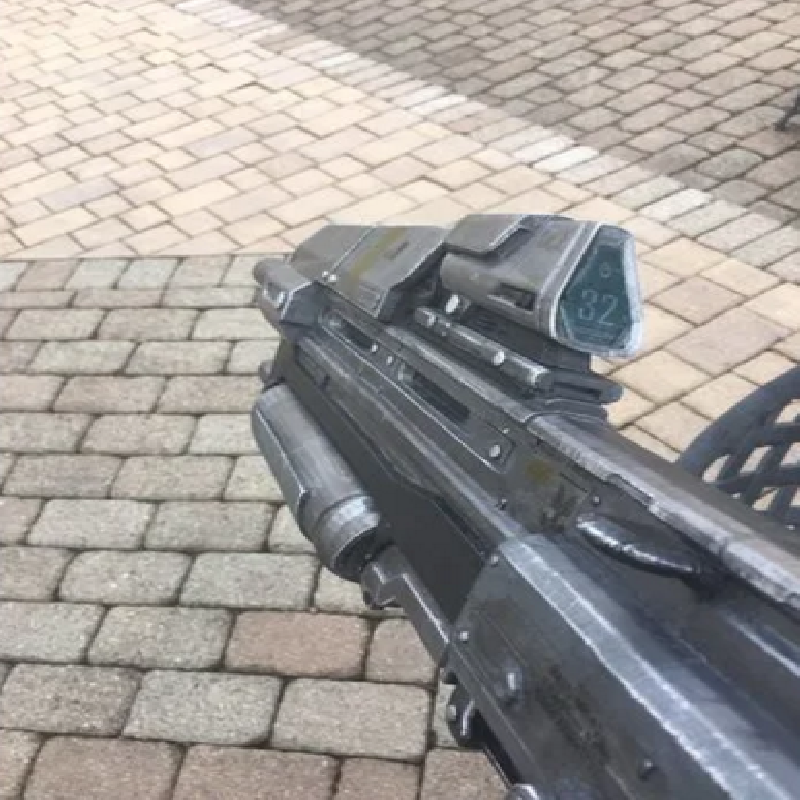
This is the MA37 ICWS, the UNSC Army's standard issue weapon and the assault rifle from Halo: Reach! It's in 1:1 scale, measuring at just about 38 inches long. This model was originally created by misterchiefcostuming, however after printing and making his model I felt that it was missing some important details and also found some issues with the 3D model itself. I also thought that, as I had made the model, including some more detailed instructions along with the resources I created/used would nice, so here we are.
The original model is fantastic though, so please like/support his work as well! You can find his model in the remix section on this one.
This model includes the instructions for printing, assembly, painting, and weathering which can be found below. I've also included the decal sheet I made and the display stand I modeled for this prop.
I also included the full model if you want to use it for something else, however be warned that it will have un-printable mesh issues that I fixed on all the individual pieces but not the whole thing.
If you find any issues whatsoever or have a question, tag me on Twitter (@Vantave) or if you can't just comment on this page. I should be able to fix any issues you find pretty quickly.
Everything was modeled in Blender, also using the Netfabb STL fixer. The splicer I use is Cura, printed on a CR-10.
Printing, Assembly, and Prepping for Paint
Printing
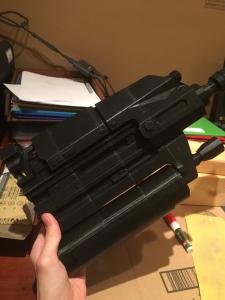
Printing this prop should be simple and easy. It took me about 200 hours, however as this model is split up differently than when I printed it, you might find that number varies. When you download the pieces they're not orientated for printing, so just rotate them to whatever you think works best in your slicer. I found that minimizing supports and putting one of the flat/inside the prop sides on the print bed worked best. Print at whatever settings your printer/filament works best at, and I'd recommend an infill of 10%. Lower would be too weak, but higher would take way too long to print. For wall and roof thickness, I just did 8mm for both. As for layer size, go as low as you're willing to wait. You'll be doing a lot of sanding anyway so it's not super important, but it's still easier. I believe I printed at 0.2mm. For the stock (parts 12 and 13) you have two choices: Extended and retracted. It's only a difference of about 1cm so just choose whatever looks nicer. You also have two options for the magazine: Basic and detailed. I reccomend detailed because it looks nicer, however the basic magazine would be easier to paint and print (and most of this detail gets hidden anyway). I also included the bullet model I used on the magazine which was created by gracey. It's the same type of bullet the gun uses in-universe (7.62x51mm), so you can print that for display as well if you want. I printed both stand pieces at the same time at 8% infill, very simple and easy print.
Assembly
Just sand the flat surfaces with 120-220 grit and glue them together with super glue. Originally I was going to add pegs, but I decided that they'd be more trouble than they're worth as I had no issue assembling without them. How to assemble them should be easy and obvious! To cover the seam lines, I recommend buying some wood filling paste. I used a 32oz tub of "Elmer's Product Probond Woodfiller" from Amazon and it worked great. Use your fingers to push it into any holes and rub it along the seam lines to fill them up. It'll be dry enough to sand in about a day. If there are any rough spots that you don't think will sand well, rub this stuff over it to make it smoother. I used it on top of the cheek rest part.
Prepping for Paint
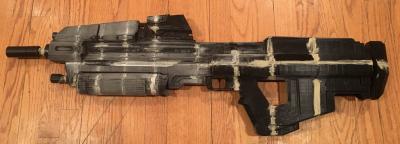
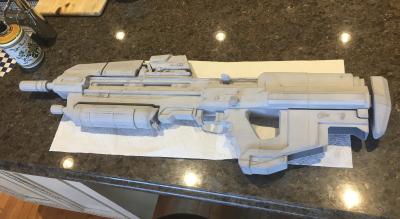
After assembling, I sanded everything down at 220 grit. Do this outside/in a workshop unless you want plastic and wood dust everywhere (including your lungs!). This will take ages but it is extremely important! After this I did a layer of Rust-Oleum 2 In 1 Filler and Sandable Primer, also bought off Amazon. This stuff is great for getting your prop smoother. Sand that at 220-400 grit, then do another layer at and sand that at 400-800 grit. At this point, the whole thing should feel totally perfect and as smooth as if it was injection molded. If not, do more layers and more sanding, perhaps going to higher grits.
Painting, Decals, and Weathering
Painting
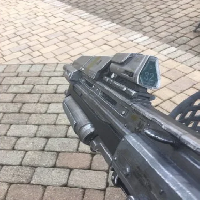
Time for the fun part! I did a layer of Krylon matte/flat black first, to act as undercoat and to color the black parts. After that, tape up the parts that you want to stay black. I used high quality Tamiya tape (yellow) to do the edges, and covered the big areas in some cheap blue painters tape. You really wanna get this part right, as mistakes are a pain to fix. The other paints I used were Tamiya TS-42 (Light gun metal) for the bright silver parts like the handguard-tube, the cheekrest, and the bright silver parts on the front/top. I used Tamiya TS-38 for the body of the gun and the flashider/flashlight. Finally I used Tamiya TS-4 (German Grey) for the flat parts near the back. Just look at the pictures attached to this page and copy that, or do your own paintjob. Once finished, I used a tube of Rub n' Buff Silver Leaf on any screw pieces. This stuff is messy as hell and a nightmare to clean so be careful, but it does look great. After that do a clear coat layer of your choice to seal in the paint and prep for the decals.
Decals
Downloaded the attached decals and print them out onto standard printer paper to make sure they're sized correctly. If not, resize them till they fit. Read up on how to apply waterslide decals because it's a delicate and kind of complicated process and I sucked at it. You'll want some Micro Set/Micro Sol though, as any tutorial will tell you. Make sure the decal paper you get is clear and made to work with your printer (inkjet/laser). Where to apply them should be pretty self explanatory, just look at the pictures of the finished prop if you're lost.
Weathering
This step is extremely important. It takes any prop from "hey that's cool" to "this is the coolest thing I've ever seen". For some more detailed tutorials, look at the attached videos, they're great. First, a acrylic wash. Mix some cheap black acrylic paint with water (about 3 to 4 parts water to 1 part paint) and brush it all over the prop, then wipe it off with a paper towel. The more paint you do the darker it is. Make sure you don't leave it on for more than a couple minutes as it will dry and become impossible to get off. When I did this, I think I did too much paint and not enough water, so make sure it's very liquid-y. Next, some dry brushing on the edges. I used Tamiya X-11 paint and dry brushed most the edges, but focused on the ones that would be the most worn in real life (magazine well, flashhider, handguard-tube, and the front top part). Be careful, you can always add more paint but you can't really remove it.
Changes made to original model
•Remodeled the flash hider to be more round, added more detail •Added depth to the flashlight •Added more depth/detail to the screws and other greebles •Added screw things and grooves to the hand guard •Added more detail to the grip •Added more detail to the magazine well •Remodeled the magazine, adding more detail and bullets on the top •Fixed various issues with the mesh that caused printing issues •Added a retracted stock option •Split up the model for printing with larger parts in better places •Modeled stand and created decals