by daveh_dev
This is a remix of @RealAbsurdity's wonderfulModular Snap-Fit Saturn Vrocket design, re-built for multi-extruder/MMU printers.
The coloration is based on as many pictures of Apollo-era Saturn V as I could find, as well as some great info from thisVintageSpace blog postwith only slight modifications.
I have spent the last several weeks modeling and re-modeling this, tweaking and test-printing each piece multiple times until I was satisfied with the outcome.
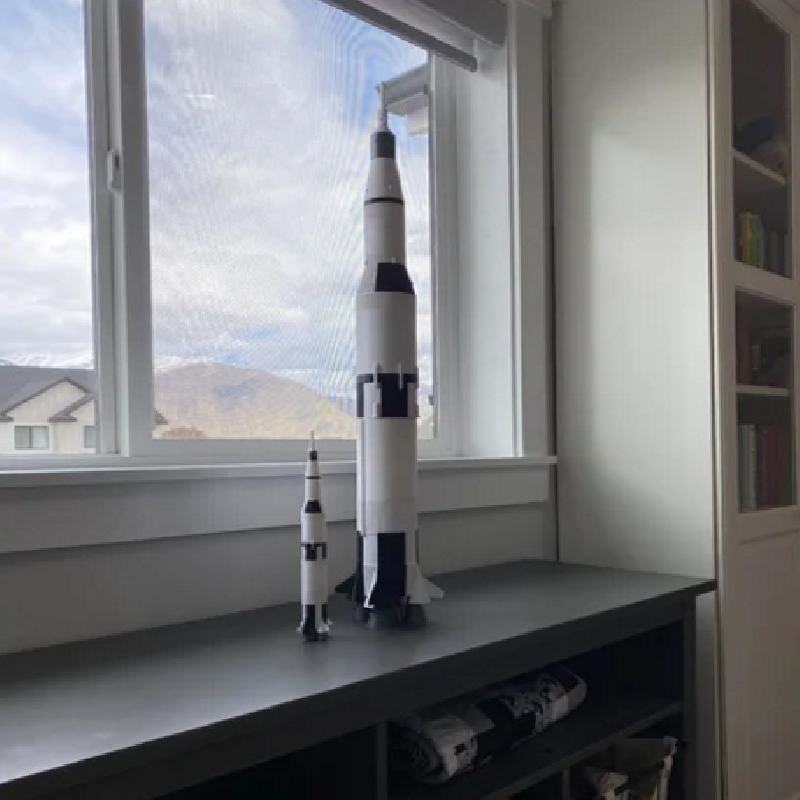
I have printed this at its default (100%) size (around 12" tall) 4 or 5 times with great success.
NOTE: this model was designed specifically to be printed with a multi-extruder or MMU-enabled printer. It was NOT designed for each color to be printed separately and then glued together afterward. I don't think that would work, since the pieces for each color support each other, and interlock in ways that wouldn't be possible to put together after the fact.
I sliced this with PrusaSlicer, so that's all I know how to use. (I'm sure it should work with other slicers as well, I just haven't tested it).
In PrusaSlicer, just set it to the MMU2S printer profile, then multi-select and drag all the color files for each "stage" in together to have each "stage" be treated as a multi-color object.
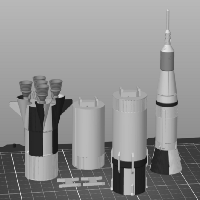
The files you'll need to print each stage are:
- SaturnV_Stage1_black.stl
- SaturnV_Stage1_silver.stl
- SaturnV_Stage1_white.stl
- SaturnV_Stage2_white.stl
- SaturnV_Stage3_black.stl
- SaturnV_Stage3_white.stl
- SaturnV_Stage4_black.stl
- SaturnV_Stage4_silver.stl
- SaturnV_Stage4_white.stl
- SaturnV_H-Clips.stl
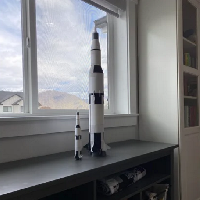
I also printed this—as you can see in some of the pictures—at a much larger size (280% scale, around 3 feet tall), also with fantastic results. There's enough detail in there to really make it shine at these larger sizes!
To print the larger version, I split the "Stage 4" piece into two sections, since the original was too tall to print in one piece on my printer. I've included those alternate "Split" files here as well, for anyone wanting to print this at a larger scale.
Use all the same files as listed above, except, INSTEAD OF:
- SaturnV_Stage4_black.stl
- SaturnV_Stage4_silver.stl
- SaturnV_Stage4_white.stl
use:
- SaturnV_Stage4-SPLIT-A_black.stl
- SaturnV_Stage4-SPLIT-A_white.stl
and:
- SaturnV_Stage4-SPLIT-B_silver.stl
- SaturnV_Stage4-SPLIT-B_white.stl
I also included a modified, hollowed-out version of the escape tower (top of Stage 4) that's truer to life. This hollow version of the escape tower printed fine for me at 280% size—without needing supports or anything. But I can't imagine the hollow version would work at a smaller scale, since the details are too small. (I haven't tried it though!)
If you want to print the hollow version of the escape tower, swap out that last file in the list above forSaturnV_Stage4-SPLIT-B_white_hollow.stl instead.
On this larger version, the two halves of the Split Stage4 section will need to be glued together after printing, as they do not have snaps. You will likely find that most of the rest of the sections might benefit from being glued together as well. This isn't strictly necessary, since they snap together just fine. But when you scale things up, the tolerances also scale up, so there's a lot more wiggle room after you snap things together... and a little bit of glue between each section helps hold things in place better.
Print Settings
Printer brand:
Prusa
Printer:
MMU2s
Rafts:
No
Supports:
No
Resolution:
0.20mm
Infill:
20%
Filament_brand:
Hatchbox, Prusament
Filament_color:
True White, True Black, Silver
Filament_material:
PLA
Notes:
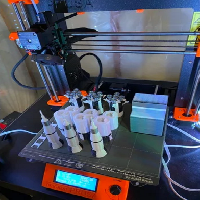
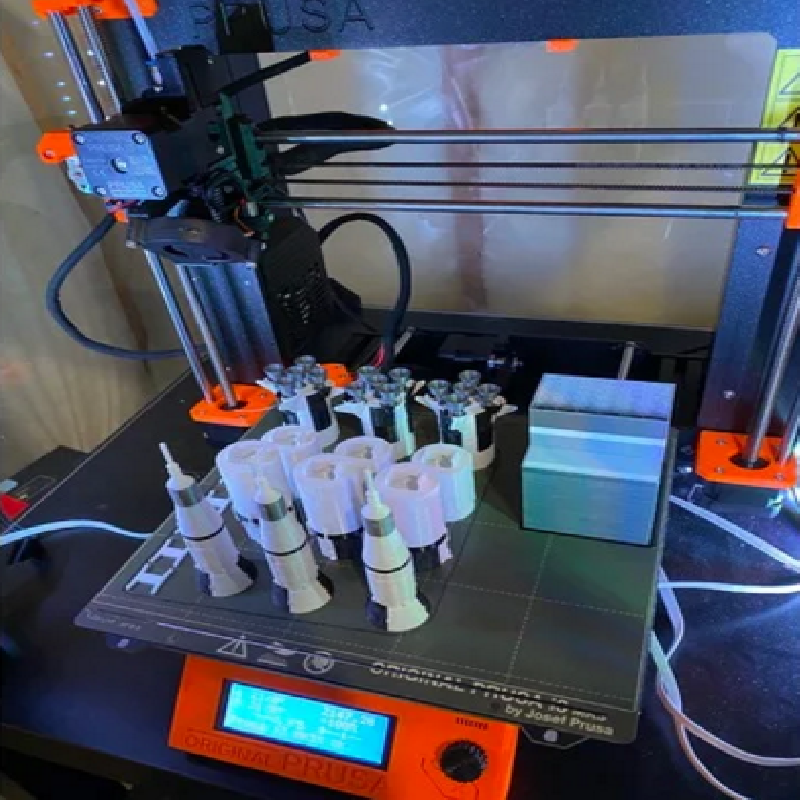
I printed this on my Prusa i3 MK3s MMU2s with fantastic results using PLA (Hatchbox "True White" and "True Black", and Prusament silver/grey). I sliced this with PrusaSlicer, set to 0.20mm "speed" preset, and 20% infill, with filament "purge volume" set to 200mm for all colors (I was getting too much bleeding between black and white if I purged any less). I did not use any rafts or supports, and did not tweak any other print settings. It took me around 20 hours to print a complete rocket (at 100% size, printing all sections together at once). Since there is so much filament purged for this print, I ended up printing 3 complete rockets at once (see picture), just to get more for the same amount of purged filament. Printing 3 complete rockets took around 30 hours. When I printed the extra large version (at 280% size), I printed each section separately. It was technically possible to fit all of the sections (and a purge block) on my build plate to print them all at once, but it would have taken over 5 days to print them all together, and that seemed risky.
How I Designed This
I designed this (in SketchUp Make 2017 edition) by deconstructing the original model, and piecing things back together carefully to ensure no holes or gaps. I added some internal "structural beams" to the Stage1 portion of the rocket so that I could print it at a much larger scale without needing to print with supports, or take risks with huge gaps that need bridging near the end of a very long print.