by reakain
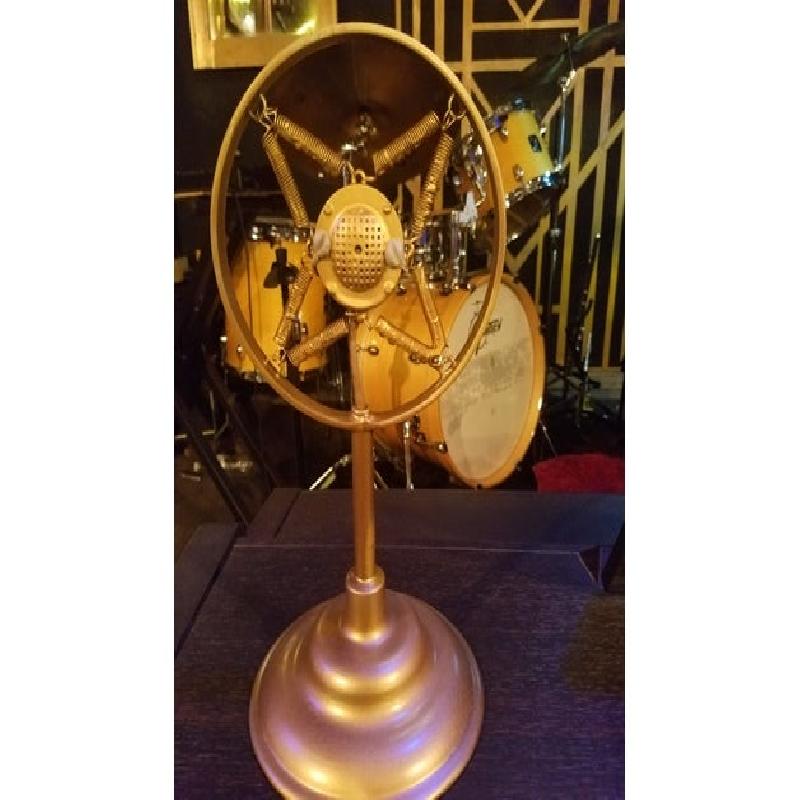
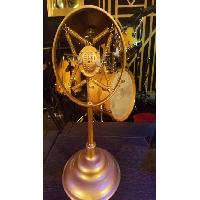
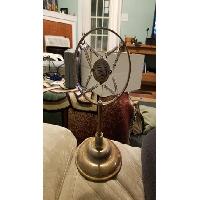
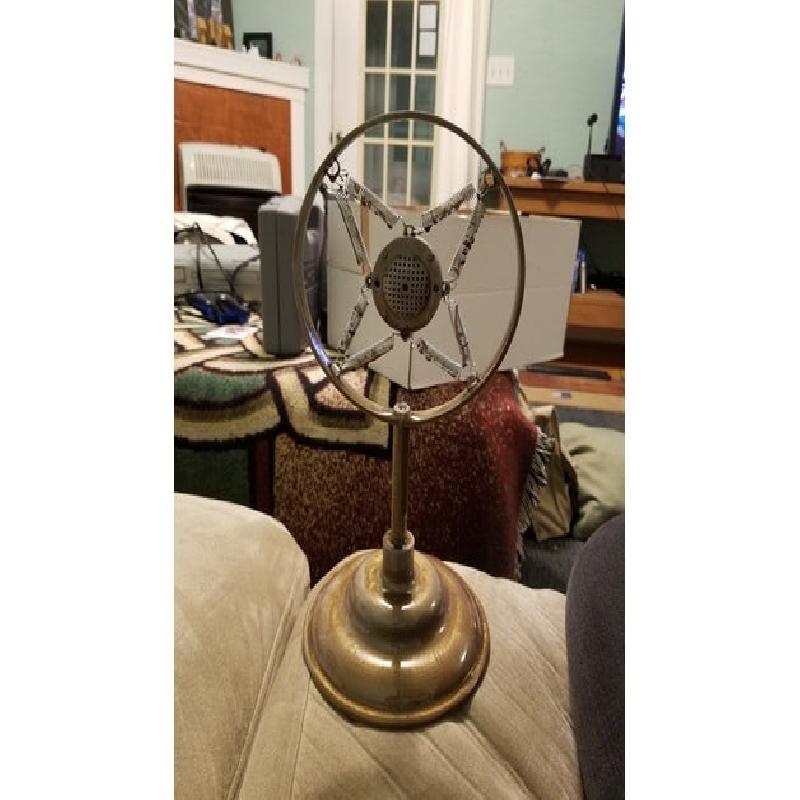
The local theatre asked if it would be possible to 3D print a fake 1920s style microphone for their production of Guys and Dolls, so I spent a couple hours designing, and a couple more on post-processing and got it turned around in about 4 days.
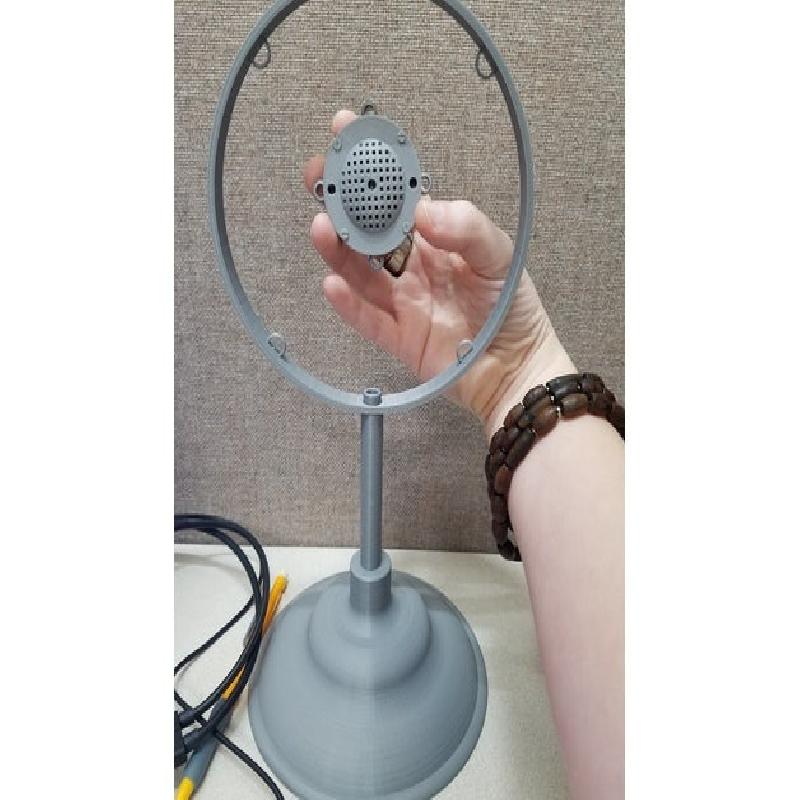
I wasn't sure whether they wanted the "tail" of cord on the base, so I made two different base designs. One is longer and has a cutout for the cord, much like a lamp. The other is shorter and doesn't have the cut out.
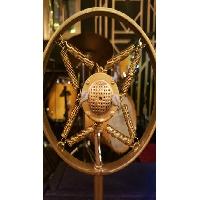
This print also needs 8 extension springs that aren't too stiff, and a bit of braided cord to fake the actual electrical cable.
I personally think the taller base piece looks better, but I made a mistake during assembly, and while trying to correct it I accidentally sheared the stem on my taller base, which already had a weak point because of some filament grinding during printing, and I didn't have time to spend another ~22 hours printing. So, the finished pictures here are using the shorter base.
Printer Brand:
Prusa
Printer:
I3 MK3S
Rafts:
No
Supports:
Yes
Resolution:
0.1mm
Infill:
15%
Filament: eSun PLA+ PLA
Notes:
Supports on build plate only to handle the overhang hooks. Otherwise everything else is just preference.
Assembly Parts & Finishing Materials
You'll need the following parts for assembly:
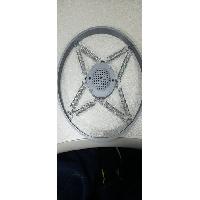
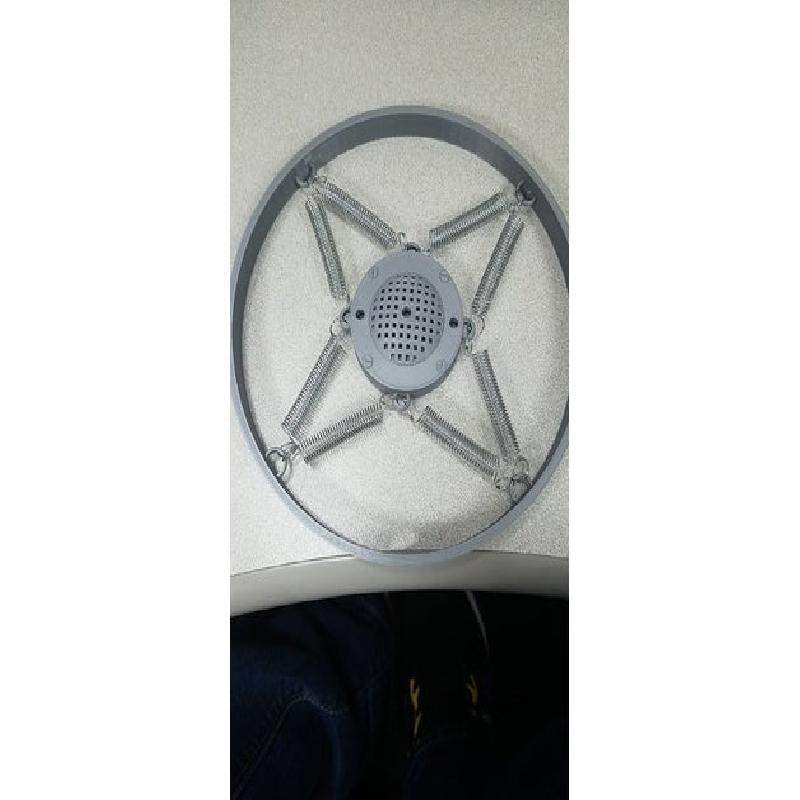
Microphone.stl print x1
Ring.stl print x1
Base.stl print x1
Note: You can use either the base or base_short model. I would recommend the non-short one, but the finished object pictures are using the short base
Extension spring x8
I used the shorter squat springs from this kit.
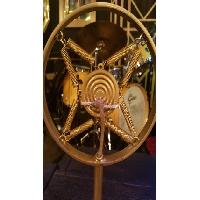
About 4" of braided cord, split about halfway up
I can't find where I got mine, since I just got a big ol' spool, but you want something like this
And the following materials for the cleanup and finish:
Some hot glue
Smooth-On's 3D Print Coating Resin
Bronze/brass spray paint (or airbrush)
I used this
Note: Don't use a hammered version, since the old-school microphones tended to look more smooth and lamp-like rather than any level of hammered metal. If you want to add dings and texture, buff it up after your spray coat by hand around the corners and "weld seams"
Enamel clear gloss sealant spray (or, y'know, again, airbrush)
I used this
Modelling glue or clay + glue for the "wire terminal" screw connections
I used gray Sugru as it's what I had on hand, but it takes 24 hours to fully cure, so I didn't get a chance to paint them after the fact.
Alternatively, use the heads of some real screws and some glue, just make sure their slot head screws to be period appropriate.
Build Steps
Assembly and finishing was pretty quick on this, purely because turnaround time had to be pretty fast.
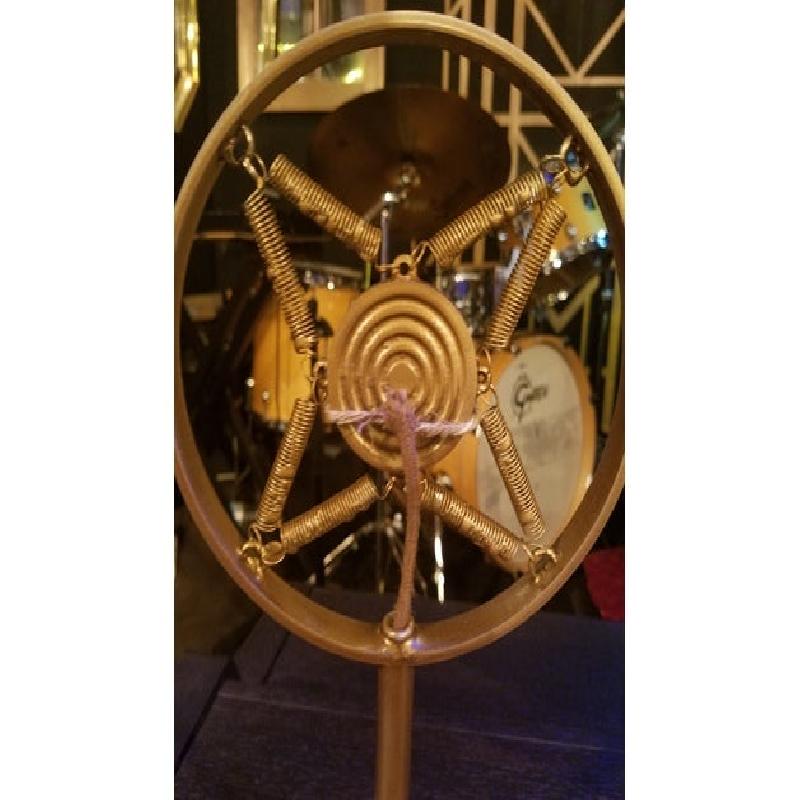
Use eight extension springs of equal strength, length, and diameter to attach the microphone part to the outer ring.
Use a line of hot glue along the base plate hole in the ring to affix it to the thinner section at the top of the stem on the base piece.
Use Smooth-On's 3D Print Coating Resin to smooth out the print lines.
Be careful not to coat the spiral part of the spring as it'll make some ugly plastic drips
Once cured, spray with even coats of spray paint until you like the color.
Use an enamel spray sealant to lock the color on
Attach the non-split end of your cord to the inside of the base piece through the hole at the top.
Take the split ends of the cord and bring them up around the back of the microphone to the two holes in the front and squash the ends in there until they mostly stay put on their own.
Cover the holes and cord ends with either your screw heads, or if going the clay route, with your molding clay, and form it to look like slot head screws.
In either situation, make sure your screws/fake screws are well connected to the microphone and not just the cord! Otherwise they might pull the cord out rather than keeping it attached.