by DrLex
This is an evolution of the rubber band gun that started out as the step-up-action wooden gun by RBGuns, which was made available on Thingiverse as a laser-cut design by ddanijell. This was later on remixed as a 3D printable design by thecrash74, and then improved by iClint.
This version has the following improvements:
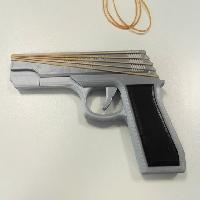
5 shot capacity instead of 3.
Larger design suitable for number 18 rubber bands, and also better fits adult hands.
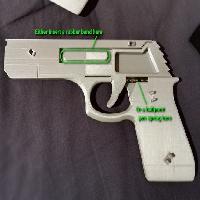
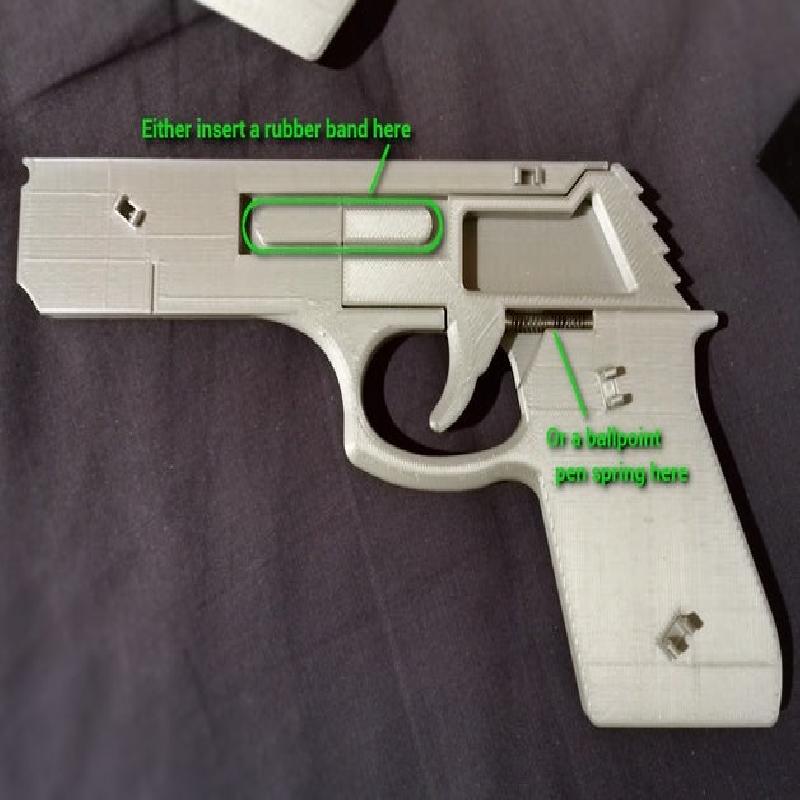
Can use either a typical 1 inch ballpoint spring for the trigger, or a rubber band.
Reliable mechanism with reduced risk of bands getting snagged.
Easy printing and assembly, using clips that do not rely on perfect tolerances (no screws, glue, nor dowels).
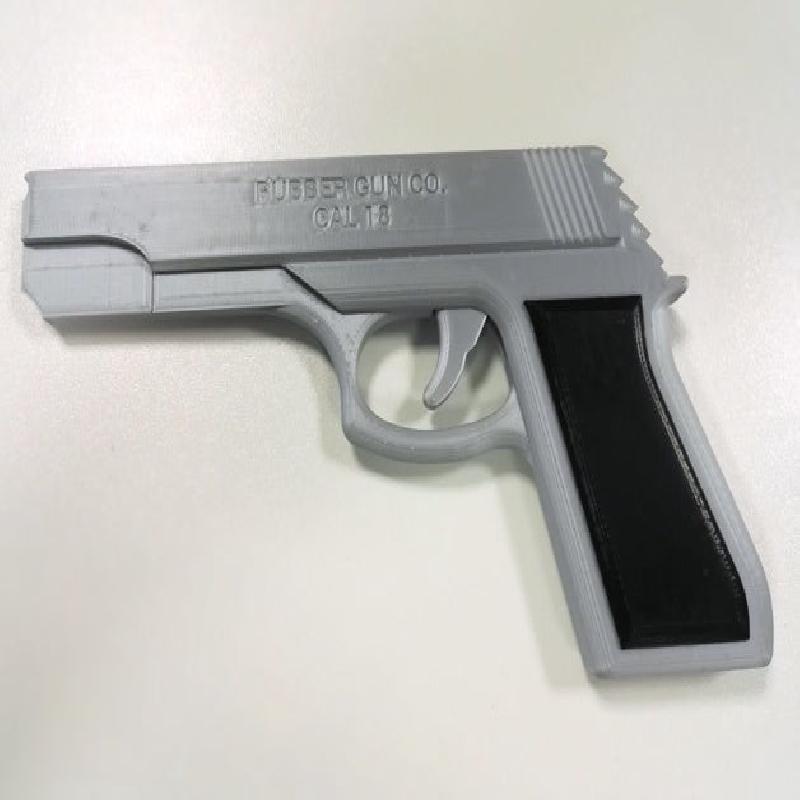
Some extra styling inspired by the 1911.
This is about the simplest semi-automatic rubber band gun design possible with only one moving part, which makes it both reliable and easy to set up. See it in action here.
Assembly
To assemble, start by pushing the two shorter clips into the two holes at the upper side of the middle part, then attach the right side by pushing it into the clips. Then insert the trigger and add either a rubber band or a 1 inch (25 mm) ballpoint ballpoint pen spring (maximum outer diameter 5 mm) for tension. Then push the left side into the clips, insert the longer clips in the grip, and finally attach the grip panels.
Should the clips not catch because your printed parts are slightly too thick, either try to sand down any irregularities, or print the ‘longer’ clips. Conversely, if the clips are too loose, try again with the ‘shorter’ clips.
Using
This has been tested with number 18 rubber bands (1.6mm or 1/16 inch thick and about 76 mm or 3 inches long when new). Shorter bands down to size 14 may work as well, but the trigger pull could become really hard with 5 of those loaded. From a quick comparison, it seems shorter bands hit harder at short distances, but due to their lower mass they will lose their momentum sooner and will not go farther than the longer ones.
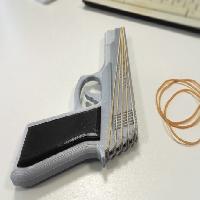
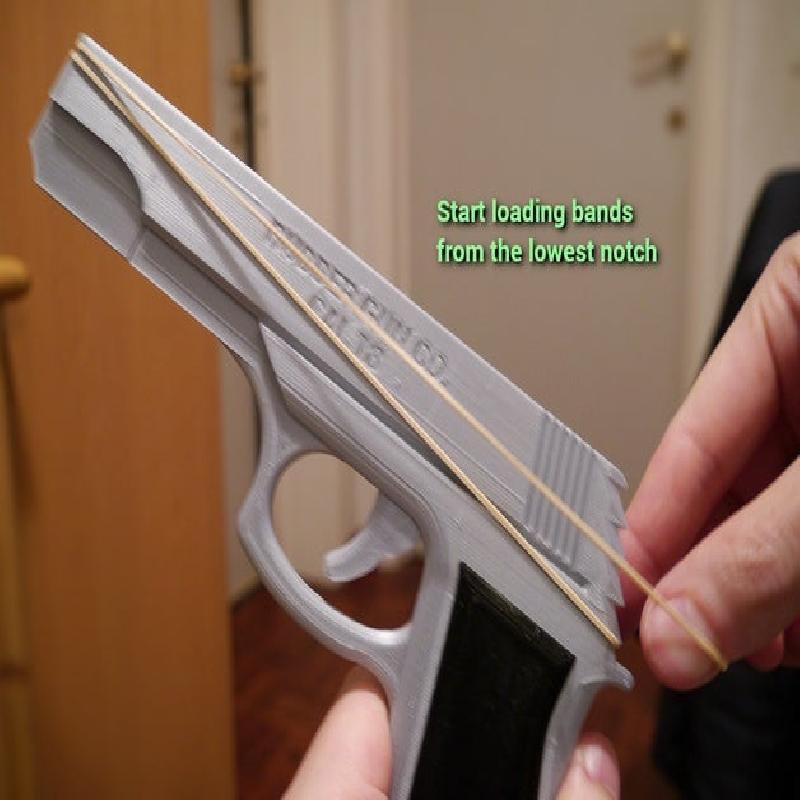
Rubber bands must be loaded in the reverse order in which they will be launched: start at the lowest notch. Otherwise they will get tangled because the first band to be launched will be covered by others. Try to maintain equal tension at the left and right sides of the rubber bands while mounting them.
When firing, pull the trigger all the way back to ensure correct cycling of the bands.
For maximum reliability, apply a little grease or oil to the two topmost notches of both the frame and the ‘hammer’. This will ensure the bands slide upwards quickly and makes it possible to quick-fire all 5 bands in one second.
Licensing notice
This is released under a Creative Commons - Attribution - Share Alike license. As far as I am concerned, you may sell printed copies if you honor the license (meaning each sold copy includes a visible reference to this Thing page). Because this is based on a design by RBGuns.com however, additional licensing may need to be obtained from them if you want to sell this for profit.
Common sense reminder
Depending on how you print this, this may look like a real gun from afar. Don't do stupid things. Also do not shoot rubber bands towards living beings' eyes at close range. This design comes without any warranties or liabilities, use at your own risk.
Printer Brand:
FlashForge
Printer:
Rafts:
No
Supports:
Doesn't Matter
Resolution:
0.2 mm
Infill:
15%
Filament: 3D Eksperten PLA, PETG Silky silver, black
Notes:
You can print at thinner layer heights to get a cleaner finish (with 0.2, there are only 3 layers above the holes for the clips, which could result in scars on the surface). You should ensure though that the middle part is as close to 6 mm, and the sides as close to 3 mm thick as possible, for the clips to fit well.
Since the clips are small anyway, you could print all variations at once and pick the ones that fit best. On a well-calibrated printer, the regular clips should work fine.
It seemed trivial to simply take the original design and increase the number of notches, but this proved a bit naïve. Modifying the angles and moving notches higher up, increased the risk of the bands getting snagged. The material I was using also had very high friction and this made the upper bands reluctant to crawl upwards, especially when carelessly trying to add sloped surfaces in the hopes of solving the snagging problem. In the end I added specific chamfers to remove any points on which the bands could get stuck, and I changed the slope of the topmost surfaces. I printed increasingly minimal versions of the side panels to test designs until I had something that works reliably.