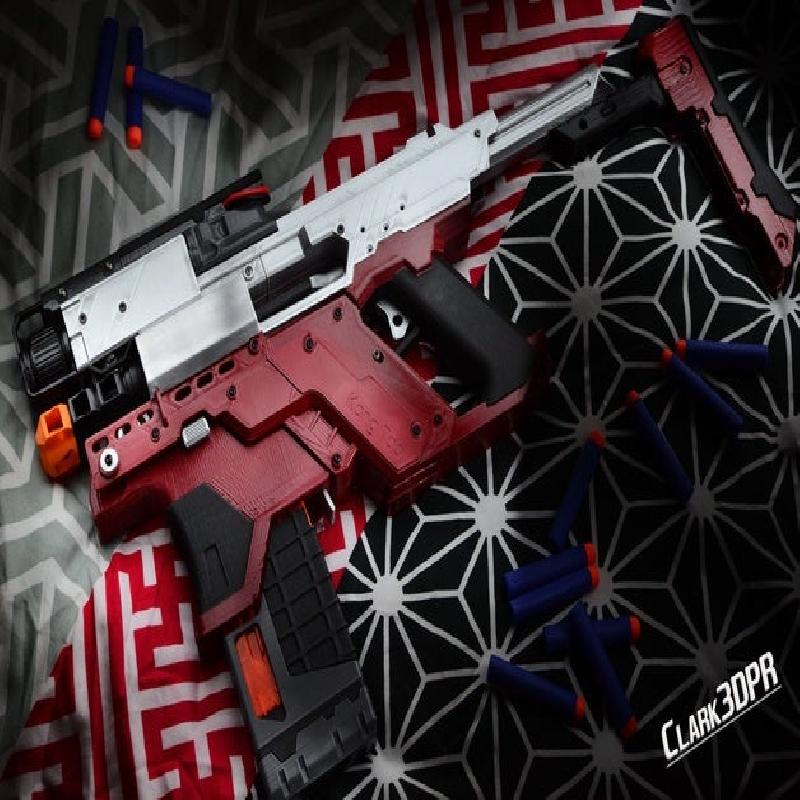
This project is an Arduino-controlled, 3D-printed functional Nerf Blaster Replica of the Kang Tao from the upcoming video game Cyberpunk 2077.
For a detailed guide of how to wire up the electronics and a copy of the code, visit the build tutorial on any of the below:
Arduino Project Hub: https://create.arduino.cc/projecthub/Clark3DPR/full-auto-3d-printed-brushless-nerf-blaster-arduino-control-a711b0?ref=platform&ref_id=424_trending___&offset=3
Reddit/Nerfhomemades: https://www.reddit.com/r/nerfhomemades/comments/djmyu0/3d_printed_kang_tao_nerf_blaster_from_cyberpunk/
NerfHaven Forums: http://nerfhaven.com/forums/topic/28493-cyberpunk-2077-kang-tao-3d-printed-nerf-gun/
Clark3DPR Youtube: https://www.youtube.com/watch?v=Q8QM8n9C2n0&list=PLJXzQfzEaGQ4h3zaYA5Da9h871IvN4cna&index=4
Also, read the READ ME DAMNIT.txt included in the downloaded files.
This project was never intended to be released to the public and was only for personal use. Consider it a prototype that requires a small amount of post processing.
Requires a 300x300mm print bed, read post-process section for required tools.
Any missing files, have a suggestion or questions? Leave a comment below.
Files are provided as-is and I will not take responsibility for any damages / injuries that may incur. Use at your own risk.
Printer:
Artillery Sidewinder X1
Rafts:
Doesn't Matter
Supports:
Yes
Resolution:
Default 0.3mm
Infill:
Default 20%
Filament: Doesn't Matter PLA
Notes:
All STL Files (unless otherwise stated) include manual supports that were painstakingly created in CAD software. All you need to do is orientate it correctly, use the print settings that work for you and away it goes. Additional auto-generated supports are not recommended.
Some files do not have or need any supports.
PLA recommended.
This project takes approx 160 hours to print, and 2-3kg of PLA filament.
Requires a 300x300mm print bed, read post-process section for required tools.
Highly Recommended Tools
Needle Nose Pliers: Use to remove supports.
Rotary Tool: Removal of supports in tight spaces is much easier with a rotary tool.
Soldering Iron: Even if you are not wiring up any electronics (you just want a prop), a soldering iron is used to insert the heated threaded inserts. They are basically nuts that melt into the plastic for the screws to fasten into.
Drill: Some 3D printed holes for screws may need to be cleaned up. Use 3.2mm or 3.5mm drill bit for the M3 screw holes.
Double Sided Tape: Add very small pieces to 'Muzzle' for attachment to flywheel cage. Also double sided tape the 'Mag Shell' onto a standard Nerf Magazine. So you can remove these later if you wish.
Glue: You will need to glue the four 'Mag Shell' Pieces together.
Glue 'Foregrip Thumb Rest' onto 'Foregrip'.
Glue 'Pusher Rod' onto solenoid Shaft Nut. Cut slots in solenoid nut for glue to stick.
Glue 'Stock Extension Rod Insert Mount'. The stock extension rod inserts into this.
Glue 'Stock Extension Rod Insert' inside 'Stock Extension'. Check for fitment first!
Glue 'Flywheel' to 'Flywheel Spacer'
Glue 'Flywheel Cage Motor Mount' to 'Flywheel Cage Rear'. Check fitment first!
Glue 'Safety Switch Mount' to 'Main Rear'
Glue the safety switch onto the 'Safety Switch Mount'
Primer: Use primer paint for plastic before using base coat paint. Found in your local hardware store.
Paint: If going for an accurate look to the Kang Tao, some parts need multiple different paint colours on a single part. For this, you will need to mask off some areas. I simply used masking tape. It is a little tedious, I recommend cutting the tape into small strips and triangles for the tight corners. Pay close attention to the tape edges lifting up. Use paint for plastic, found in your local hardware store.
Threaded Inserts: Use M3 heated threaded inserts. Use a soldering iron to insert.
Fasteners: Use M3 screws. Various lengths from 6mm to 20mm. Mostly button head with a few countersunk. Recommend hex type.
All other material and components refer to the link build logs above.