by Ellindsey
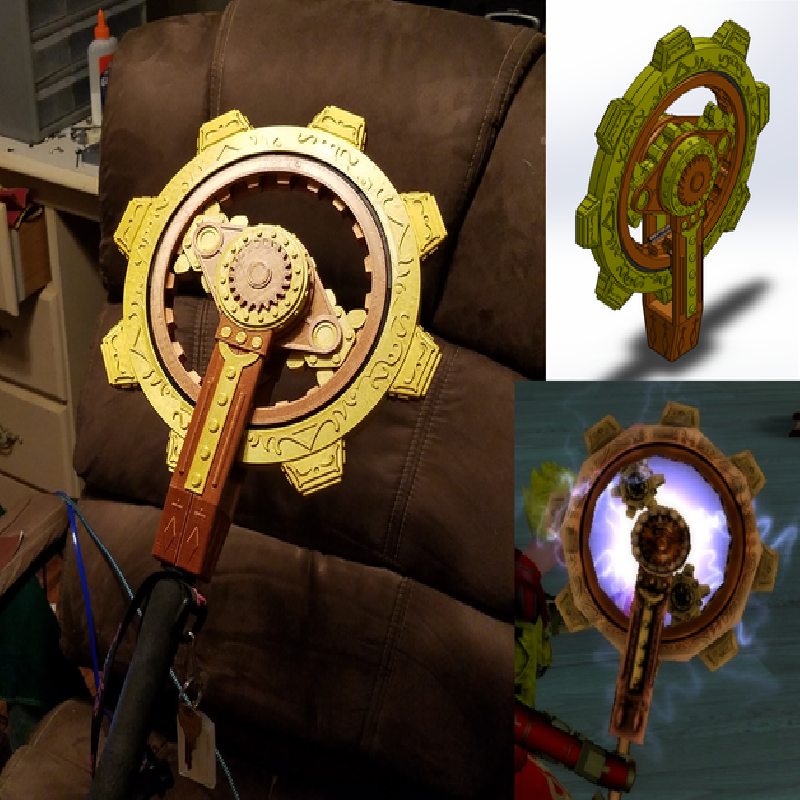
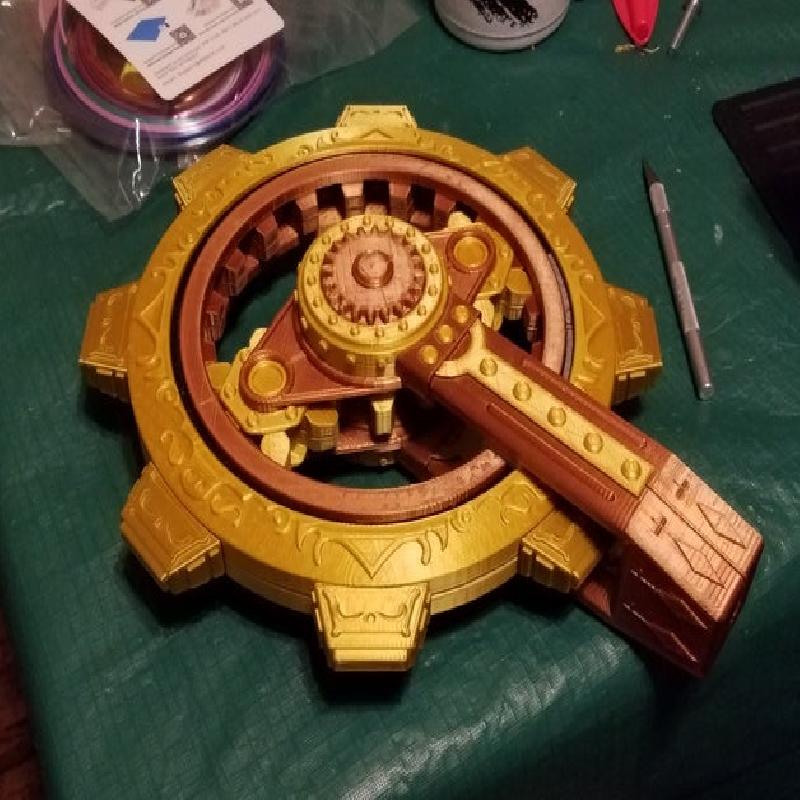
Two weeks before DragonCon, my wife told me that she was going to be attending the steampunk themed ball with friends, and could I please print something for her to bring for cosplay? Perhaps the Nemesis Staff, a weapon from the old City of Heroes MMORPG we both still play? And I agreed, and then spent a week designing and printing this thing.
This prop was a major rush job. It's a first draft, and nearly all the printed parts were used without iteration after seeing how they fit together. It came out pretty well, but there was a lot I'd redesign if I was doing it from scratch now.
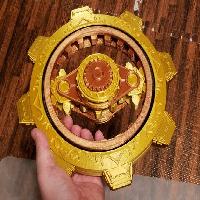
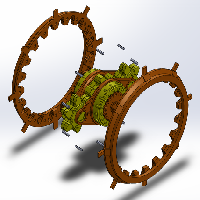
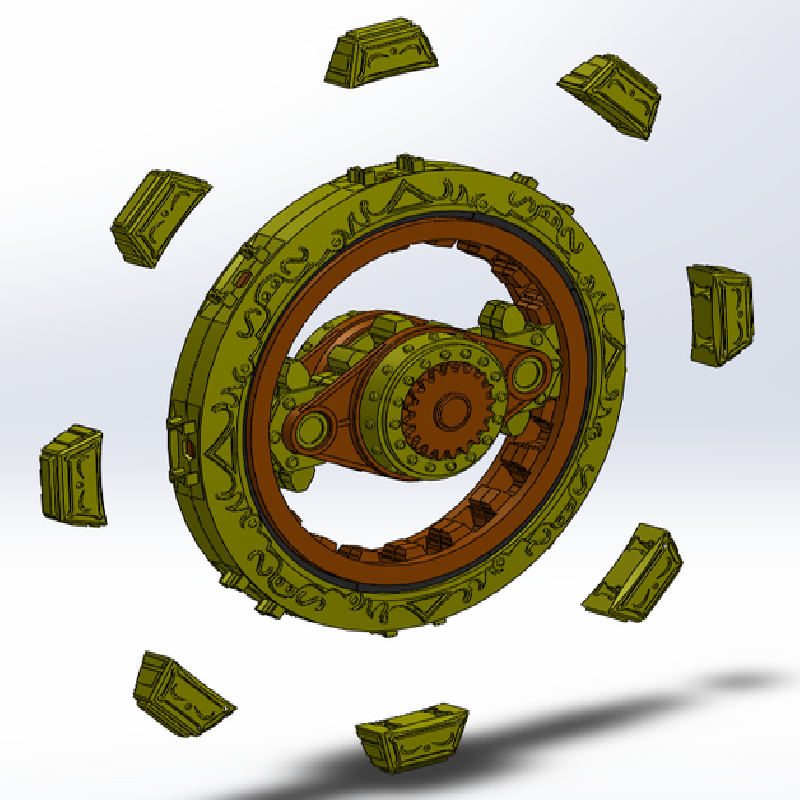
The main gear ring does rotate, although it's very tight and mine has already cracked in a few spots. Best assembled, rotated to an angle that looks good, and then left there.
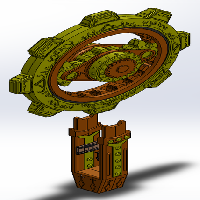
This is just a topper, and not a complete staff, as I designed it to fit onto the top of my wife's walking staff. There's a pocket in the fork where a hex nut can be inserted to attach to a threaded rod.
Best printed in metallic silk copper and gold, with some black, and a few translucent parts. No painting required.
To assemble:
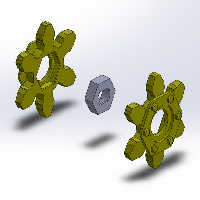
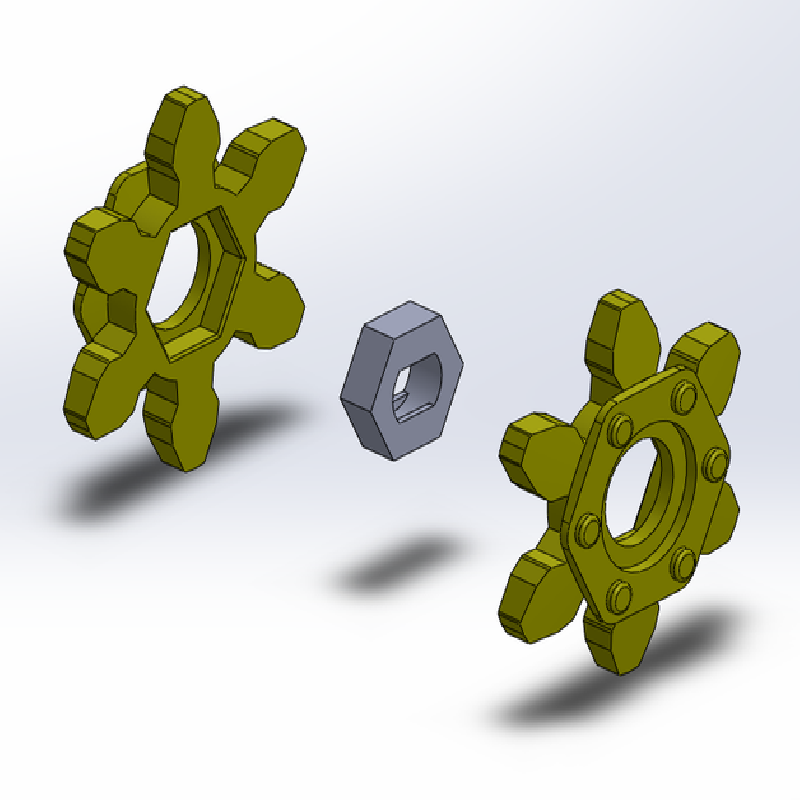
Print four planet gear halves in gold, and two planet gear cores (color doesn't matter).
Glue together the planet gear halves around the cores to make two planet gears.
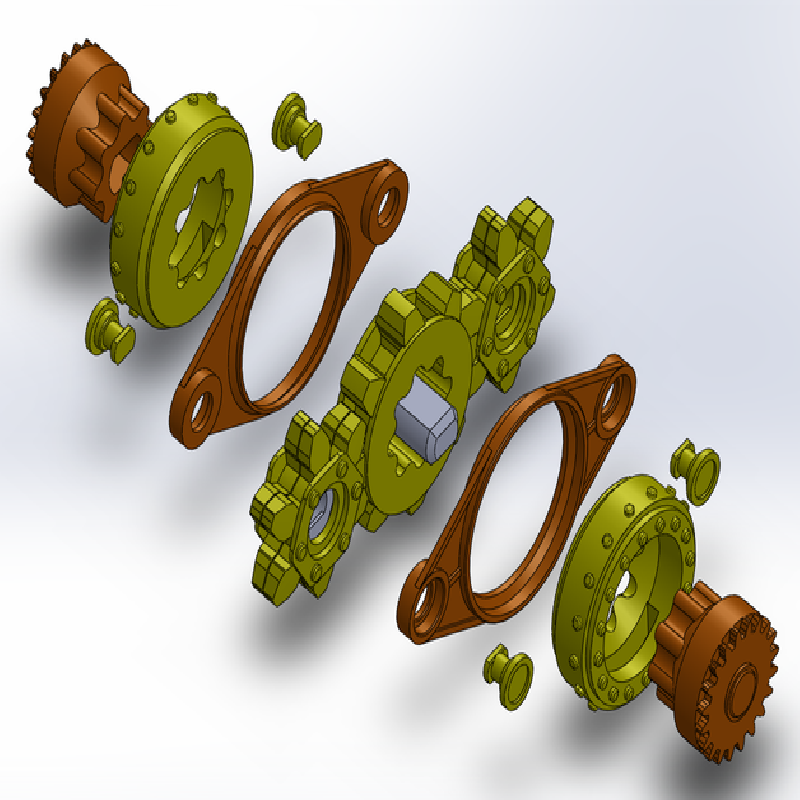
Print one sun gear, two sun gear hubs, and four planet gear hubs in gold. Print two planet gear carriers, and two sun gear cores, in copper. Print one sun pin, color doesn't matter.
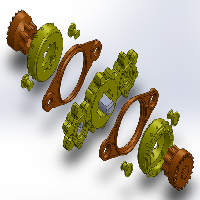
Put the planet gears side by side with the sun gear, and then use the planet gear carriers to hold them in place. Insert the planet gear hubs into the planet gears, and carefully glue the planet gear hubs together as you do, making sure the planet gears can still freely rotate. Insert the sun gear hubs into the sun gear, along with the sun pin, and then insert the sun gear cores into the sun gear hubs. There is a rectangular slot in the core and hubs that needs to line up so you can insert the forks later. Glue the sun gear cores to the pin as you insert them, being sure that the planet gear carrier can still rotate freely.
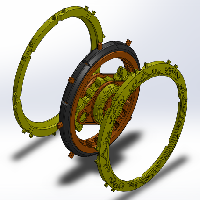
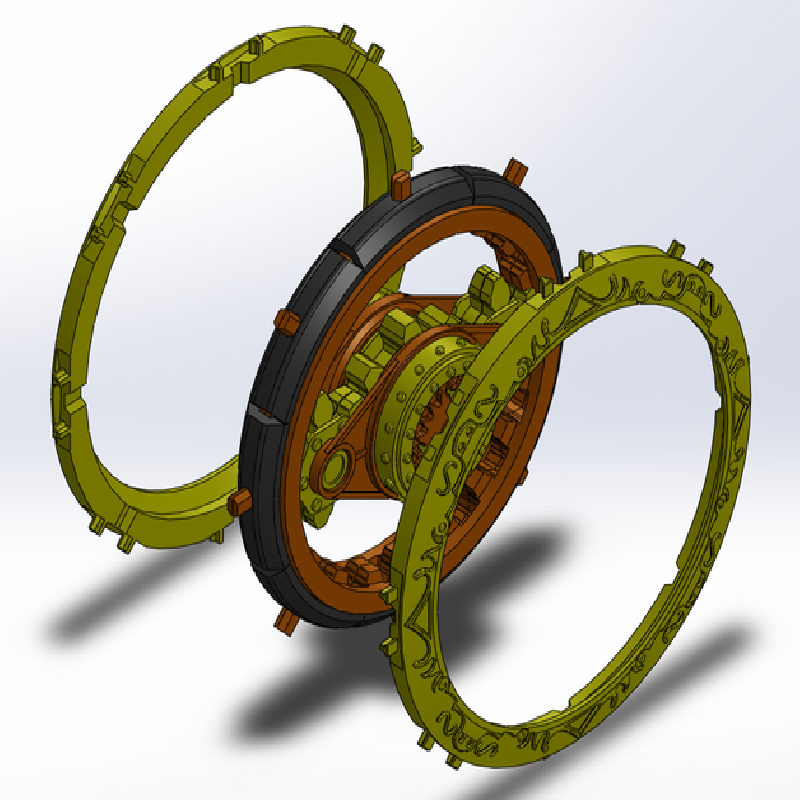
Print the two ring gear halves in copper, and ten or so ring pins in any color. Glue the pins into the halves, and assemble the halves around the sun and planet assembly.
Print eight black ring segments. Place them over the pins on the outside of the ring gear.
Print two ring halves in gold, and glue them together around the black ring segments.
Print eight ring teeth in gold. Press them onto the tabs sticking them out of the ring and glue in place.
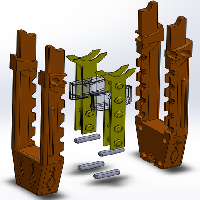
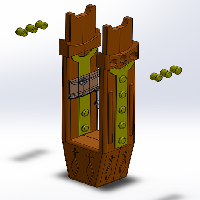
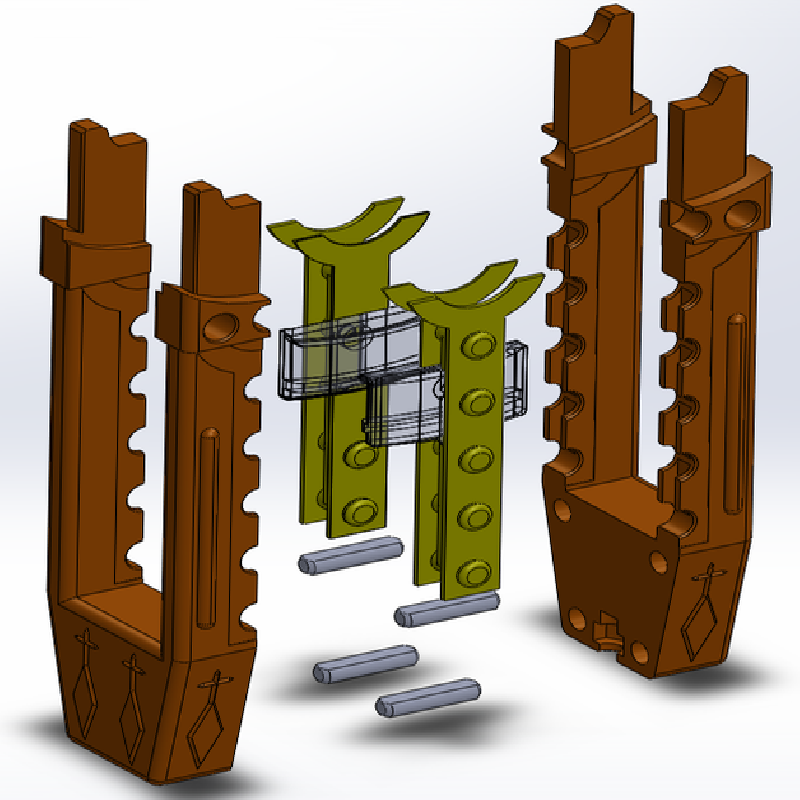
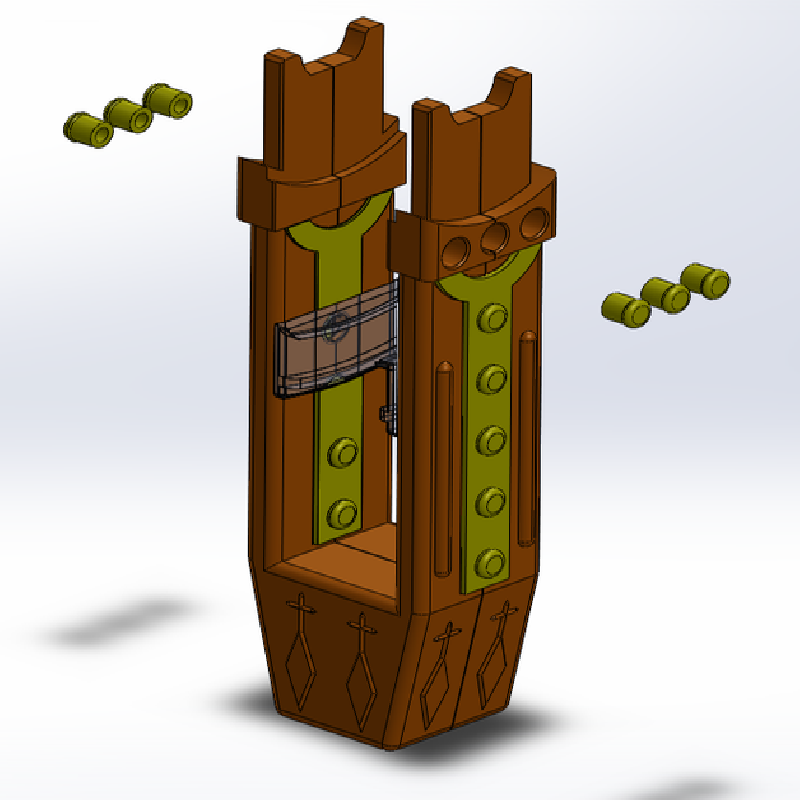
Print two arm halves in copper. Print two of each arm detail pieces in gold. Print six rivet heads in gold. Print two ring guides in clear, and four ring pins in any color.
The arm details and ring guides fit between the arm halves, and the ring pins help them stay in place. After you have assembled everything, glue the six rivet heads into the holes in the arms.
The last step is to insert the forks of the arm into the slots in the sun gear hub. This is very tricky to get right, and you may actually want to assemble the arm in place as it may be easier to get everything in place when completed.