by Corris13
Students will create a recognizable building or architectural landmark, create a 3D model based on observation and adding some of their own details, then 3D print their model. Students will present their original and added details of their model.
Printer Brand:
MakerBot
Printer:
Rafts:
Yes
Supports:
Yes
Infill:
May vary depending on your needs
Filament: Makerbot PLA gray
Notes:
Since student work will not be the same as this model, the print settings can change depending on needs of specifics prints.
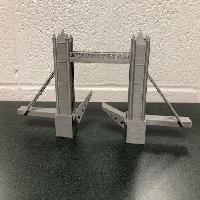
Bridge was printed upright. Therefore supports were needed. It took quite some time to remove all of the support material after printing. Needle nose pliers and flush cutters were used to remove supports.
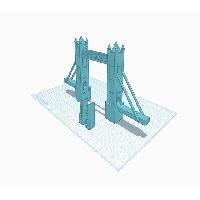
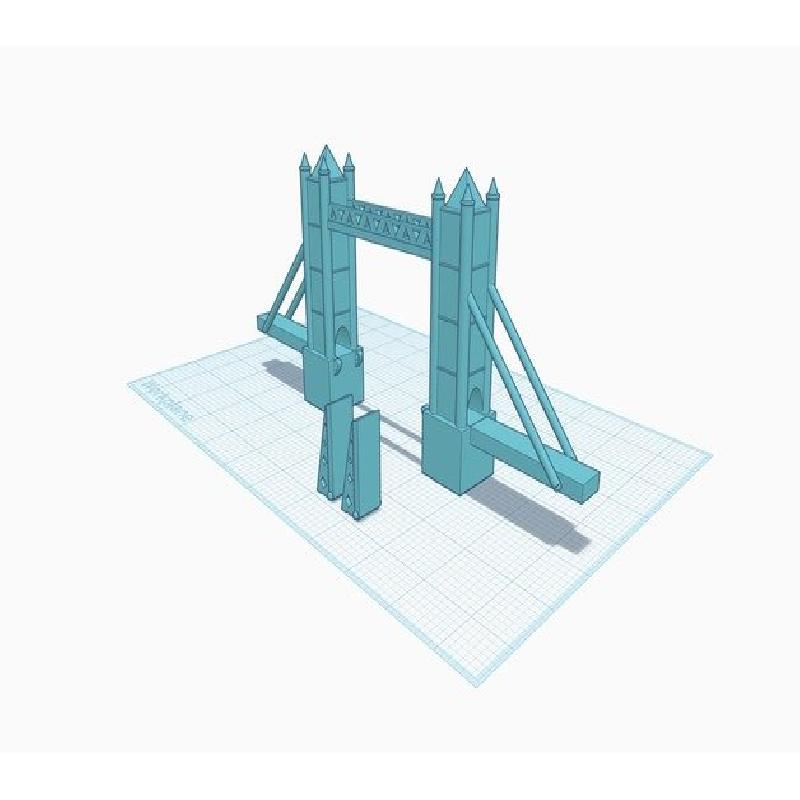
The bridge was designed in Tinkercad, based on a bridge in London. After looking at images of the bridge and Google Earth, basic shapes were used to design the bridge that was printed. The goal was to create a building or landmark that would be recognizable using basic shapes and to add my own twist in the design so it would not look exactly like the real thing. Depending on the level of skills and grade level of students that would be creating something along these lines would depend on how close to the real thing the model would be.
Overview
A high school art standard is for students to demonstrate basic technical skill and craftsmanship with various art media when creating images from observation, memory and imagination (1PR). The goal is for a student to choose a famous or at least recognizable building or architectural landmark, create a 3D image of the building or landmark, and then 3D print the image for presentation. The 3D print should be recognizable, but student should add his/her own twist to the creation and be able to identify the original characteristics of the creation compared to the details the student integrated on their own.
Another standard that can be included is for students to investigate how to access available digital tools and innovative technologies to create and manipulate artwork (5PR).
1) Students will choose a famous/recognizable building or architectural landmark. (Prior knowledge and exploration will depend on what is needed for course.)
2) Students will research building/landmark using pictures and Google Earth/Google Maps to observe shapes and details from as many angles as possible.
3) Students should sketch out the basic shapes that will be used and how the basic shapes will be combined for solid parts and holes.
4) Students should also include a few additions is design and detail of their own. These details should not drastically change the design but should be more subtle things that enhance the model they are developing.
5) Once students have sketched out their ideas, they will create a 3D rendering of their building or landmark in Tinkercad.
6) Students will 3D print their creation once it has been completed.
7) Students will present their creations and share information about the building/landmark. Differences will be pointed out between the original details and the details the student added to the design. CHALLENGE: If you have the ability to create videos using a green screen, have the students create a video for their presentation where the student is walking, flying, hovering on or around the 3D printed model while explaining about the details.
-computer
-access to the Internet
-Google Earth / Google Maps
-pencils for sketching
-sketch paper
-Tinkercad
-3D printer
Optional for CHALLENGE
-green screen
-video editing program (ie. WeVideo)
-cloud drive (ie. OneDrive, Google Drive)
observation
3D modeling
digital tools
May vary depending on needs and skill levels, but I would suggest anywhere from 1-3 hours for research and developing 3D model. Print times will vary depending on students' creations.
Students could go through the Tinkercad tutorials prior to beginning this project to get a head start on creating 3D models.