by mech-G
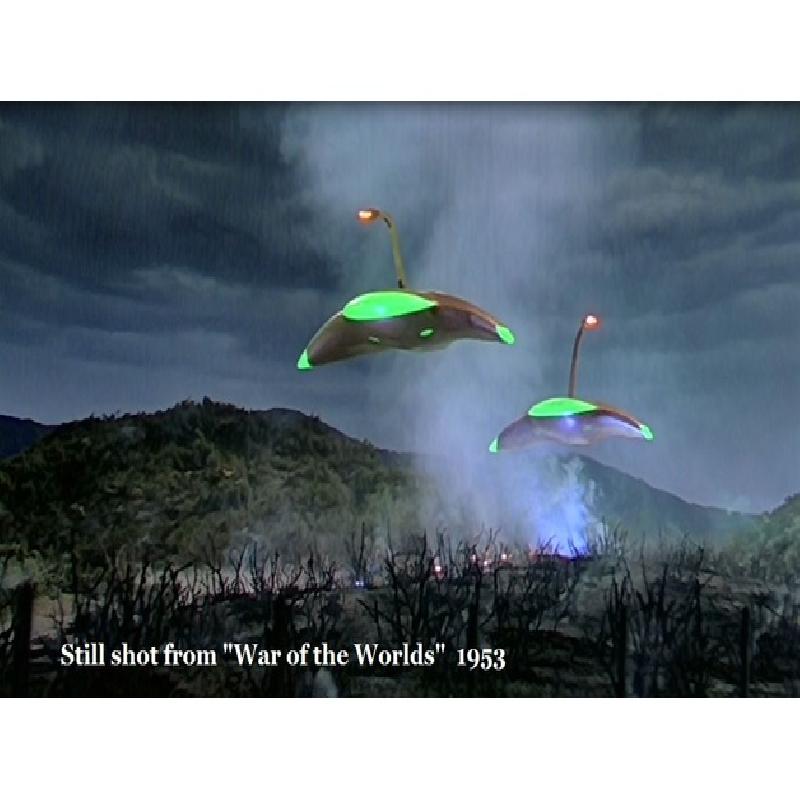
H.G. Wells' classic novel was brought to life in the movie about Martians invading Earth.
Details of the making of the movie can be found here:
http://www.roger-russell.com/war/war.htm
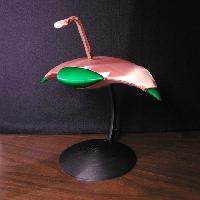
Models originally used in the film were made of copper metal and green glass, and were designed by art director Al Nozaki. The general shape was intended to be similar to that of a manta ray.
Printed with StrongHero Silk Copper PLA and ESun Green Transparent PETG. The lens of the heat ray is Taulman Clear PETG.
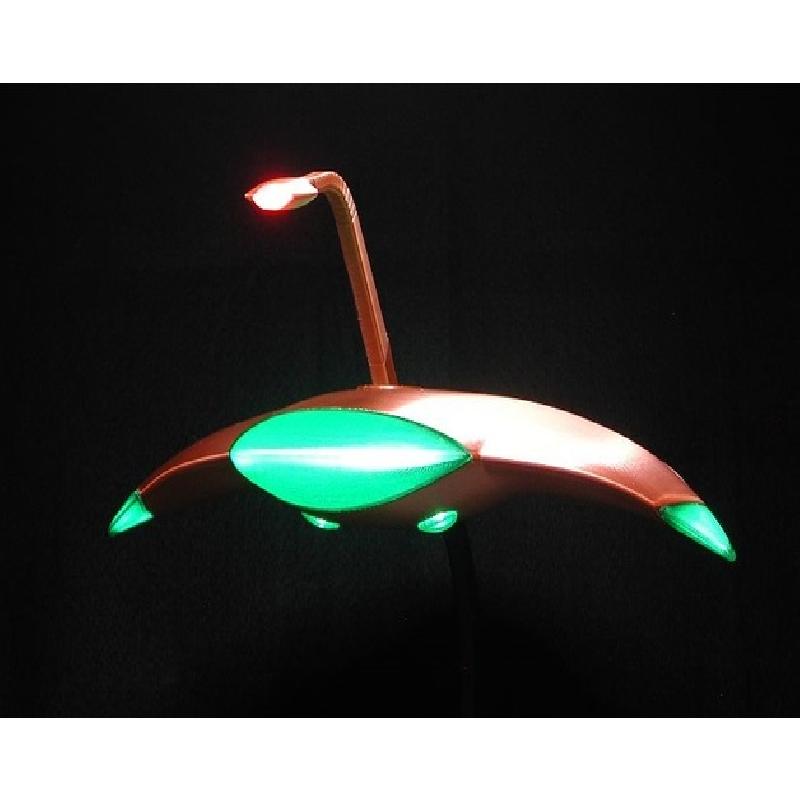
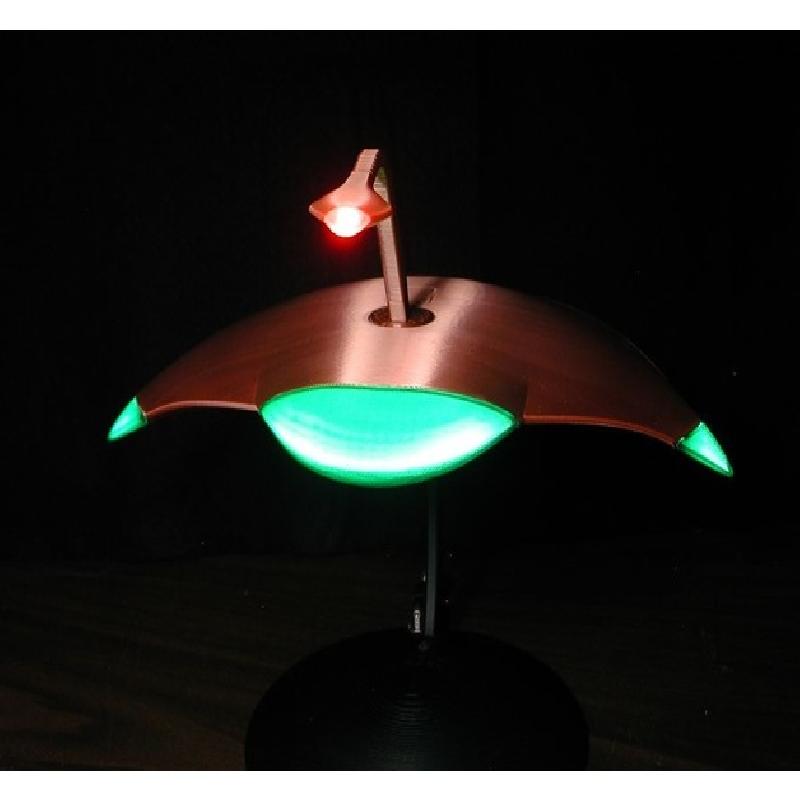
White LEDs were used to illuminate the transparent green components. A white LED with a filter cut from red plastic was used for the heat ray. By using diffuse LEDs, plus additional diffuser inserts printed in thin-wall white PLA, the lighted areas have a soft glow similar to the original movie models. It might be worthwhile trying the new UV-reactive filaments with UV LEDs.
The base and pylon are white Hatchbox PLA spray-painted flat black. The base has a rectangular hole in front of the pylon that will accept a micro-slide switch, and there is one just to the side of the pylon for mounting a through-hole power jack.
Warning: This model requires considerable post-processing to remove integral supports and to get the parts to fit together well. See Printer Settings below, and the instructional drawings posted.
Printer Brand:
SeeMeCNC
Printer:
Artemis 300 ARP
Supports:
No
Resolution:
.2 and .3
Filament: Strong Hero and ESun PLA and PETG Silk Copper and Transparent Green
Notes:
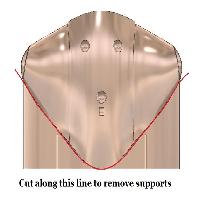
The nose, nose diffuser, and main body have integral supports that must be sawn off using a jeweler saw, razer saw, or dremel. This method insures the best print quality by minimizing travels / retractions during printing. Sawn edges should be sanded with 150 grit sandpaper.
Printing all parts at 200% will result in a model that has about a 12" span.
Most of the parts will need to be rotated in your slicer to get the flat side or end to sit flat on the print bed.
The wall thicknesses recommended below, along with scale factor of 200%, will insure the parts will fit together. Some filing / sanding of corners of the nose and wingtips are needed for them to fit into the main body. If you decide to add LEDs, holes will need to be drilled in some parts to allow for wiring.
The nose and nose diffuser both need to be rotated in your slicer so that the square base is down on the print bed. This base and the triangular supports must be cut off as shown in the drawings. Printing them this way makes it optically cleaner than if you printed it nose-up. The wingtips are different, since they are more pointy and will print cleanly if plenty of layer fan cooling is used.
The nose also has a partial cone-shaped piece that must be cut off. It is there to help give the material time to cool - otherwise the small perimeter would allow heat build-up even with full layer fan.
As printed, the heat ray will face directly forward, but you can gently heat the neck and bend it if you want it to angle down.
If you use the ESun green PETG, watch for bubbles between layers that indicate moisture in the filament. I had problems with that until I dried the filament roll at 50C for a couple hours in the oven. It would seem that even a brand new roll had moisture in it. For this model, you might not consider the bubbles to be a big deal, since the green parts need to diffuse the light anyway.
The repulser lenses on the underside also benefit from being heated and bent slightly to conform better to the curved surface of the model.
Since all parts of the heat ray, and the pylon, are small in diameter, they benefit greatly from having an additional hollow cylinder printed at the same time, to give each layer time to cool.
Gel superglue was used throughout to assemble the model.
Print settings:
Main Body
Wall Thickness 1.2 mm (either 1 perimeter at 1.2 mm or two perimeters at .6 mm)
Layer Height 0.3 mm
Infill none
Top Solid Layers 0
Bottom Solid Layers 20
Nose
Wall Thickness 1.2 mm
(Best transparency will be with single layer of 1.2 mm extrusion)
Layer Height 0.2 mm
Infill none
Top Solid Layers 0
Bottom Solid Layers 6
Wing tips
Wall Thickness 1.2 mm
Layer Height 0.3 mm
Infill none
Top Solid Layers 0
Bottom Solid Layers 0
Nose Diffuser
Wall Thickness 0.45 mm
Layer Height 0.2 mm
Infill none
Top Solid Layers 0
Bottom Solid Layers 3
Wing Tip Diffuser
Wall Thickness 0.45 mm
Layer Height 0.2 mm
Infill none
Top Solid Layers 0
Bottom Solid Layers 3
Pylon
Wall Thickness 1.2 mm
Layer Height 0.3 mm
Infill none
Top Solid Layers 0
Bottom Solid Layers 0
Base
Perimeters 6
Layer Height 0.2 mm
Infill 20%
Top Solid Layers 5
Bottom Solid Layers 2
Repulser Lens
Wall Thickness 1.2 mm
Layer Height 0.2 mm
Infill none
Top Solid Layers 0
Bottom Solid Layers 8
Heat Ray Base
Wall Thickness 1.2 mm
Layer Height 0.2 mm
Infill none
Top Solid Layers 1
Bottom Solid Layers 6
Heat Ray Neck
Wall Thickness 1.2 mm
Layer Height 0.2 mm
Infill none
Top Solid Layers 0
Bottom Solid Layers 0
Heat Ray Head
Wall Thickness 1.2 mm
Layer Height 0.2 mm
Infill none
Top Solid Layers 0
Bottom Solid Layers 0
Heat Ray Lens
Wall Thickness 0.6 mm
Layer Height 0.2 mm
Infill none
Top Solid Layers 0
Bottom Solid Layers 0