by GeoDave
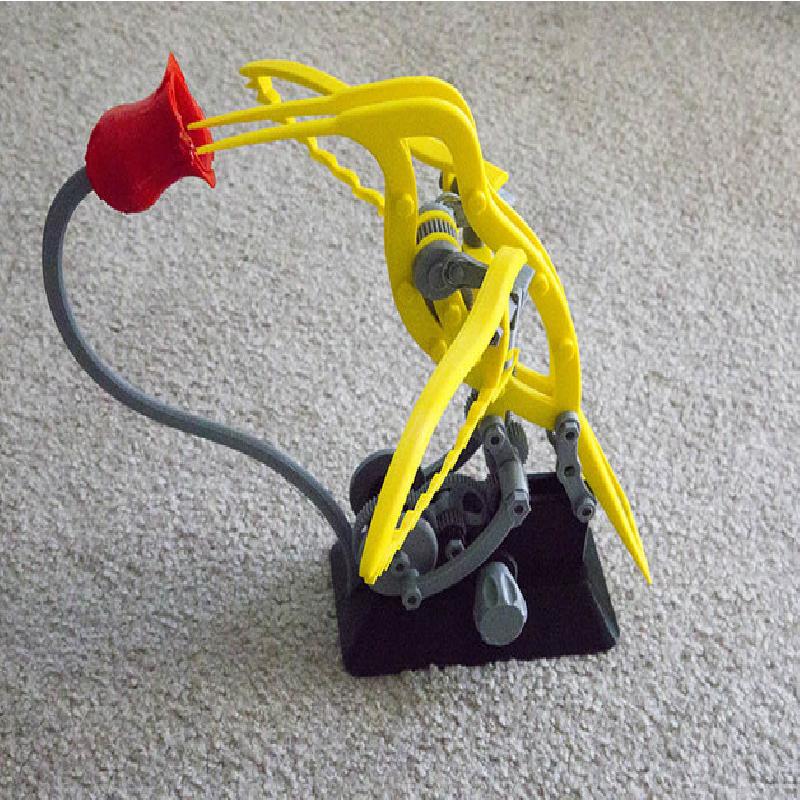
First of all I want to thank gzumwalt for such an interesting design. I started out to just change the threading tolerance, but also had to change the tolerances of the bushings and gear holes. Think I changed 30 of the 38 parts and added a hand crank since I was not going to use a motor. I started to use the hand crank that someone else designed, but then I ended up making a motor gear axle so it stayed in place better. Most of the tolerances I made .4mm difference in diameter from Male to Female connections. For the gears, I initially did not have the bevel on the outside of the gears, but after I changed the compound gear to a bevel cut it works better. The bushings that go inside the gears I changed from 8.0mm to 8.9mm diameter to make them a little thicker. Consequently, I also had to change the gear holes. Since I had to change the Base a little, I also made the corners rounded.
There are 2 versions of the base, one hollowed out on the bottom Base_Mod_HollowBot_Rev9.stl & one solid Base_Mod_Rev9.stl.
The threaded parts I used a non-standard threading for better printing at .2mm layer height, by changing the thread pitch from 1.0 to 1.25 & Thread_Angle = 40. To modify any of the openscad files that use the threading, you will need to download the threads.scad file from http://dkprojects.net/openscad-threads/ . I put the settings for the threads in the ThreadSettings.scad file, so if you want to adjust the threading it only needs to be done in one place. The height of the threads is the only threading variable that changes from part to part. After some tests, I could have used the standard 1.0 pitch & 30 angle if I was printing them at .1mm height.
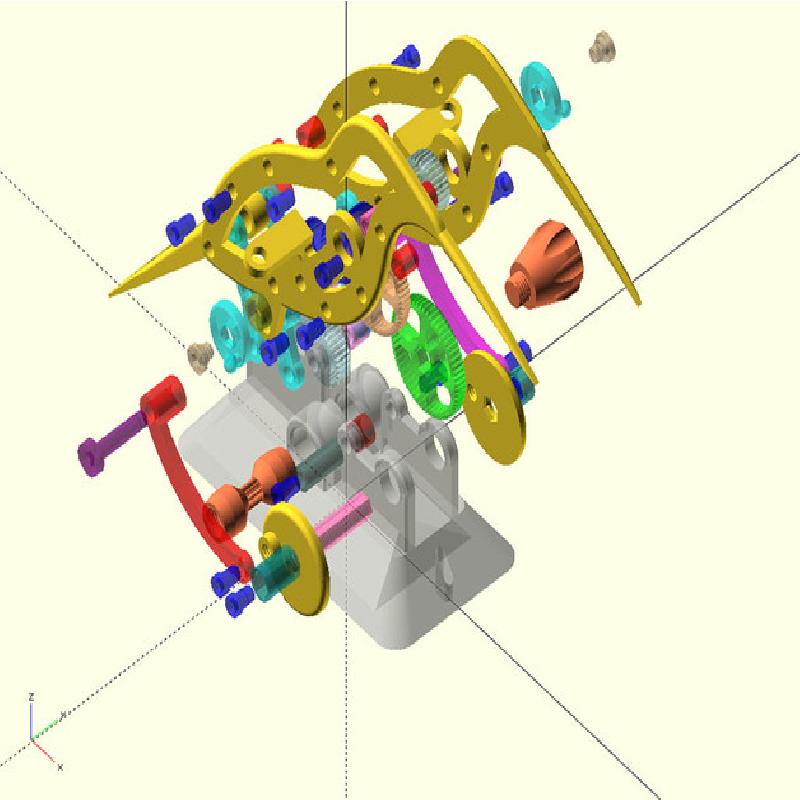
I included all the parts needed for this design. 6 of the parts I did not change. The parts I changed have _Mod in the name & there is an associated scad source file for each of those. If you are using the motor as mentioned in original design use the GearMotor_10_Mod_Rev8.stl. If you are using the Crank_Mod_Rev6.stl use GearMotor_Axle_Rev8.stl.
Things I might change if I reprint this is to make the sphere on the Pivot_Wing slightly bigger so the connecting rod stays on better. Looks like there is room to make that bigger. I would also add another screw where the birds beak meets to body & pull the beaks together. Looks like that would not bind the gears any.
Follow the instructions of the original design: http://www.semaker.com/productdetail/13017. One thing to watch out if you are using the Crank instead of the motor is to install the GearMotor_10_Mod_Rev.stl before the gears around it otherwise the fat axle will not get by the other gears.
For my use while testing this, I made the heads on the bolts hex head so I could easier tighten them. The versions I uploaded have a flat surface on 2 sides of the round heads to tighten if the allen wrench hole does not work well. I also made 2 flat sides on the spacers inside the gears.
There is an openscad file for each part I changed in case you want to modify this further. If I left something out, let me know.