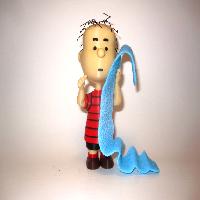
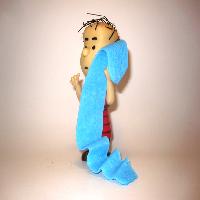
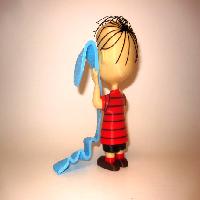
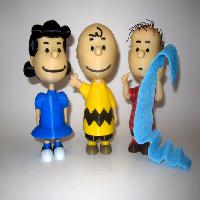
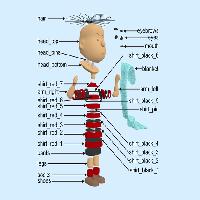
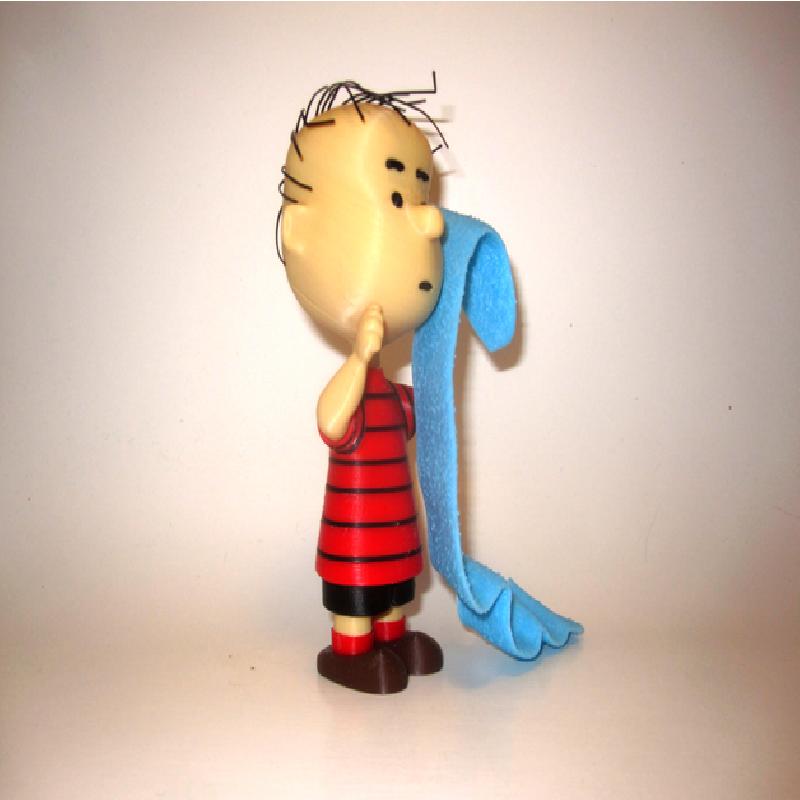
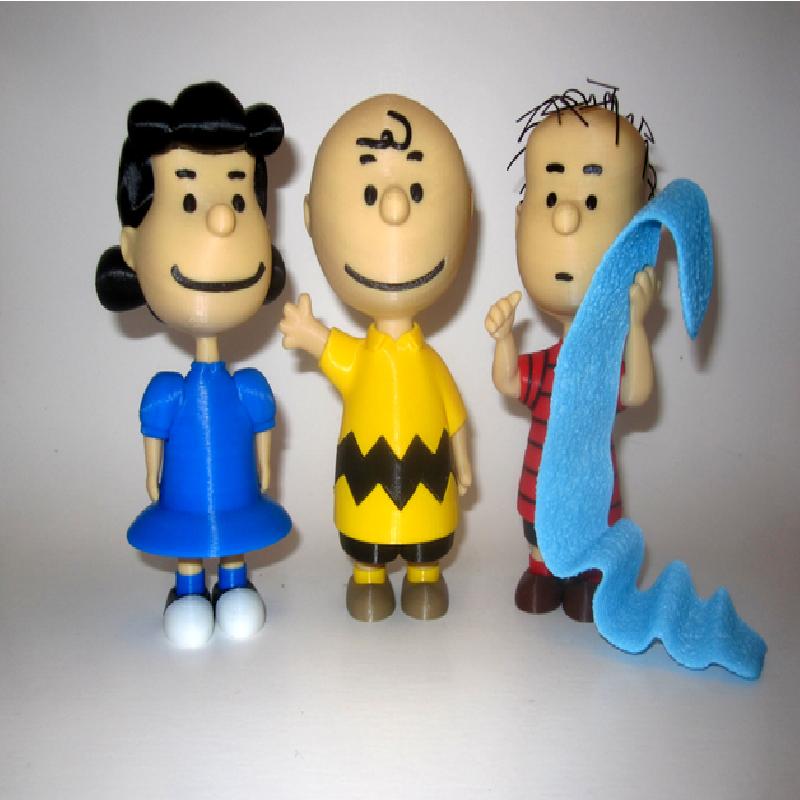
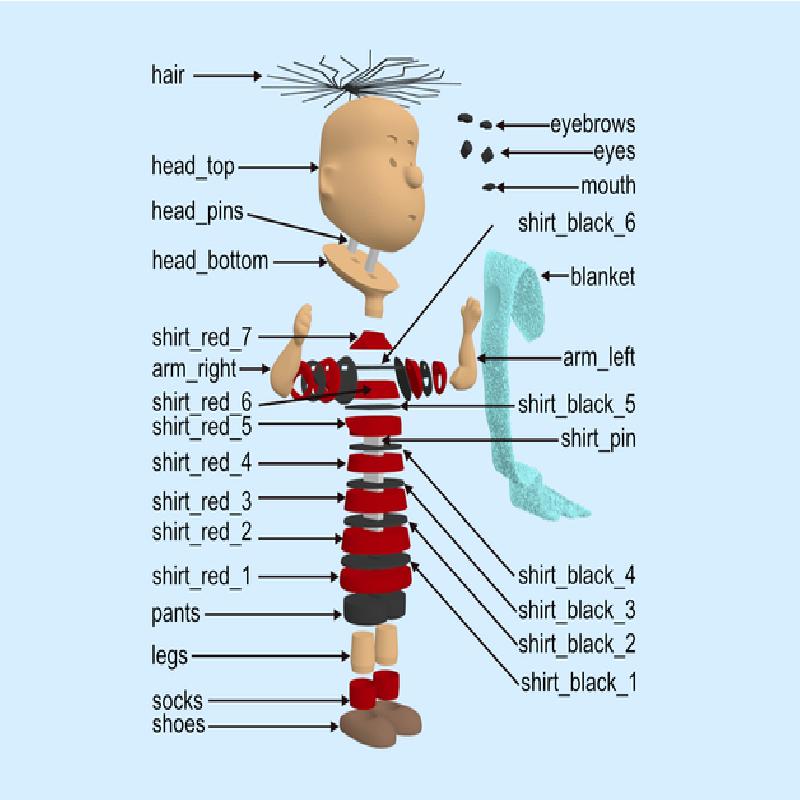
Linus van Pelt, from the comic strip Peanuts by Charles Schulz.
Linus is the best friend of Charlie Brown and is also the younger brother of Lucy van Pelt.
Though young, Linus is very intelligent and very wise, and acts as the strip's philosopher and theologian.
The model is in proportion to my Charlie Brown and Lucy van Pelt models:
http://www.semaker.com/productdetail/10061
http://www.semaker.com/productdetail/10135
No supports are required. If you have the proper filament colors, no painting is needed.
Don't let the number of pieces or my lengthy notes worry you, it's a reasonably quick print and very, very easy to assemble.
The model is 140mm tall.
Enjoy!
Printer Brand:
FlashForge
Printer:
Creator Pro
Rafts:
Doesn't Matter
Supports:
No
Resolution:
.2mm
Infill:
10%
Notes:
See below for helpful printing and assembly tips.
Colors (there are no multiple printed pieces)
Black:
hair
eyes
mouth
eyebrows
pants
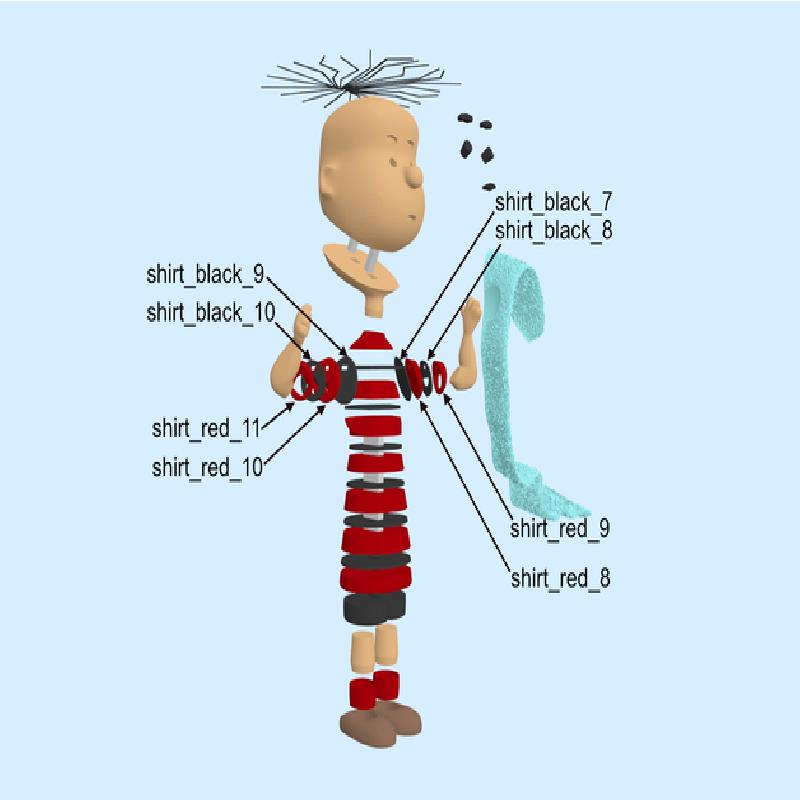
shirt_black_1
shirt_black_2
shirt_black_3
shirt_black_4
shirt_black_5
shirt_black_6
shirt_black_7
shirt_black_8
shirt_black_9
shirt_black_10
..
Beige or Flesh:
head_top
head_bottom
arm_left
arm_right
legs
..
Brown:
shoes
..
Light Blue:
blanket
..
Red:
socks
shirt_red_1
shirt_red_2
shirt_red_3
shirt_red_4
shirt_red_5
shirt_red_6
shirt_red_7
shirt_red_8
shirt_red_9
shirt_red_10
shirt_red_11
..
Any color (hidden pieces)
head_pins
shirt_pin
Printing and assembly tips
Printing tips
1-As with most of my models, no supports are required.
2-The arms are tall with a small base, so I used a brim on those two pieces.
3-Be sure to clean any first layer squish if you have any problem joining parts. The parts should fit nicely when printed cleanly or with a slight first layer squish.
..
Assembly tips:
1-The left/right eyes and eyebrows are interchangeable.
2-The leg holes in the pants should be positioned toward the back.
3-The left/right shoe parts are not interchangeable but are easy to distinguish which is left and right.
4-The left right pieces of the sleeves of the shirt are NOT interchangeable, so take some care in placing them before gluing.
5-When putting the shirt together the holes for the shirt pin is positioned towards the back. The side of each shirt part that was on the printer bed will always face down as you slide each piece through the shirt_pin. Similarly, when sliding the arm pieces on to the shirt_black_6 piece (which acts as a pin) the side that was on the printer bed will face the body.
6-The hair is quite simple. It is printed flat. After removing it from the printer bed, you need to curl each individual hair similar to how you would curl a ribbon. Be sure to curl the all the hair strands in the same direction and start from the 'root'. This results in what looks like spider legs. Position the root in the back/top of the head and adjust for the desired look as you glue it down. There is no 'notch' to be matched.
6-I glued the head/blanket/arm_left all in together to the body at the same time. The blanket does not necessarily need to touch the ground. I did it this way to ensure the model stands stable on the shoes and the blanket does not cause any balancing issue.
*Refer to the assembly diagrams in the pictures section for putting the model together. (for some unknown reason I cannot load the assembly diagrams in the narrative section). The model is meant to be glued.