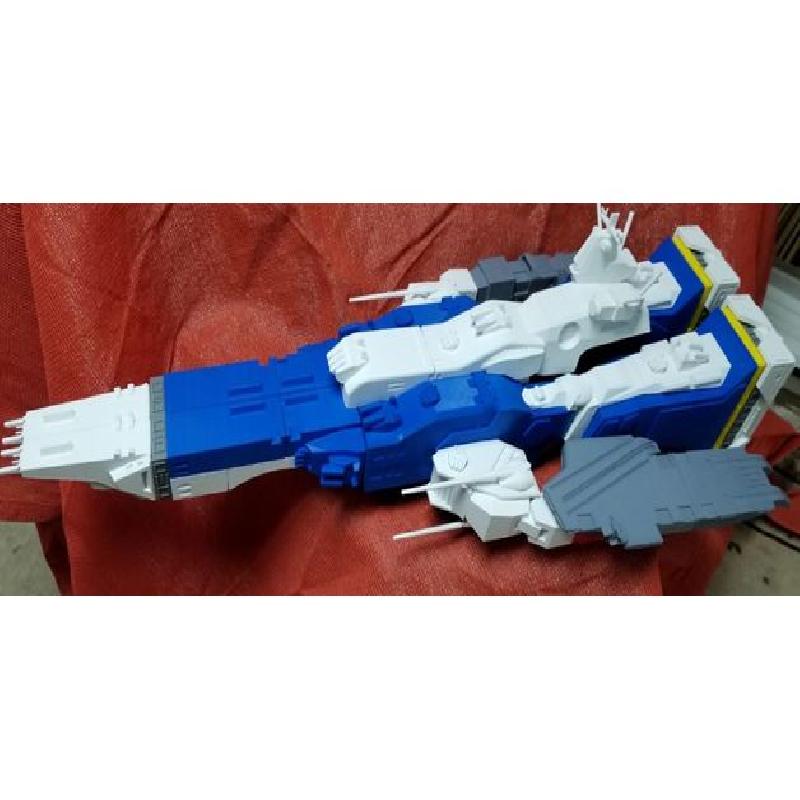
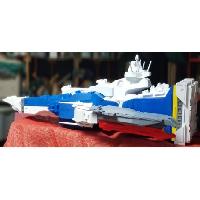
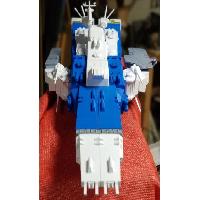
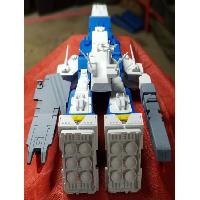
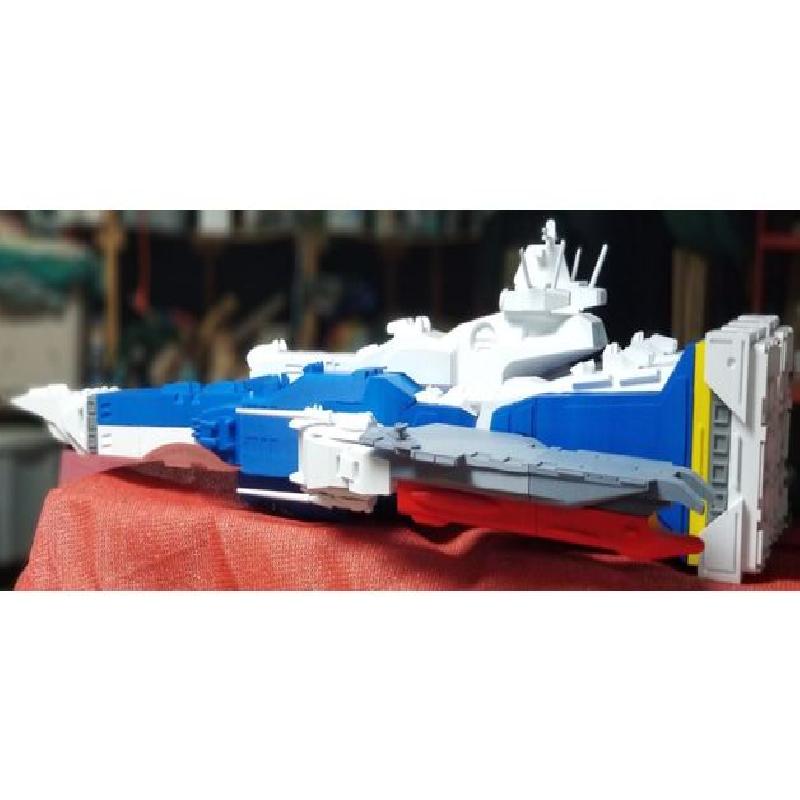
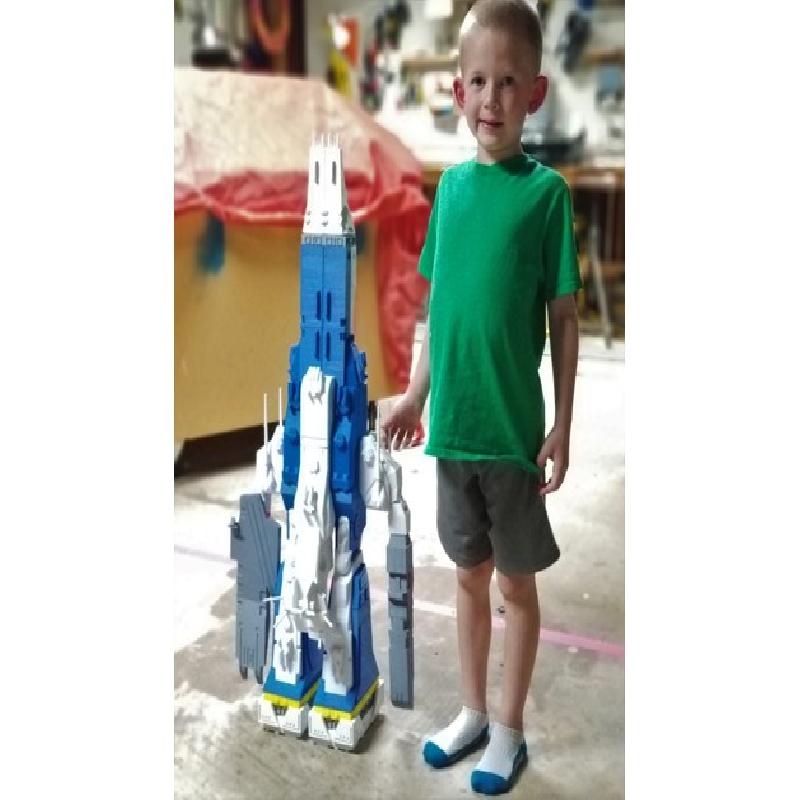
This SDF-1 model, when printed at 100%, will be about 1 meter long. This is based off of a sketchup model by Cochayuyoman at:
https://3dwarehouse.sketchup.com/user/1602380013767622994724936/cochayuyoman?nav=models
I scaled, sliced and made 3D print ready as well as add a few details to give the model for depth and character. You can download that sketchup model at:
https://3dwarehouse.sketchup.com/model/109ee11e-2ac5-40b2-b67a-44e46dda0c04/Macross-Robotech-SDF-1-Shipmode-3d-Print-Ready
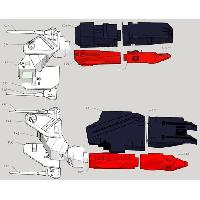
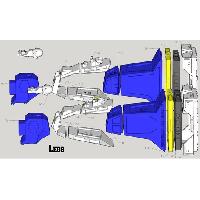
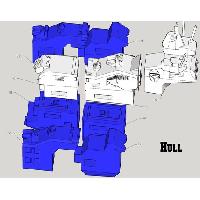
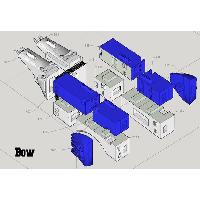
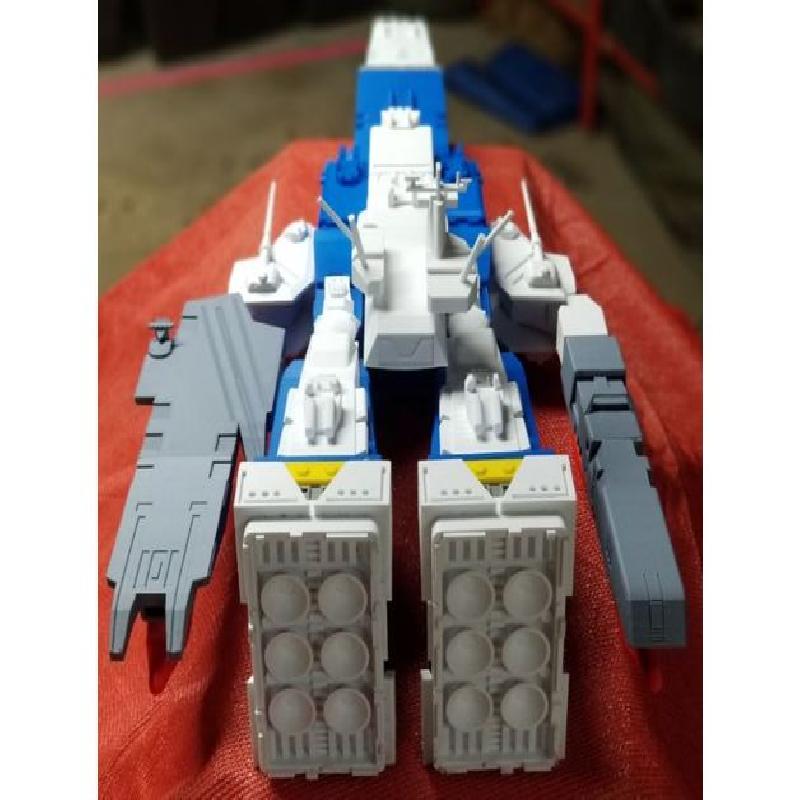
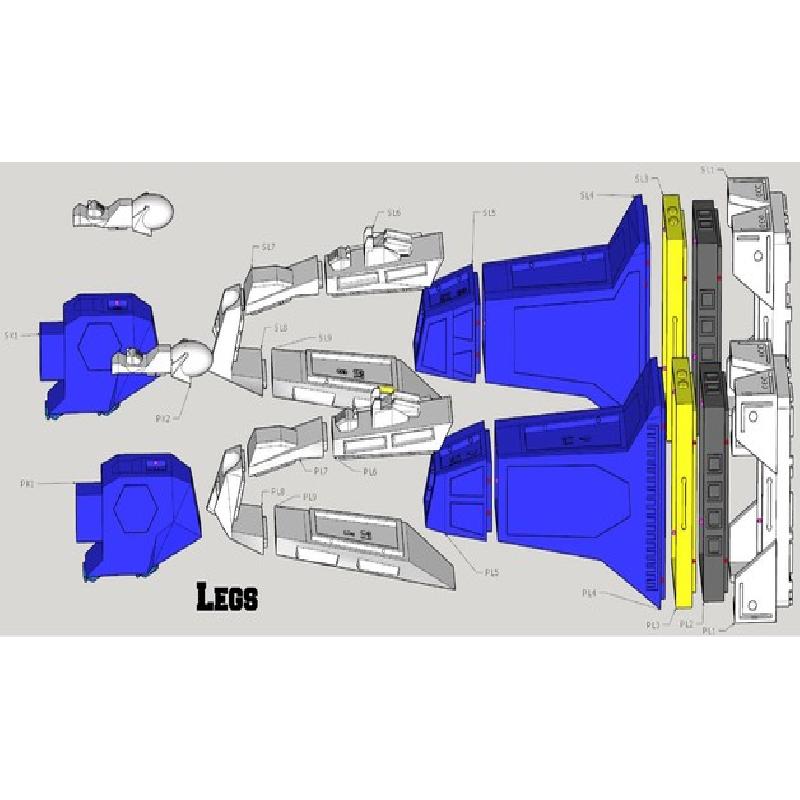
When slicing, I made it so that you can print the different parts in the matching color if you so choose (like my model). I used silver/gray, white, blue, yellow, red and dark gray
I also added snap-fit ends to most parts of the model where it would work. Some parts have long posts that slide in and are either held in place by friction (or if need be glue).
Prepping the model for 3D printing and fitting together took about 5 months - but it's still not perfect. After putting mine together, I found the knee joints are really weak and in reality require glue (or if someone has the time) a reworking of the model.
If I had the time and talent I would love to rework the model to be transformable in to robot mode. Challenge for a Macross lover out there? And I'd tweak it so it could be wired for fiber optic lights (of which I have zero experience but would be incredible for a model this size).
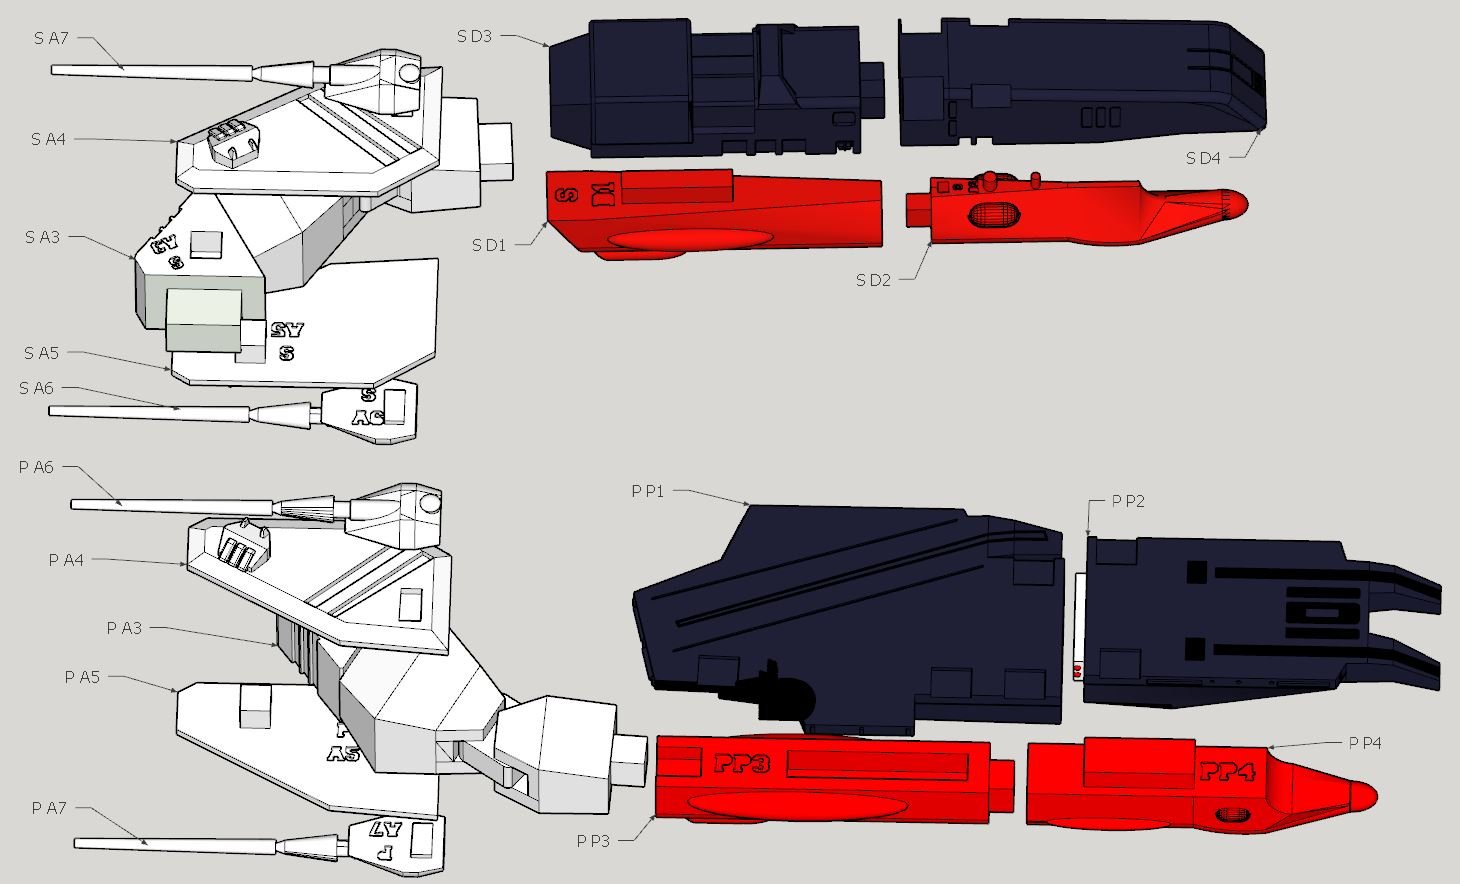
Printing at 100% will get you a 1 meter model, with part # PP1 being the largest part. I'm pretty sure you could go smaller since most parts are decent sized. If going smaller, I'd print part #PA 7 or #PA 6 since the end of the cannons get pretty thin.
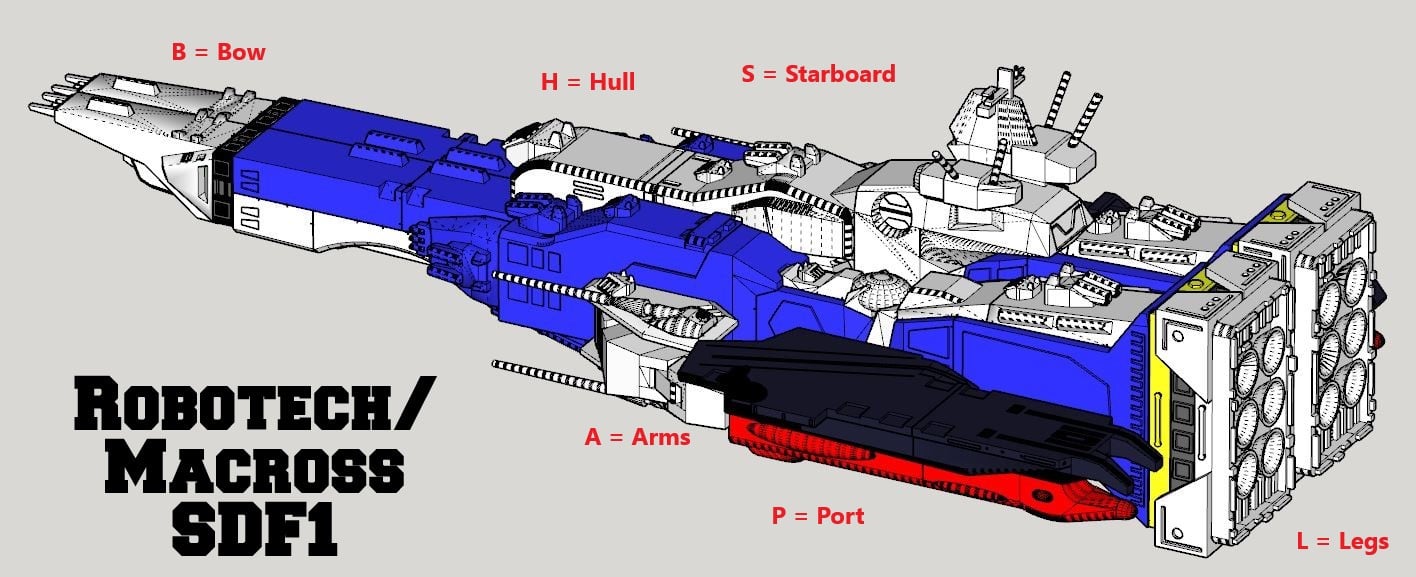
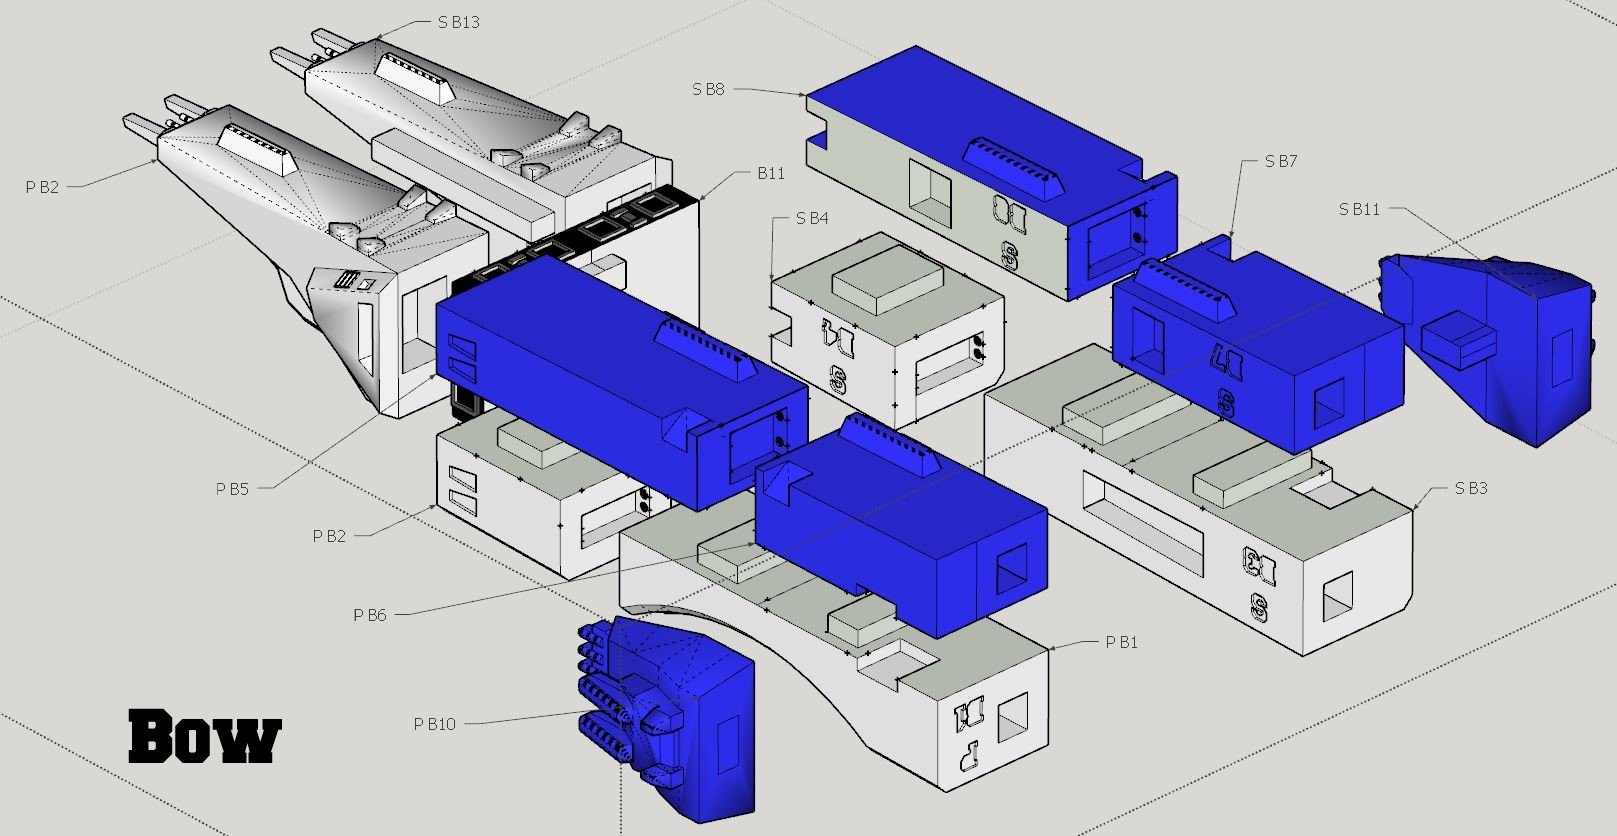
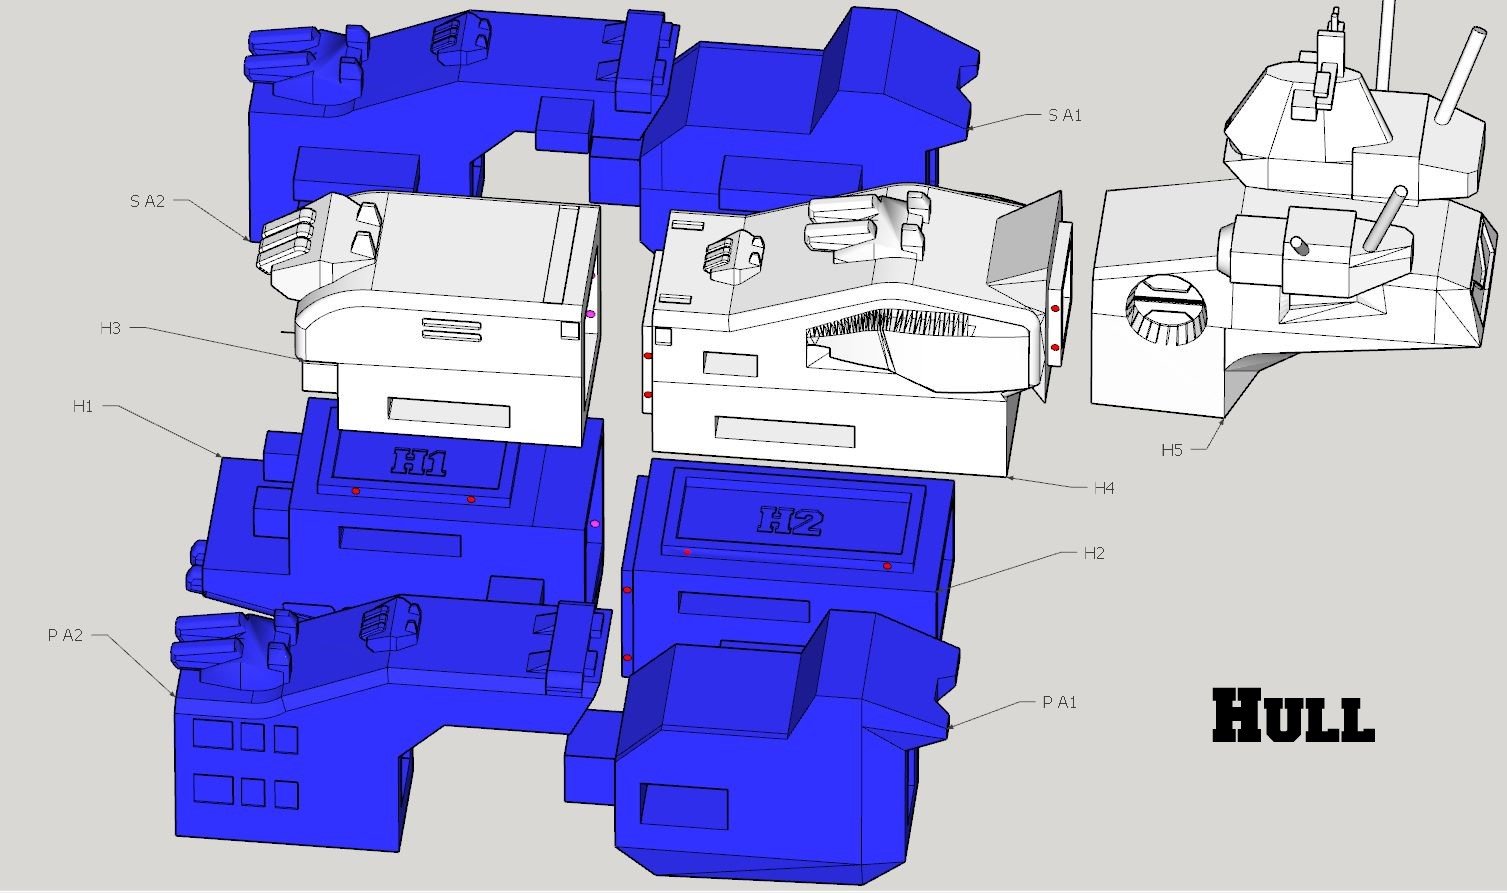
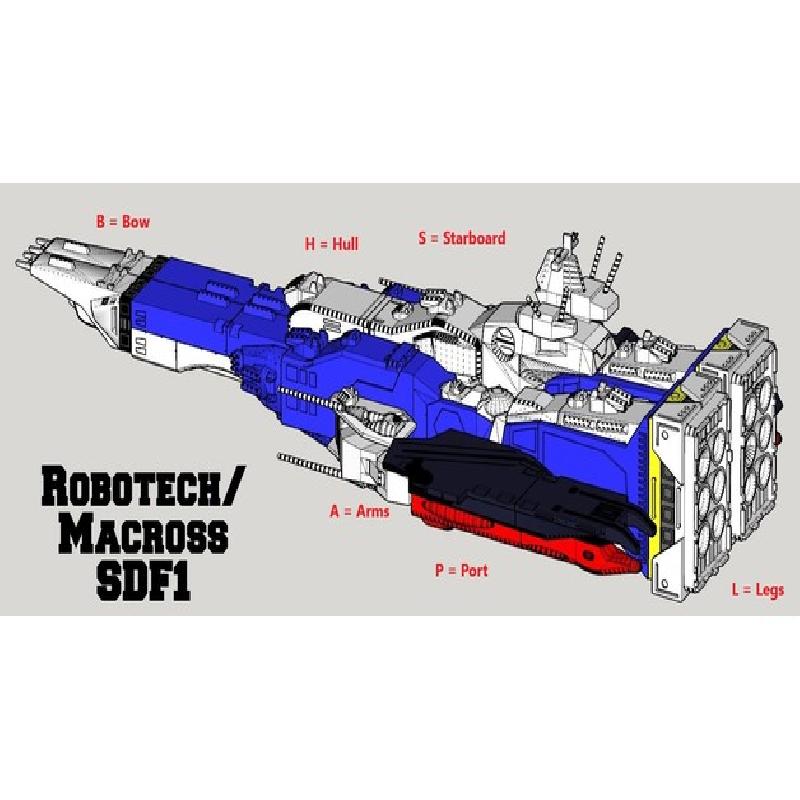
I've included instructions on putting the model together as well as embed in the part its part number. It can get confusing knowing which part is port side and which is starboard.
I labeled most parts first on which side they are (p=port, s=starboard), then which section (B=bow, L=leg, etc) and then a part #.
Printer:
MakerSelect Plus
Rafts:
Doesn't Matter
Supports:
Yes
Resolution:
.2mm
Infill:
5%
Notes:
The largest part is #P P1 at 192mm, which barely fit on my MakerSelect plus. You can use this part if you plan on upscaling. If you're downscaling, I would first try part # PA 7